
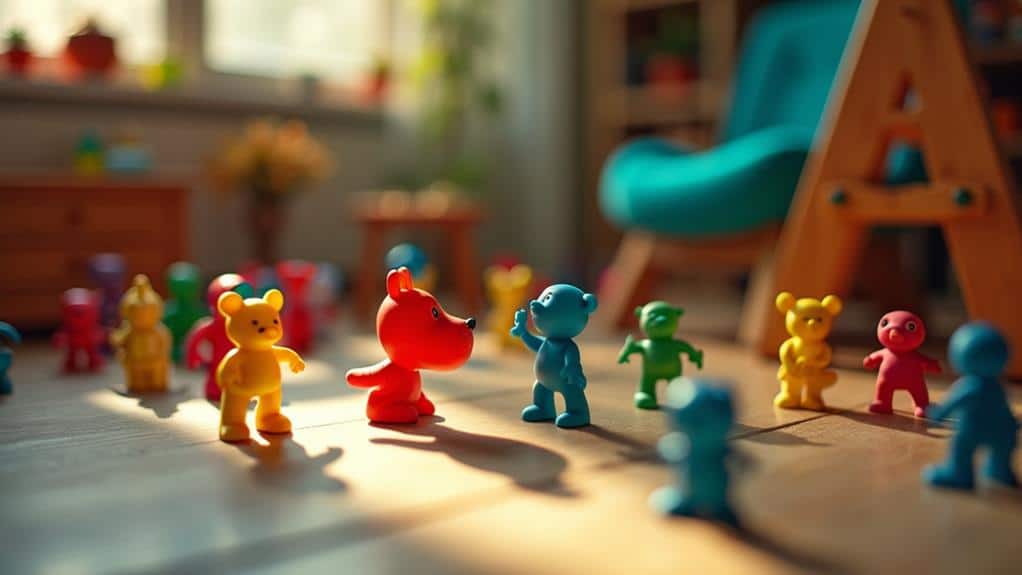
When you're setting up a toy scene, the way you use lighting can make all the difference between a flat image and an engrossing story. Proper lighting isn't just about visibility; it's about creating mood, drawing attention to key details, and adding depth through shadows and highlights. You'll need to ponder factors like the size and color of your toys and the emotions you want to convey. Whether you use natural or artificial light, mastering these techniques can transform your scenes. But how exactly do you achieve this balance?
Key Takeaways
- Proper lighting sets the mood and highlights key details, adding depth and drama to toy storytelling.
- Natural light offers a soft look but can be inconsistent; artificial lighting provides control and flexibility.
- Shadows enhance the narrative by adding depth and highlighting emotions, guiding the viewer's eye.
- Warm lighting (2000K-4000K) evokes comfort and nostalgia, while cool lighting (5000K-7000K) creates tension and emphasizes details.
- Positioning the key light at a 45-degree angle adds depth, with varying intensity to prevent overexposure and ensure clear details.
Importance of Proper Lighting
When it comes to toy storytelling, proper lighting is essential for setting the mood and highlighting key details. Without the right lighting, your scene might fall flat, lacking the depth and drama needed to captivate your audience. Imagine trying to create an intense battle scene with dull, flat lighting. It just won't have the same impact, right?
By carefully positioning your lights, you can emphasize the main characters and pivotal elements, making them pop against the background. Shadows and highlights play a significant role in creating a sense of realism and drama. Soft lighting can give your scene a dreamy, whimsical quality, while harsh lighting can convey tension and urgency. Consider using adjustable brightness, which allows you to tailor the lighting to your specific scene needs, enhancing the overall effect.
You'll also find that proper lighting helps in directing the viewer's attention. It's a subtle but powerful tool to guide the eyes to where you want focus. For instance, a spotlight on a hero's face can draw attention to their determined expression, setting the tone for the narrative.
In short, mastering lighting techniques can transform your toy storytelling from mundane to magical, allowing you to weave a more compelling, visually engaging tale. So, never underestimate the power of good lighting
Choosing the Right Light Source
Selecting the right light source can make a significant difference in your toy storytelling. You want to bring out the best in your characters and set the perfect mood for your scenes. Start by considering the size and color of the toys. Smaller toys might need more focused, intense lighting to highlight their details, while larger toys can handle broader, softer light. The color and material of your toys also matter. Glossy surfaces might reflect light differently compared to matte finishes, so adjust accordingly. It's also vital to manipulate shadows and highlights to create the desired effect in your scene.
Think about the purpose of your scene. Are you going for a dramatic moment or a cozy, intimate setting? For drama, experiment with strong, directional light that casts deep shadows. For a softer feel, diffuse the light using a lampshade or softbox to spread it evenly. Don't forget to pay attention to the light's color temperature. Warmer lights can create a welcoming, homely atmosphere, while cooler lights can give a more clinical, modern vibe.
Lastly, test different light sources – lamps, LED panels, even flashlights – to see what works best. Remember, the right light source can elevate your storytelling from good to unforgettable
Natural Vs. Artificial Lighting
Choosing the right light source is just the beginning. When it comes to toy storytelling, you've got two main options: natural and artificial lighting. Natural light, like sunlight, offers a soft and realistic look that can bring your toy scenes to life. It's great for outdoor settings or creating a warm, inviting atmosphere. However, natural light isn't always consistent; it changes throughout the day and can be affected by weather conditions, making it tricky to maintain uniformity in your shots. Using tools like diffusers and reflectors can help manipulate natural light to achieve the desired effect.
On the other hand, artificial lighting gives you control and consistency. You can use lamps, LED lights, or even specialized photography lights to highlight your toys precisely the way you want. Artificial light can be adjusted to different colors and intensities, allowing for creative flexibility. While setting up artificial lights might take more time and effort, the ability to recreate the same lighting conditions repeatedly can be invaluable for lengthy projects or stop-motion animation.
Ultimately, the choice between natural and artificial lighting depends on your specific needs and constraints. Consider what best suits your scene's mood, the time you have for setup, and the level of control you require
Creating Mood With Shadows
Shadows aren't just a byproduct of lighting; they're powerful tools that can add depth and emotion to your toy storytelling. By carefully manipulating shadows, you can enhance the narrative, highlight emotions, and create a specific atmosphere. Whether you're aiming for an eerie, suspenseful scene or a warm, cozy moment, shadows play a vital role.
Start by considering the placement of your light source. A low-angle light can cast long, dramatic shadows, perfect for creating tension or mystery. Conversely, a high-angle light produces shorter, subtler shadows that evoke a calmer, more serene mood. Experiment with different positions to see how the shadows change the feel of your scene.
Next, think about the intensity of the light. Softer, diffused lighting creates gentle shadows, adding a touch of realism without overwhelming the scene. On the other hand, hard, direct lighting results in stark shadows that can underscore dramatic moments or highlight specific features of your toys.
Lastly, use shadow play to guide the viewer's eye. Shadows can frame a central character or object, directing attention precisely where you want it. By mastering shadow techniques, you'll elevate your toy storytelling to new emotional heights.
Color Temperature Effects
When you're crafting a toy story, using warm or cool lighting can drastically affect the mood and atmosphere. Warm lighting often evokes feelings of comfort and happiness, while cool lighting can create tension or sadness. By carefully choosing the color temperature, you enhance your characters' emotions and add depth to your scenes.
Warm Vs. Cool Lighting
Lighting plays a pivotal role in storytelling, especially when it comes to toy photography. You've got to understand how warm and cool lighting can dramatically change the scene. Warm lighting, which has a color temperature around 2000K to 4000K, adds a cozy, inviting feel to your shots. It's perfect for creating a sense of nostalgia or highlighting an emotional bond between toys. Think of the golden hues of a sunset or the soft glow of a candle—they evoke warmth and intimacy.
On the other hand, cool lighting, with a color temperature around 5000K to 7000K, brings a different energy. It's crisp, clean, and often used to create a modern or futuristic vibe. Cool lighting can emphasize the details and textures of your toys, making them pop. It's ideal for showcasing high-energy action scenes or creating a sense of tension.
Mood and Atmosphere Influence
In toy photography, the color temperature of your lighting profoundly influences the mood and atmosphere of your shots. Using warm lighting, with a color temperature around 3000K, evokes feelings of coziness, happiness, and nostalgia. Imagine a toy tea party bathed in a golden glow; it immediately feels inviting and heartwarming. On the other hand, cool lighting, around 6500K, lends a more clinical, mysterious, or even eerie vibe. Picture an action figure in a dimly lit, blue-toned scene – it's suspenseful and dramatic.
When you're aiming for a serene, dreamy atmosphere, try using softer, warm lights. They gently wrap your subjects in a comforting embrace, perfect for bedtime stories or peaceful play scenarios. Conversely, if you want to create tension or highlight the starkness of a scene, cooler lights will serve you well. Cool lights can make your toys appear sharper and more defined, setting the stage for high-stakes adventures or somber moments.
Mixing color temperatures can also add depth to your storytelling. Combining warm and cool lights can create dynamic contrasts, making your scenes more engrossing. Experiment with different settings, and you'll see how color temperature can transform your toy photography.
Enhancing Character Emotions
Understanding how color temperature shapes the mood and atmosphere of your shots sets a strong foundation for enhancing character emotions in toy photography. Warm tones, like those from a setting sun or a cozy indoor lamp, can convey comfort, happiness, or nostalgia. Imagine your toy characters basking in the golden glow of a sunset, their expressions reflecting warmth and contentment.
On the other hand, cool tones, such as those from a cloudy day or a moonlit night, can evoke feelings of sadness, mystery, or tension. Picture your characters under a bluish light, their faces hinting at introspection or concern. By adjusting the color temperature, you're not just lighting the scene—you're telling a story.
To achieve this, you can use practical tools like colored gels, LED lights with adjustable temperatures, or even post-processing techniques. Experiment with different settings to see how each temperature shift impacts the emotion conveyed. Don't be afraid to mix temperatures; a warm key light combined with a cool fill can create dynamic contrasts and deepen emotional layers. Mastering color temperature effects allows you to craft compelling, emotionally resonant toy stories.
Positioning Lights for Drama
To create dramatic scenes with your toy storytelling, you need to master key light placement and shadow creation techniques. Position your key light to highlight your main subject while casting intriguing shadows. This approach adds depth and a sense of mystery to your shots, making them more compelling.
Key Light Placement
Mastering key light placement is crucial for creating dramatic and enchanting scenes in toy storytelling. Your key light is the primary source of illumination and sets the mood of your scene. To start, position the key light at a 45-degree angle from your subject. This angle highlights the toy's features, adding depth and dimension.
Experiment with the height of your key light. Placing it slightly above the toy can mimic natural sunlight, casting gentle shadows that enhance realism. Conversely, a lower placement can create a more mysterious or eerie atmosphere, perfect for dramatic storytelling.
Consider the distance between the key light and the toy. A closer light source will produce harsher, more defined shadows, while a farther one softens the overall effect. Adjust the light intensity to prevent overexposure, ensuring the toy's details remain clear and vivid.
Shadow Creation Techniques
Creating shadows can dramatically transform your toy storytelling, adding layers of depth and intrigue. To achieve this, start by positioning your key light at a sharp angle, either from the side or below your toy. This technique casts long, dynamic shadows that create a sense of mystery and tension.
Experiment with backlighting to produce silhouetted figures. Place your light source behind the toy, aimed directly at the camera. This method outlines your toy in a halo of light, making it stand out while cloaking its features in shadow, perfect for creating suspense.
Use low-intensity fill lights to soften shadows without eliminating them. Position these lights at a wide angle to the key light to maintain the drama but reveal some details. This balance keeps the scene visually engaging without becoming too dark.
Don't forget practical lighting sources within the scene, like mini lamps or LED strips. These can cast natural-looking shadows and add authenticity. Place them strategically to enhance the narrative, like highlighting a toy's face or casting an ominous shadow on the wall.
Enhancing Details With Highlights
Amidst the vibrant world of toy storytelling, enhancing details with highlights can bring your characters and scenes to life. By strategically adding highlights, you'll create depth and dimension, making your toys appear more dynamic and engaging. Start by identifying the primary light source in your scene. This will help you determine where the highlights should be placed on your characters and objects.
Don't overdo it; subtlety is key. Use a fine brush or a precise light source to apply highlights on the most protruding parts of your toys, like the tips of noses, edges of clothes, or the top of heads. This mimics how light naturally hits surfaces and accentuates their shapes. Experiment with different intensities to see what makes your scene pop without looking artificial.
At a Glance
You've got the power to transform your toy storytelling with just the right lighting. By choosing the appropriate light source, balancing natural and artificial lighting, and playing with shadows and color temperatures, you can create magical, immersive scenes. Position your lights to add drama and use highlights to bring out essential details. With these techniques, your toy stories will captivate audiences and elevate your narratives to new heights. Now, it's time to light up your imagination! Consider experimenting with different angles and perspectives to further enhance your toy storytelling. Changing the placement of your lights and exploring various camera angles can breathe new life into your scenes, adding depth and dimension. By incorporating diverse toy storytelling perspectives, you can truly transport your audience into the magical worlds you create. It’s all about finding the perfect balance between lighting and perspective to bring your toy stories to life.


