
To excel in focus stacking photography, start by choosing the right equipment. Use a reliable camera with manual focus, a sturdy tripod, and consider a macro lens for detailed shots. Plan your composition carefully, establishing a clear focal point and using leading lines. Consistent lighting is essential, so stabilize your light source and balance exposure. In manual mode, set your camera to a smaller aperture and bracket your focus shots with slight adjustments. Finally, blend your images seamlessly using software tools, ensuring sharpness and detail in your final photo. There's plenty more to explore about perfecting this technique.
Choose the Right Equipment
A successful focus stacking photography setup often begins with choosing the right equipment. You'll want a reliable camera with manual focus capabilities, as this is essential for capturing sharp images at varying focal points. A DSLR or mirrorless camera fits the bill perfectly. Pair your camera with a sturdy tripod to prevent unwanted movement during shooting. Stability is key, so invest in a good-quality tripod that keeps your camera steady.
Next, consider the lens. A macro lens is ideal for close-up focus stacking, as it allows you to capture intricate details. If you're working with landscapes, a standard or wide-angle lens may be more suitable. Make sure your lens has a good magnification ratio to guarantee crisp images.
Don't forget a remote shutter release or intervalometer. These tools help you take multiple shots without touching your camera, reducing the risk of camera shake. Finally, lighting is essential. While natural light can work, you might need additional lighting like a ring light or external flash to make sure your subject is well-lit and shadows are minimized. With the right equipment, you're set to plunge into focus stacking photography with confidence.
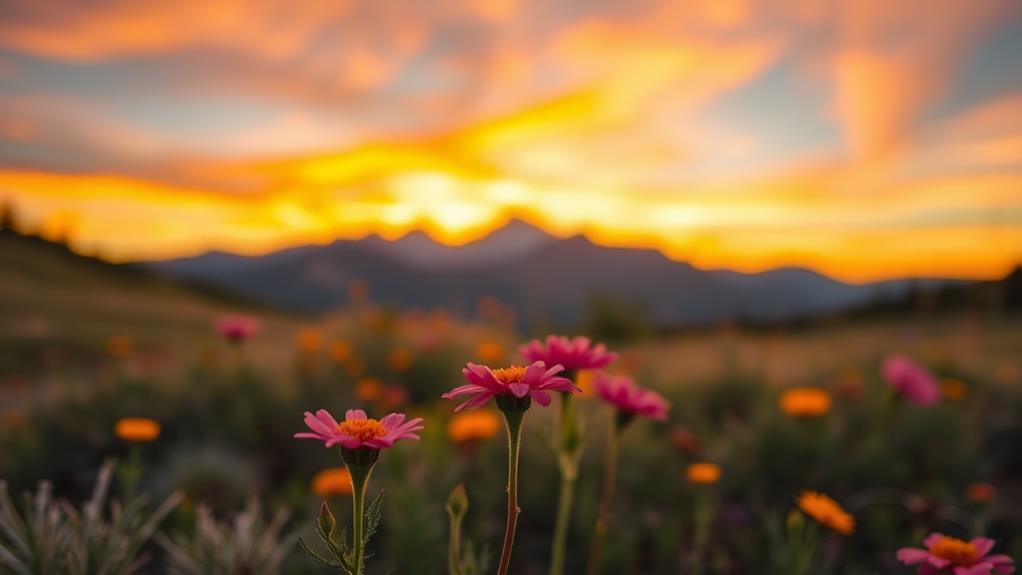
Plan Your Composition
With the right equipment in hand, your next step is to plan your composition thoughtfully. Start by envisioning the final image you want to create. Consider the elements in your scene and how they'll interact once stacked. Decide on a focal point and guarantee it will draw the viewer's attention. Look for leading lines or patterns that guide the eye through the frame, adding depth and interest.
Think about the foreground, middle ground, and background to create a sense of dimension. Arrange objects to enhance this effect. For instance, place larger objects in the foreground and smaller ones in the background to reinforce depth. Ascertain that each element contributes to the overall story or mood you're trying to convey.
Take your time to experiment with different angles and perspectives. Sometimes, a slight shift in your camera's position can dramatically enhance composition. Don't hesitate to get down low or move around to find the most compelling vantage point.
Lastly, maintain balance within your frame. Symmetry can be striking, but asymmetry often adds dynamic tension. By planning your composition carefully, you'll set the stage for a stunning focus-stacked photograph.
Set Consistent Lighting

Illuminate your scene with consistent lighting to guarantee each image in your focus stack aligns seamlessly. In focus stacking, variations in lighting between shots can create noticeable inconsistencies, complicating the blending process. Start by choosing a stable light source. Whether you're using natural or artificial light, make certain it remains unchanged throughout your session. If you're outdoors, shoot during the golden hour or on overcast days to minimize harsh shadows and fluctuating light.
Consider using diffusers or reflectors to spread light evenly across your subject. This helps eliminate unwanted shadows and highlights, making sure each part of your scene is well-lit. If you're shooting indoors, use continuous lighting rather than flash, which can introduce variability between shots. Adjust your lighting setup until you achieve a balanced exposure across the entire frame.
Don't forget to check your white balance settings. Consistent lighting includes maintaining the same color temperature across all your images. Use a gray card or adjust manually to match your lighting conditions. This prevents color shifts, preserving the true colors of your subject. By setting consistent lighting, you make certain each layer of your focus stack is perfectly matched, creating a polished final image.
Master Camera Settings
When it comes to mastering camera settings for focus stacking, you'll want to guarantee precision and control over every shot. First, set your camera to manual mode. This gives you full control over shutter speed, aperture, and ISO, ensuring consistent exposures across all images. A smaller aperture like f/8 or f/11 provides a deeper depth of field, capturing more detail in each shot. However, avoid going too small, like f/22, as diffraction can reduce sharpness.
Next, lock your focus. Autofocus can vary between shots, so switch to manual focus. Use live view and zoom in on your subject to adjust focus precisely. Bracketing your focus is essential; take multiple shots, slightly adjusting focus each time to cover the entire subject.
Stability is key, so use a tripod to eliminate camera shake. Set your camera's mirror lock-up feature if available, reducing vibrations. A remote shutter release or timer minimizes movement when capturing shots.
Blend Images Seamlessly

After capturing your perfectly focused shots, the next step is blending these images seamlessly to achieve a sharp and detailed final result. You'll want to use software like Adobe Photoshop or specialized stacking programs like Helicon Focus. Here's how you can make the process smooth and effective:
- Import Your Images: Load all your focused shots into your chosen software. Make sure each photo is aligned properly to avoid any ghosting in the final image.
- Select the Right Tool: Use the focus stacking tool or feature in your software. In Photoshop, for example, you can use the "Auto-Blend Layers" option to merge your images seamlessly.
- Fine-Tune Blending Options: Adjust the settings to guarantee that the blend enhances the sharpness without introducing artifacts. This might include tweaking the depth map or using layer masks to manually correct any errors.
- Review and Refine: Once the images are blended, closely examine the final photo. Look for any areas that need retouching or further adjustments to guarantee every detail stands out.
Frequently Asked Questions
How Can I Prevent My Subject From Moving During Focus Stacking?
To prevent your subject from moving during focus stacking, stabilize it with clamps or weights. Choose a wind-free environment and shoot indoors if possible. Use a tripod to keep your camera steady. Avoid touching or bumping anything.
What Software Options Are Best for Focus Stacking Post-Processing?
You’ve got several great software options for focus stacking post-processing. Consider using Helicon Focus for its user-friendly interface, Adobe Photoshop for versatility, or Zerene Stacker for high-quality results. Each offers unique features tailored to your needs. Additionally, these programs can effectively enhance your focus stacking figurine photography techniques, allowing you to achieve stunning levels of detail and clarity in your images. Each software provides various tools to fine-tune your results, making them suitable for novice and experienced photographers alike. Experimenting with the different features of these options will ultimately lead to breathtaking photographs that truly showcase the intricacies of your subjects.
How Do I Handle Focus Stacking With Moving Elements Like Water or Plants?
Imagine capturing a dance in a storm. You can use a fast shutter speed to freeze movement or take multiple shots and blend them in post-processing. Consider shooting at different times to minimize motion.
Can Focus Stacking Be Used Effectively in Portrait Photography?
Yes, you can use focus stacking in portrait photography to guarantee sharpness from the eyes to the background. It's especially useful with shallow depth of field. Align and blend images carefully for a natural-looking result.
What Techniques Help Reduce Noise in Focus-Stacked Images?
You'll want to use a low ISO setting and shoot in RAW format to reduce noise. Apply noise reduction during post-processing. Guarantee consistent lighting across all shots to minimize variations that can cause noise in focus-stacked images.
At a Glance
By now, you've got the essentials for focus stacking photography down. You might think it sounds complicated, but with a bit of practice, you'll see it's not as intimidating as it seems. Using the right equipment, planning your composition, ensuring consistent lighting, mastering your camera settings, and blending images seamlessly are all steps you can nail with patience. So grab your gear, get out there, and start capturing those stunning, razor-sharp images you've always wanted.


