
Creating lifelike toy scenes involves selecting toys that match the scene's theme, ensuring scale consistency, and using detailed props. Set up a realistic background with materials like fabric or painted cardboard and incorporate elements like tiny plants and rocks. Master lighting to create dynamic shadows and mood. Capture images by experimenting with angles, motion, and post-processing techniques. By refining your approach and maintaining attention to detail, you'll discover endless creative possibilities in toy scene creation.
Choosing the Right Toys for Your Scene
Selecting the perfect toys is essential for bringing your scene to life. You want to choose toys that match the theme and atmosphere you're aiming to create. Consider the scale of each toy relative to others in your scene to maintain consistency. If you're creating a bustling cityscape, guarantee your cars, buildings, and figures align in size. Choose toys with detailed features that enhance realism, like articulated limbs or textured surfaces.
Think about the story you want to tell. If it's a historical scene, select toys that reflect that era. Use colors wisely; they should complement the setting without overwhelming it. Don't forget the importance of variety—mix different types of toys to add depth. With careful selection, your scene will captivate and engage viewers.
Setting Up a Realistic Background
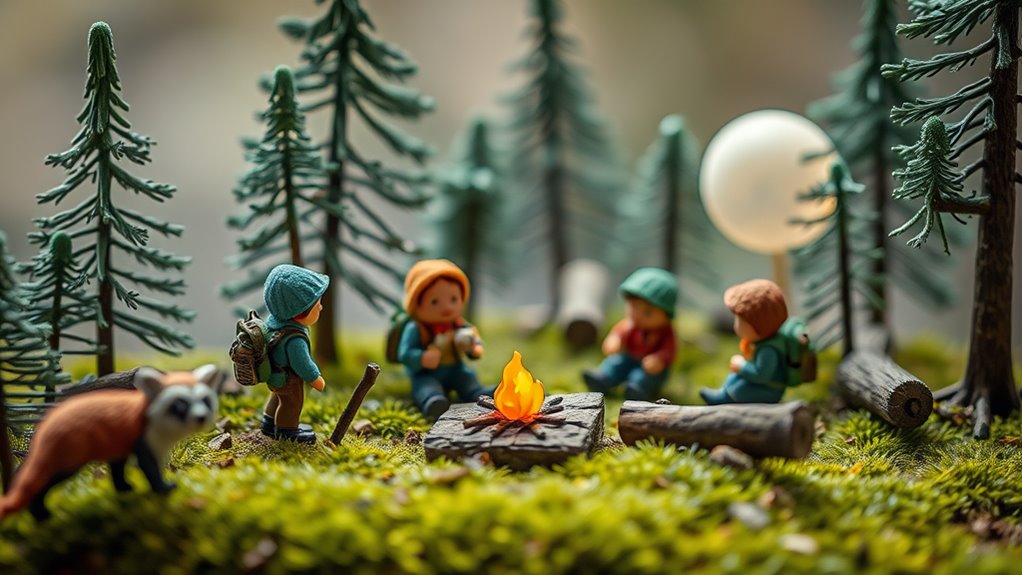
How do you create a background that breathes life into your toy scene? Start by selecting a backdrop that complements your toys and tells a story. Use materials like printed paper, fabric, or painted cardboard to set the stage. Consider the theme of your scene—whether it's a bustling city, serene forest, or a cozy living room—and choose background elements that reflect this setting.
Incorporate small props to add depth and interest. Miniature trees, furniture, or even household items can enhance realism. Arrange these elements thoughtfully to guide the viewer's eye and create a sense of space. Pay attention to scale; make certain props match the size of your toys for a cohesive look. With a well-chosen background, your toys will truly come to life.
Mastering Lighting Techniques

While a well-crafted background sets the stage for your toy scene, lighting is what truly animates it. Use lighting to evoke emotion and depth, bringing plastic figures to life. Start by experimenting with different light sources. Natural light offers a soft, warm glow, while artificial lights can create dramatic shadows. Adjust angles and intensity to highlight details and textures, making your toys appear more realistic and engaging.
To master lighting techniques, remember:
- Direction: Adjust the light source to create dynamic shadows, enhancing depth and dimension.
- Color: Use colored lights to set the mood, whether it's a warm sunset or a cool, mysterious night.
- Intensity: Balance light levels to avoid harshness, ensuring every feature is seen without overpowering your scene.
Incorporating Natural Elements
When you're creating lifelike toy scenes, incorporating realistic textures can make a huge difference. Use materials that mimic natural surfaces, like wood or stone, to ground your scene in reality. Don't forget to add organic accents, such as tiny plants or sand, to enhance the authenticity and depth of your setup.
Using Realistic Textures
To create toy scenes that captivate and feel authentic, start by incorporating realistic textures through natural elements. Consider using items like sand, leaves, or small rocks to mimic the textures you'd find in real-world environments. These elements provide depth and enhance the realism of your scene, making it more engaging for viewers. When you select your textures, think about the setting you're trying to replicate and choose materials that reflect that environment accurately.
- Sand and Soil: Use fine sand or soil to simulate beaches, deserts, or garden beds. It adds a tactile dimension that enhances realism.
- Leaves: Small leaves can mimic bushes or forest floors, offering a lush background.
- Rocks and Pebbles: Scatter them to recreate rugged terrains or riverbanks, providing a natural and varied surface.
Adding Organic Accents
Building on the realistic textures, integrating organic accents can bring your toy scenes to life. Start by adding small branches or leaves to mimic a forest floor. Tiny pebbles or sand can create a realistic path or beach setting. Using real moss adds depth and a touch of nature, making the scene more immersive. Consider incorporating dried flowers or small twigs; they offer color and texture without overshadowing your toys.
Don't overlook the power of lighting. Natural light enhances these organic elements, casting shadows that add drama and realism. Position your scene near a window or use a soft lamp to highlight these features. Remember, organic accents aren't just about realism; they're about creating a dynamic and engaging environment for your toys.
Creating a Sense of Scale

How do you make toy scenes appear convincingly real? Mastering the art of scaling is key. Consider the size of your toys and the surroundings. A tiny tree next to a large action figure won't convince anyone. Pay attention to perspective; position the camera close to the toys to maintain proportionate distances. Use background elements like trees or buildings to reinforce the illusion of scale.
To create a believable scale in your toy scenes, keep these tips in mind:
- Consistent Proportions: Ascertain all elements align in scale, from toys to props.
- Camera Angles: Use angles that enhance depth and avoid distorting size relationships.
- Natural Elements: Incorporate elements like grass or sand that help define the scale and support the scene's authenticity.
Using Props to Enhance Realism
Props breathe life into toy scenes, adding layers of realism that captivate the viewer's imagination. When selecting props, think about how they interact with your toys. Choose items that complement the scene's theme and setting. If you're crafting a desert adventure, small pebbles and sand can mimic a realistic landscape. For a kitchen scene, tiny utensils and miniature food items add authenticity.
Don't hesitate to repurpose everyday objects. A cotton ball can become a fluffy cloud, while a piece of fabric can serve as a vibrant picnic blanket. Pay attention to color and texture, as they play vital roles in creating depth. Remember, the key is to create a cohesive story where every element, no matter how small, contributes to the overall narrative.
Experimenting With Angles and Perspectives
While props lay the foundation for a realistic toy scene, the camera's angle and perspective truly bring it to life. By experimenting with different angles, you can transform an ordinary setup into an immersive world. Try shooting from the toy's eye level. This approach creates a sense of intimacy and makes the viewer feel part of the scene. Don't hesitate to go for dramatic low or high angles, either. These perspectives can add depth and emphasize the scale of your toys, making them appear larger than life. Rotate around your scene to find the most dynamic composition.
- Eye-level shots: Establish a connection with your subject.
- Low angles: Enhance size and importance.
- High angles: Provide a bird's-eye view, showcasing the entire scene.
Capturing Motion and Action
Capturing motion and action in your toy scenes can turn static displays into dynamic narratives. You can achieve this by posing your toys in mid-action positions. For instance, if you're setting up a battle scene, position figures as if they're mid-strike or dodging an attack. Use materials like wire or clear plastic stands to suspend objects or figures, giving the illusion of jumping or flying. To enhance the feeling of movement, incorporate elements like flowing fabric or scattered debris. Pay attention to the direction of motion; align your camera angle to emphasize the momentum. Experiment with shutter speed settings to blur motions selectively, creating a sense of speed. With practice, you'll convey energy and excitement in every shot.
Editing and Post-Processing Tips
After mastering the art of capturing dynamic motion in your toy scenes, it's time to refine those images with editing and post-processing techniques. Start by adjusting the brightness and contrast to make your toys pop against their backgrounds. Consider enhancing colors to bring out the vibrant hues in your scenes, making them more engaging and lifelike. Sharpening is essential to highlight details, especially in intricate toy designs.
To elevate your scenes further, follow these tips:
- Use Layers: Experiment with layers to separate elements, allowing for targeted adjustments without affecting the entire image.
- Add Depth: Apply a subtle blur to the background, creating depth that mimics a professional camera's depth of field.
- Healing Tools: Remove any imperfections or distractions in the scene for a polished finish.
Frequently Asked Questions
How Can I Add Sound Effects to My Toy Scenes?
You can enhance your toy scenes by using a small speaker or Bluetooth device to play sound effects. Record or download sounds that match your scene, and sync them with the action for an immersive experience.
What Materials Are Best for Building Custom Toy Accessories?
You'd swear it's magic when you use polymer clay for crafting custom toy accessories. It's versatile and durable. Don't forget balsa wood for lightweight structures and acrylic paint for vibrant details. Release your creativity with these materials!
How Do I Safely Transport My Toy Scenes for Exhibitions?
Make certain your toy scenes are securely packed by using bubble wrap and sturdy containers. Label fragile items clearly. Keep an inventory list to prevent loss. Use a dolly or cart for easy transportation. Don't rush the process.
Can Digital Tools Be Used to Create Virtual Toy Scenes?
You can definitely use digital tools to create virtual toy scenes. Software like Blender or Photoshop lets you design realistic environments. Experiment with lighting, textures, and angles to make your scenes as lifelike as possible.
What Camera Settings Work Best for Low-Light Toy Photography?
You should use a wide aperture to let in more light, bump up the ISO for sensitivity, and set a slow shutter speed. Don't forget to stabilize your camera to avoid any blur in low-light conditions.
At a Glance
You've got all the tools to bring your toy scenes to life! Remember, the devil's in the details, so focus on every element to make your scenes pop. Play with lighting, angles, and props to create that perfect illusion of reality. Don't shy away from experimenting—sometimes the best ideas come from a little chaos. With practice and creativity, you'll be crafting scenes that leap off the screen and into the imagination. Now, go release your inner artist!


