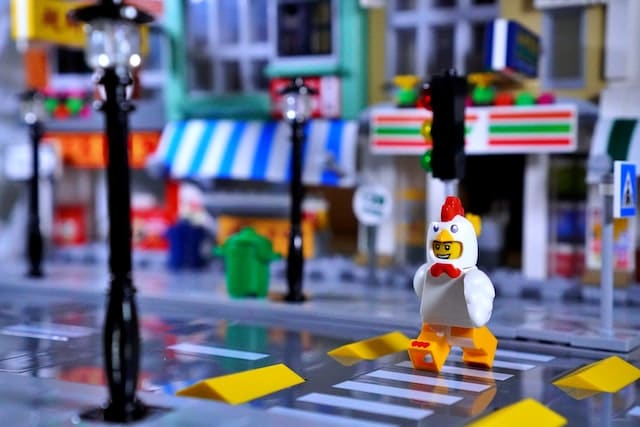
Mastering toy photography in Photoshop involves several tips for stunning results. Start by working with layers for flexible editing. Use the Clone Stamp Tool to remove distractions and perfect composition. Enhance colors and apply filters for a vibrant and unique style. Use lighting tools like dodge and burn for depth, and blur effects for dynamic shots. Finish off with sharpening tools for crisp details and adjust perspectives to fit your vision perfectly. Stay tuned for these essential techniques.
Mastering the Use of Layers for Better Composition
Layers in Photoshop are your best friend when it comes to refining composition in toy photography. They allow you to manage different elements separately without affecting the whole image. Start by creating a new layer for each toy or prop. This way, you can move or resize them without disturbing other parts of your composition. Use layer masks to blend elements seamlessly. Got a background that needs tweaking? Adjust it on its own layer. If you need to add shadows or highlights, create another layer. This approach keeps your edits non-destructive. Don't forget about layer opacity to adjust transparency levels for subtle effects. By mastering layers, you'll have precise control over every aspect, making your toy photography shine with depth and detail.
Enhancing Colors for a Vibrant Look
When you want to make your toy photography pop, enhancing colors is key. Start by adjusting the saturation and vibrance. These tools let you intensify colors without overdoing it. Increase saturation for a bold look, but be careful—too much can make your photos look unrealistic. Vibrance is subtler, enhancing less saturated colors, which is ideal for toys with mixed shades.
Next, use the Hue/Saturation adjustment layer. It helps you target specific colors in your photo. For instance, if your toy's red isn't quite right, you can tweak it to match your vision. Also, try the Color Balance tool to adjust shadows, midtones, and highlights individually. It can add depth and dimension, making your toy figures stand out brilliantly.
Utilizing the Clone Stamp Tool for Seamless Edits

While vibrant colors can make your toy photography enchanting, the Clone Stamp Tool offers another level of refinement by removing unwanted elements. This tool lets you duplicate parts of your image, effectively erasing distractions like dust or stray objects that disrupt your scene. Start by selecting the Clone Stamp Tool from the toolbar. Hold the Alt key (or Option on Mac) and click an area you want to clone. Then, paint over the unwanted element with seamless precision. Adjust the brush size for better accuracy and match the texture of the surrounding area. Remember, practice makes perfect, so experiment with different opacity levels and brush settings. By mastering this tool, you'll create polished images that capture your audience's attention effortlessly.
Perfecting Lighting With Dodge and Burn Techniques
When you're working on toy photography, mastering the dodge and burn techniques can dramatically enhance your images. Use dodge to brighten highlights and burn to deepen shadows, striking the perfect balance in exposure levels. This approach will create depth and dimension, making your toy figures pop against their backgrounds.
Enhancing Highlights and Shadows
Mastering the art of enhancing highlights and shadows can transform your toy photography, bringing depth and dimension to your images. Start by using the Dodge and Burn tools in Photoshop. These allow you to selectively brighten or darken areas, perfect for highlighting details or adding dramatic shadows. Follow these simple steps:
- Create a New Layer: Set it to Overlay mode and fill it with 50% gray. This keeps your adjustments non-destructive.
- Select the Dodge Tool: Adjust the exposure to 10-20% for subtle highlights. Focus on areas where light naturally falls, like the toy's edges.
- Switch to the Burn Tool: Use it to deepen shadows with the same low exposure. Target areas beneath arms or feet to create realistic shadows.
These techniques will elevate your toy images!
Balancing Exposure Levels
To achieve a well-balanced exposure in your toy photography, leverage the Dodge and Burn tools to perfect lighting. Start by selecting the Dodge tool to brighten specific areas. Focus on parts of the toy where light naturally falls, enhancing the highlights without overexposing. Switch to the Burn tool to darken shadows, giving depth and contrast. This helps emphasize details and adds realism to the scene.
Adjust the tool's exposure settings to maintain subtlety. Use soft brush tips and low exposure percentages for gradual effects, preventing harsh changes. Alternate between Dodge and Burn, evaluating the impact on your image. Remember, the goal is harmony, not extremes. With practice, you'll enhance your toy photographs, capturing the light's essence beautifully and maintaining a natural appearance.
Creating Depth and Dimension
Although toy photography can be challenging, mastering the art of creating depth and dimension brings your images to life. One effective way to do this is by using the Dodge and Burn techniques in Photoshop. These tools help you manipulate light and shadow, adding realism and depth to your toy subjects.
Here's how you can enhance your photos:
- Select the Dodge Tool: Lighten specific areas to mimic highlights, making your toy appear more three-dimensional.
- Switch to the Burn Tool: Darken shadows to add depth, emphasizing contours and creating a more dramatic effect.
- Adjust Exposure Settings: Use a low exposure setting to gradually build up the effect, ensuring a natural look without harsh shifts.
Experiment with these techniques to make your toy photography stand out!
Creating Depth With the Blur Tool
When you're looking to add depth and realism to your toy photography, the blur tool in Photoshop can be your best friend. It allows you to mimic the natural focus fall-off of a camera, directing viewers' attention where you want it. Start by duplicating your original layer to preserve your work. Select the Blur Tool from the toolbar, adjusting the brush size to suit your subject. Gently apply the blur to background elements, carefully avoiding the toy itself. This method enhances the illusion of distance, making the toys pop against a softened backdrop. For added control, use a layer mask to blur with precision. With practice, you'll create stunning, lifelike scenes that draw viewers into your miniature world.
Applying the Right Filters for a Unique Style

To create a distinct look in your toy photography, start by choosing filters that enhance complementary color schemes. You can also use filters to bring out textures and details, giving your images a more lifelike appearance. Don't hesitate to experiment with blurring effects to add depth and focus to your photos.
Choose Complementary Color Schemes
Choosing the right complementary color schemes can elevate your toy photography from ordinary to extraordinary. By selecting colors that work harmoniously, you create images that captivate viewers and enhance the toys' features. When applying filters in Photoshop, aim for combinations that highlight the toy's essence. Here's how you can achieve stunning results:
- Study the Color Wheel: Understanding color theory helps you choose pairs like blue and orange or red and green, providing balance and contrast.
- Experiment with Filters: Use Photoshop's built-in filters to adjust tones and moods. Try different combinations to see which complements your toys best.
- Stay Consistent: Develop a style by sticking to a particular color scheme across your photos, making your work instantly recognizable and cohesive.
These tips can transform your toy photography!
Enhance Textures and Details
Although capturing the perfect shot is essential, enhancing textures and details in post-production can truly set your toy photography apart. Start by applying the "Unsharp Mask" filter to bring out fine details without overdoing it. This technique sharpens the image, making textures more pronounced. Next, use the "High Pass" filter. Set it to a low radius for subtle texture enhancement and blend it via "Overlay" mode. This emphasizes minute details without altering the overall look.
Experiment with the "Texture" filter to add a unique touch, giving your toys a distinct surface feel. Adjust the settings to match the mood you want to convey. Finally, don't hesitate to play around with layer masks, allowing you to selectively enhance textures in specific areas, adding depth and dimension.
Experiment With Blurring Effects
After enhancing textures and details, it's time to explore the creative possibilities of blurring effects in your toy photography. Blurring can add depth, focus, or even a whimsical touch to your images. Here's how you can apply the right filters for a unique style:
- Gaussian Blur: Use this to create a soft, dreamy background without losing focus on your toy subject. It's perfect for isolating the main character and creating an ethereal atmosphere.
- Motion Blur: Apply this effect to suggest movement. Whether it's a superhero in action or a vehicle speeding, motion blur can make static toys appear dynamic.
- Lens Blur: Mimic the effect of a shallow depth of field. This blur can highlight your subject while blending out distracting elements in the background.
Experiment and see what fits your style best!
Sharpening Details for Crisp Photographs
When it comes to toy photography, sharpening details can make all the difference in creating eye-catching images. You want your toys to pop with clarity, showcasing every nuance. Start by duplicating your image layer in Photoshop. Go to Filter > Sharpen > Unsharp Mask. This tool allows you to adjust the amount, radius, and threshold to fine-tune the sharpness.
Be subtle; too much sharpening can cause unnatural halos around edges. Zoom in to check your progress and verify you're not overdoing it. To sharpen specific areas, use a layer mask to selectively apply the effect. By enhancing the textures and details, your toy photos will stand out with a polished, professional look. Remember, restraint is key to achieving that perfect balance.
Removing Unwanted Background Elements
Sometimes, unwanted background elements can distract from the main focus of your toy photography, so it's essential to know how to remove them effectively. You want your toys to shine without any distractions. Here's how you can tidy up your images:
- Use the Clone Stamp Tool: Select this tool to copy pixels from a clean area and paint over the unwanted parts. It's perfect for small distractions.
- Utilize the Content-Aware Fill: Highlight the unwanted element, go to Edit > Fill, and choose "Content-Aware". Photoshop will intelligently fill in the gap to match the surrounding area.
- Try the Spot Healing Brush: Click on the blemish, and this tool will automatically blend it with the surroundings, ideal for quick fixes on minor elements.
These steps will keep your toys as the stars of the show!
Adjusting Perspective for Realistic Effects
In toy photography, adjusting perspective can elevate your images by creating more realistic and dynamic effects. Start by opening your image in Photoshop and selecting the 'Perspective Warp' tool under 'Edit'. This tool lets you manipulate the image's perspective lines, making the toys appear more lifelike. Drag the corner points of the grid to align with the toy edges and adjust the perspective accordingly, ensuring the toy fits seamlessly into its environment.
Don't forget to use the 'Transform' function to tweak angles and proportions further. Hold down the 'Shift' key while dragging to maintain consistency. With practice, you'll master creating depth and scale, making your toy scenes look as though they leap off the screen. Experiment with different angles to discover what works best!
Frequently Asked Questions
How Can I Ensure My Toy Subjects Appear Lifelike in Photos?
To make your toy subjects look lifelike, focus on lighting, angles, and backgrounds. Use natural light or softbox lighting to eliminate harsh shadows. Experiment with camera angles and choose realistic backgrounds to enhance the overall scene.
What Are the Best File Formats to Save Edited Toy Photos?
You should save edited photos in TIFF or PSD formats for best quality and easy future edits. If you need smaller file sizes for sharing, go with JPEG, but remember it compresses and might lose some detail.
How Do I Maintain Consistency in Style Across Multiple Toy Photographs?
To maintain consistency, develop a unique style by defining your color palette, lighting, and composition. Create presets or actions in Photoshop, and apply them uniformly. Regularly review your work to guarantee each photo aligns with your vision.
What Resolution Should I Use for Printing Toy Photography?
When printing toy photography, use a resolution of at least 300 DPI for sharp, high-quality prints. Confirm your image size matches the print dimensions you want, so your photos look their best on paper.
Can I Automate Repetitive Edits to Multiple Toy Photos at Once?
Did you know that 60% of photographers automate tasks? You can automate repetitive edits using Photoshop's batch processing or actions. Create an action for your edits, then apply it to multiple photos, saving time and effort.
At a Glance
So, you've made it to the end, armed with Photoshop tips that'll elevate your toy photography to near-professional levels—because, let's face it, who doesn't want their tiny plastic army men to look like they're waging epic battles? Remember, it's not just about enhancing colors or perfecting lighting; it's about convincing the world your action figures lead more exciting lives than you do. Now, go forth and create images so stunning, even Barbie will want a copy!

