
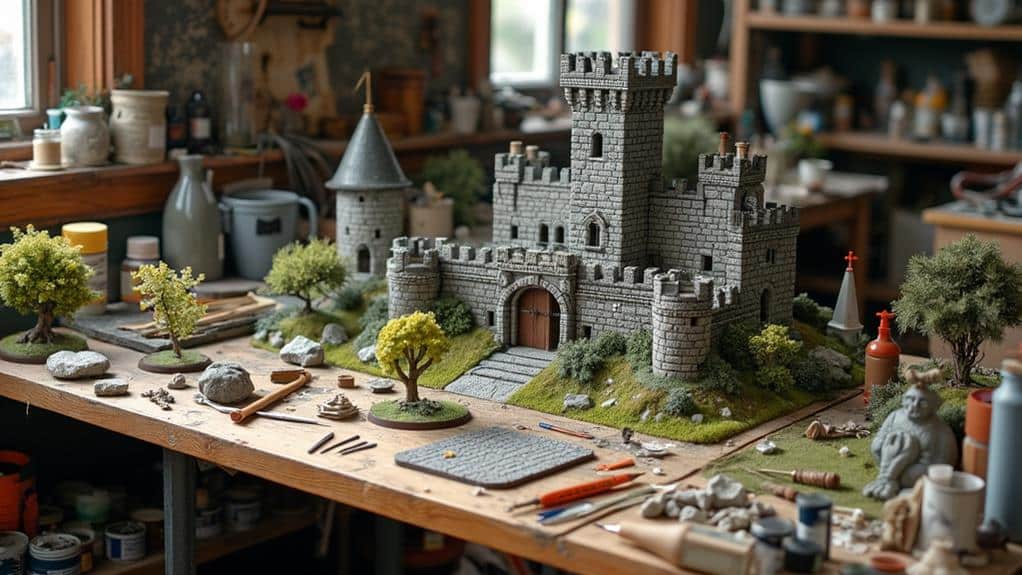
Imagine transforming your miniature scenes with three simple DIY prop tutorials that add a touch of realism and creativity. You'll start by crafting lifelike trees, using wire, floral tape, and foliage material to bring nature into your tiny world. Next, build charming miniature houses with balsa wood, craft knives, and glue, complete with detailed windows and doors. Finally, create quaint street lamps by threading beads onto LED lights and attaching them to wooden dowels, finishing off with a decorative wire wrap. Each step is straightforward, but there's a key detail that makes all the difference.
Key Takeaways
- Craft realistic trees using wire, floral tape, glue, and foliage materials like foam or small leaves.
- Construct miniature houses from balsa wood, glue, and paint, following a simple blueprint for accuracy.
- Create tiny street lamps with thin wooden dowels, small beads, LED fairy lights, and hot glue.
- Use pliers to twist wire for tree trunks and branches, covering with floral tape for a natural texture.
- Detail miniature houses with window frames, doors, and shutters made from tiny wood pieces or cardstock.
Crafting Realistic Trees
Creating realistic trees can be a game-changer for your DIY props, whether you're working on a theater set, a model train landscape, or a home diorama. To start, gather some basic materials: wire, floral tape, glue, and a selection of foliage materials like foam or small leaves. First, twist the wire to form the trunk and branches. You can use pliers for more intricate bending and shaping. For added realism, consider using softbox lights to illuminate your scene and reduce harsh shadows.
Next, cover the wire frame with floral tape to give it a more natural, bark-like texture. This step is vital for making the structure look less artificial. Once you've wrapped the entire frame, apply a thin layer of glue and sprinkle some fine texture material, like sawdust or ground foam, to mimic the bark's roughness.
Now, it's time to add foliage. Dab small amounts of glue onto the branches and attach your chosen foliage material. Be sure to vary the sizes and shades of the leaves to create a more natural appearance. Let everything dry thoroughly before moving or placing your tree in its final setting. By following these steps, you'll craft trees that enhance any miniature scene with stunning realism.
Building Miniature Houses
Building miniature houses can be an incredibly rewarding part of your DIY prop projects. To start, gather essential materials like balsa wood, craft knives, glue, and paint. Sketch out a simple blueprint to guide your construction. It doesn't have to be complex; basic shapes will work wonders. Consider using a Neewer Portable tripod to hold your camera steady while documenting your progress.
Cut the balsa wood into your desired shapes for walls, roofs, and floors. Be precise with your measurements. Use sandpaper to smooth out rough edges. Once your pieces are ready, begin assembling the walls, using glue to hold them together. A few clamps can help keep everything in place while drying.
Next, add details to give your house character. Use tiny pieces of wood or cardstock to create window frames, doors, and shutters. Paint adds personality; consider a weathered look for a rustic vibe or bright colors for a more whimsical touch. Apply thin layers and let each dry before adding another to avoid smudging
Making Tiny Street Lamps
Crafting tiny street lamps brings a magical touch to your miniature world. These charming props illuminate your scenes and add a realistic flair. You'll need a few simple materials: thin wooden dowels, small beads, LED fairy lights, and hot glue. For those who enjoy outdoor shooting, consider using a lightweight travel tripod like the ZOMEi M5 to capture your illuminated scenes in the best light.
Start by cutting the dowel into lamp post lengths, about 3-4 inches. Sand the ends to verify they're smooth. Next, take your small bead and thread it onto an LED light. Secure it with a dab of hot glue at the top of the dowel. This bead acts as the lamp's bulb holder, giving it an authentic look.
To create the lamp base, glue a larger bead or button to the bottom of the dowel. This helps the lamp stand steadily. Now, wrap the LED wire around the dowel, using a bit of glue to keep it in place. This step hides the wire and adds a decorative touch
At a Glance
By following these DIY prop tutorials, you'll bring your miniature scenes to life with realistic trees, charming houses, and enchanting street lamps. It's amazing what you can create with some wire, balsa wood, and LED lights. So, gather your materials and get crafting! Your epic miniature world awaits, ready to be populated with the props you've made. Embark on this creative adventure and watch your imagination flourish in every tiny detail. Happy crafting! Don’t be afraid to experiment with different materials and techniques to add depth and personality to your miniature world. Whether it’s using textured paper for a cobblestone street or incorporating realistic foliage with sponge painting, there are endless possibilities to enhance your scenes. These miniature world techniques will help you achieve a professional finish and create a captivating world that you’ll be proud to display. So, roll up your sleeves and let your creativity run wild as you build your own unique and enchanting miniature world. Happy crafting!


