
Enhancing toy textures in macro photography relies on the right equipment, lighting, and technique. Choose a macro lens with a 1:1 magnification ratio and a high-resolution camera. Stabilize it with a tripod. Gentle lateral lighting reveals textures beautifully, while the right angles and uncluttered backgrounds make them pop. In post-processing, adjust contrast and clarity to emphasize details. With creative experimentation, your shots will mesmerize viewers. Discover more strategies for stunning capture.
Choosing the Right Equipment for Macro Shots
When you're diving into macro photography, choosing the right equipment is vital to capturing stunning details. Start by selecting a good macro lens; they're designed specifically for close-up shots and provide sharpness and clarity. Look for lenses with a 1:1 magnification ratio to guarantee life-size reproductions of your toy subjects. Pair your lens with a camera that has a high-resolution sensor to capture every fine detail.
Don't overlook a sturdy tripod. It stabilizes your camera and reduces blur, important for close-up shots. Consider using a remote shutter release to avoid vibrations from pressing the shutter button. Additionally, macro extension tubes can enhance your lens's magnification without losing image quality. With these tools, you'll be well-equipped to capture the intricate textures of toys.
Understanding Lighting Techniques for Enhanced Textures
To capture the intricate textures of toys in macro photography, you need to pay attention to light direction and the shadows it creates. Position your light source to highlight surface details without overwhelming them. Use diffusion techniques to soften highlights, ensuring the textures remain the focal point.
Light Direction and Shadows
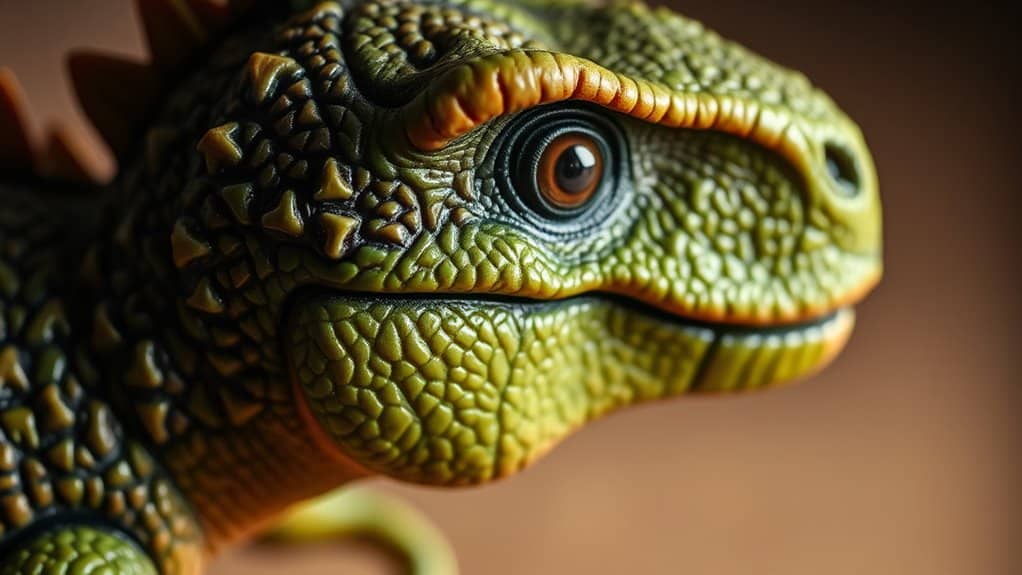
Capturing the intricate details of toy textures in macro photography hinges on your understanding of light direction and shadows. The angle at which light hits your subject can dramatically alter its appearance, revealing textures or flattening them entirely. Position your light source to strike the toy from the side; this lateral lighting emphasizes texture by casting small shadows, highlighting the intricate details.
Experiment with different angles to see how shadows transform the texture. Shadows add depth, making textures pop, so don't shy away from them. However, be mindful not to create harsh, distracting shadows. Move your light source and adjust its height to achieve the desired effect. Remember, the key is to accentuate the toy's texture without overpowering the image with excessive contrast.
Diffusion for Soft Highlights
While lateral lighting accentuates textures through shadows, achieving soft highlights requires a different approach. You'll want to use diffusion to create those gentle highlights that enhance your toy's textures. Start by placing a diffuser, like a softbox or translucent paper, between your light source and the toy. This setup will scatter light, softening harsh spots and reducing glare.
Experimenting With Angles and Perspectives
When you're capturing toy textures, experimenting with angles can reveal surprising details and add intrigue to your shots. By exploring unique viewpoints and trying dynamic angle variations, you can transform ordinary scenes into extraordinary images. Don't forget to play with depth perception techniques to enhance the three-dimensional feel of your macro photographs.
Unique Viewpoint Exploration
Ever wondered how to make your macro photography stand out? Unique viewpoint exploration is the key. When shooting toy textures, changing your perspective can reveal hidden details and surprising patterns. Start by lowering your camera to eye level with the toy. This shift transforms ordinary shots into engaging compositions. Don't hesitate to move around; capturing a toy from different vantage points can disclose its unseen sides and textures.
Experiment with proximity. Get closer to highlight intricate textures that often go unnoticed in regular views. Play with angles—tilting your lens slightly can introduce unexpected elements into the frame. Each shift in perspective adds depth, making your images more enthralling. By exploring unique viewpoints, you'll discover new ways to showcase the fascinating world of toy textures.
Dynamic Angle Variations
Exploring unique viewpoints naturally leads to experimenting with dynamic angle variations. When you shift your camera's angle, you reveal new dimensions of your toy subjects. Instead of capturing a toy's texture straight on, tilt your camera upwards or downwards. This simple change can dramatically alter the texture's appearance. Try shooting from a low angle to emphasize surface details, or go high to reveal different patterns. Rotate your camera slightly and you'll see textures pop in ways you didn't expect. Don't hesitate to get creative; move around and observe how each slight adjustment affects the final image. Dynamic angles can transform mundane textures into intriguing visuals, giving your macro photography a fresh and compelling perspective.
Depth Perception Techniques
Although capturing textures is an essential aspect of macro photography, achieving a sense of depth can make your images truly stand out. To create depth, experiment with angles and perspectives. Don't just shoot head-on; instead, try tilting your camera slightly or positioning it lower or higher than the toy. This change in perspective can add layers and dimension.
Play with foreground and background elements. Positioning a part of the toy closer to the lens while keeping other elements in the background can enhance depth perception. Use shallow depth of field to blur the background, drawing attention to the toy's textures and adding a three-dimensional feel. Lighting plays a vital role too; side lighting can create shadows that emphasize depth in your macro shots.
Utilizing Backgrounds to Complement Textures
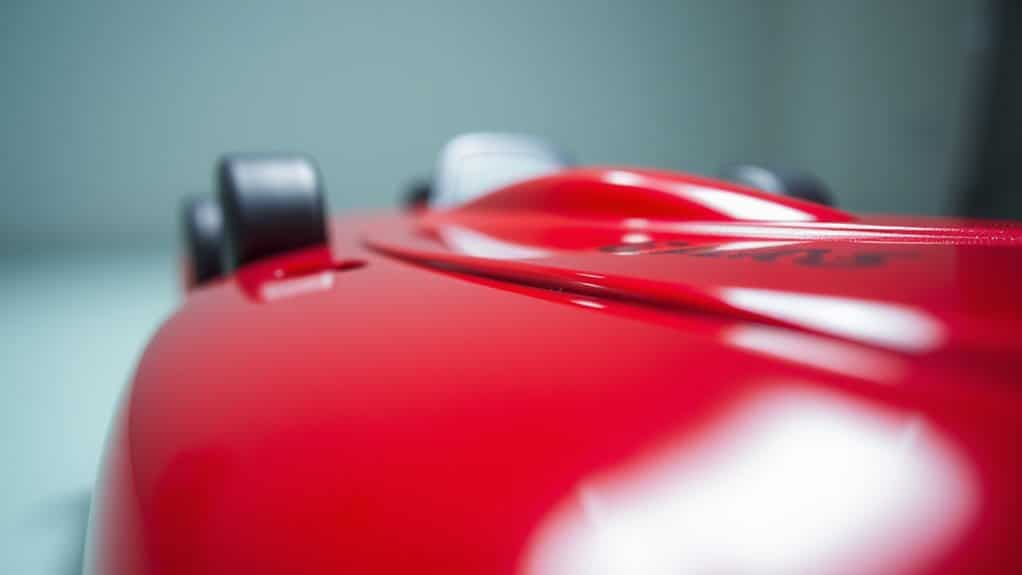
When capturing macro photographs of toy textures, choosing the right background can make all the difference in highlighting the intricate details of your subject. Opt for a background that contrasts with the toy's texture to make it pop. A smooth, neutral surface works wonders, letting the texture take center stage without distraction. Consider using colors that complement or contrast with the toy to add depth and interest. You might use a gradient backdrop to subtly shift focus toward the toy. Keep the background uncluttered and simple to avoid pulling attention away from the main subject. Experiment with different textures in your background to see how they interact with the toy's surface, enhancing the overall visual impact of your macro shots.
Post-Processing Tips for Highlighting Details
To truly make the textures in your macro photography stand out, post-processing is key. Start by adjusting the contrast to emphasize the fine details. Increasing contrast can make textures pop and add depth to your images. Use sharpening tools carefully to enhance edges without introducing noise, ensuring every intricate detail is crystal clear.
Next, experiment with clarity sliders, which can enhance mid-tone contrasts and bring out hidden textures. Don't forget the importance of color correction. Adjusting the saturation and vibrance can help highlight the natural hues of your toy's surface, making textures more vibrant and realistic. Finally, cropping can help eliminate distractions and focus attention on the most textured areas. With these techniques, your photos will capture every detail beautifully.
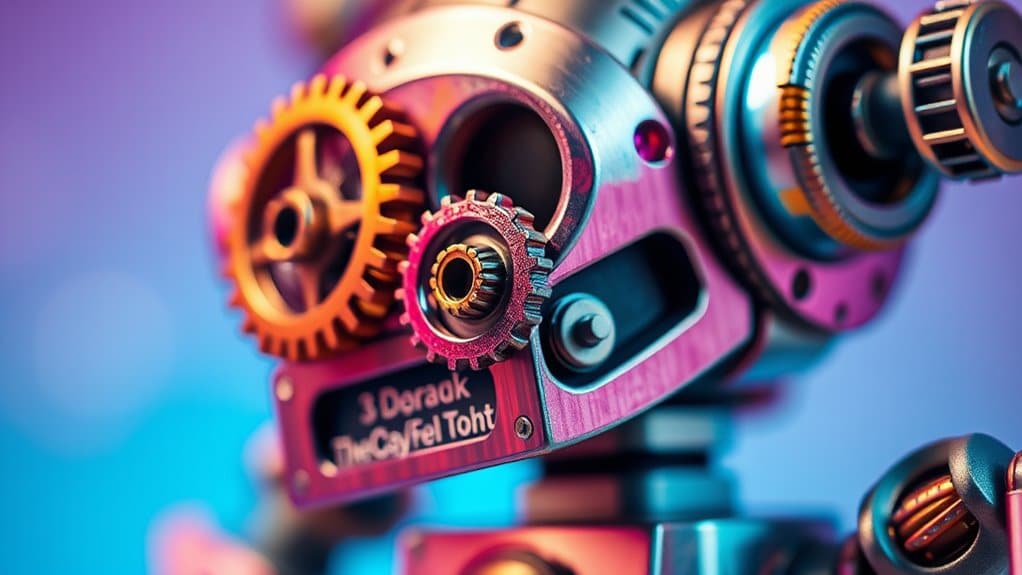
Selecting Toys With Interesting Surface Features
Selecting toys with interesting surface features can dramatically elevate your macro photography. Look for toys that have intricate patterns, unique materials, or varied textures. You might find that a toy's grooves, ridges, or raised elements create stunning visual interest when captured up close. Consider toys made of different materials like wood, metal, or fabric, as each offers distinct tactile qualities. Bright colors or contrasting shades often enhance the texture, making it pop in your photos. Miniature models or action figures frequently boast detailed craftsmanship, ideal for macro shots. Don't overlook vintage toys, as their wear and tear can add character. By choosing toys with rich textures, you'll not only capture engaging images but also discover new perspectives in your photography.
Creating Depth and Dimension Through Layering
Exploring toys with fascinating surface features lays the groundwork for another essential aspect of macro photography: creating depth and dimension through layering. To achieve this, position your toys at different distances from the camera. This technique allows you to capture multiple layers within a single frame, adding richness and interest. Use props like colored paper or textured backgrounds to enhance depth further. Adjust your aperture settings to keep the foreground sharp while blurring the background, creating a beautiful bokeh effect. Don't hesitate to experiment with lighting angles to cast shadows that emphasize contours and textures. By layering elements thoughtfully, you'll create images that invite viewers to explore every detail, transforming simple toys into fascinating subjects bursting with life and dimension.
Frequently Asked Questions
How Can I Prevent Reflections on Glossy Toy Surfaces During Macro Photography?
You can prevent reflections on glossy toy surfaces by using a polarizing filter and adjusting your lighting. Diffuse the light with softboxes or white umbrellas. Position lights at angles that minimize glare, ensuring even, reflection-free exposure.
What Are Some Common Mistakes to Avoid in Toy Macro Photography?
You often overlook lighting, leading to harsh shadows or reflections. Don't forget to stabilize your camera to avoid blur. Pay attention to background clutter that distracts from your subject, and always check your focus for sharp details.
How Do I Manage Dust and Imperfections on Toy Surfaces Before Shooting?
Did you know 80% of macro photos show dust if you don't clean properly? Gently use a microfiber cloth to remove dust and imperfections. A soft brush helps reach tricky spots, ensuring your photos capture flawless toy details.
Are Certain Toy Colors More Challenging to Photograph in Macro Settings?
Yes, certain toy colors like bright reds or deep blacks can pose challenges in macro photography. You need to adjust your lighting and camera settings to capture details accurately without losing texture or causing unwanted reflections.
Can Macro Photography Techniques Be Applied to Moving Toys or Figures?
You can definitely apply macro photography techniques to moving toys or figures. Use faster shutter speeds and adjust your focus settings to capture sharp images. Practice patience, and you'll improve your skills with moving subjects over time.
At a Glance
Imagine you're an artist, and your camera is the brush that brings toy textures to life in the grand gallery of macro photography. By selecting the right tools, mastering light, and playing with angles, you breathe life into miniature worlds. Like a sculptor chiseling marble, you reveal hidden details and layers, making each toy a masterpiece. With the magic of post-processing, your captured moments become timeless tales, inviting viewers to explore and marvel at the intricate beauty within.


