
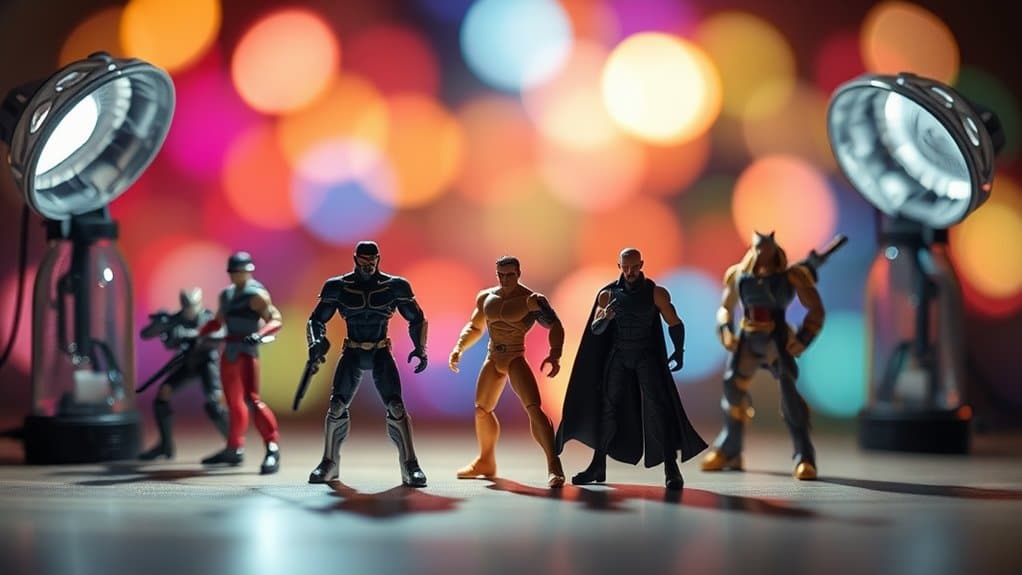
Release your creativity with DIY lighting hacks for toy photography! Embrace natural light for drama, or craft a homemade softbox from household items. Reflectors made from aluminum foil enhance shadows, while custom gobos cast unique patterns. Create a light tent for even illumination, and try recycled materials for soft diffusion. Use fairy lights for magical effects and experiment with color hues. Dive deeper to discover how these techniques can elevate your toy photography to new heights.
Utilizing Natural Light for Dramatic Effects
When shooting toy photography, harnessing natural light can elevate your images with dramatic effects. Position your toys near a window where sunlight streams in during early morning or late afternoon. These golden hours provide a soft, warm glow that adds depth to your photos. Experiment with different angles to see how shadows play across your subjects, creating a dynamic look.
Use sheer curtains to diffuse harsh light and prevent overexposure. Move your toys closer or further from the light source to control highlights and shadows. Don’t forget to adjust your camera settings; lower ISO to reduce noise, and tweak the aperture for sharp focus and depth of field. Embrace the unpredictability of natural light—it’s your friend in crafting compelling, vibrant toy images. Experiment with different angles to capture the toys in the most flattering light, as the right perspective can transform a simple shot into an eye-catching masterpiece. Additionally, consider incorporating the best backlighting techniques for toys to add a magical glow, making your subjects stand out beautifully against their surroundings. With a little creativity and patience, you can turn every play session into an inspiring photography adventure.
Creating a Softbox With Household Items
While natural light offers stunning effects, there are times when you need more control over your lighting. Creating a softbox using household items is a simple solution. Start by grabbing a cardboard box and cutting out one side. Cover the opening with a white sheet or tracing paper, securing it with tape. This diffuses the light, giving your toy photos a softer, more professional look.
Next, position a lamp behind the softbox to direct the light through the diffuser. Adjust the distance between the lamp and the box until you achieve the desired softness. You can experiment with different light sources, like LED bulbs or even a flashlight, to see which works best. With this easy DIY project, you're ready to elevate your toy photography effortlessly.
Enhancing Shadows With DIY Reflectors

Ever wondered how to add depth and drama to your toy photos? You can enhance shadows using DIY reflectors, which is an easy and effective technique. Start by grabbing some aluminum foil or white cardboard. These materials are great for bouncing light back onto your subject, giving your toys a more dimensional look. Position the reflector opposite your main light source, adjusting its angle to control how the shadows fall. This will deepen the contrast and highlight the textures on your toys, making them pop in your photos. Experiment with different distances and angles to see how they affect the shadows. You'll notice how this simple trick adds an artistic flair, elevating your toy photography to a professional level.
Crafting a Light Tent for Even Illumination
After mastering the art of enhancing shadows with DIY reflectors, it's time to explore another brilliant technique: crafting a light tent for even illumination. A light tent helps you achieve soft, diffused lighting, eliminating harsh shadows and glare on your toy subjects. Start by creating a simple frame using PVC pipes or a cardboard box. Drape a white fabric or tissue paper over it, guaranteeing it covers all sides except the front. Place your light sources around the tent, like desk lamps or LED panels, to envelop your scene in gentle light. This setup guarantees your toy figures are illuminated evenly, enhancing details and colors. With a light tent, your toy photography will have a professional, polished look, making your subjects truly shine.
Building Custom Gobos for Creative Shadows

Creating custom gobos is a fantastic way to add creative shadows to your toy photography. Start by cutting shapes or patterns into cardboard or black foam board. These cutouts will act as your gobos. Position them between your light source and the toys. The light will pass through the cutouts, casting interesting shadows onto your scene. You can experiment with different patterns to see what works best for your setup. Try using shapes like stars, leaves, or abstract designs. You can tape a translucent material, like tracing paper, over the cutouts to soften the shadows for a different effect. Use clamps or stands to hold your gobos steady. Don't be afraid to adjust the distance and angle to achieve the perfect shadow play.
Using LED Strips for Colorful Backdrops
When you're looking to enhance your toy photography with vibrant backgrounds, using LED strips can be a game-changer. These versatile lights allow you to create colorful backdrops that bring your toy scenes to life. Here's how to make the most of them:
- Choose Your Colors: Select LED strips with a wide range of colors. This gives you the flexibility to switch hues depending on the mood or theme of your shoot.
- Position Strategically: Place the LED strips behind or around your toys. Experiment with different angles to see how the light interacts with the figures.
- Adjust Brightness: Use dimmable LED strips to control the intensity of your backdrop lighting.
- Create Patterns: Arrange the strips in patterns or shapes to add depth and interest to your photos.
Making a Miniature Ring Light for Close-Ups
To create a miniature ring light for your toy photography close-ups, gather simple materials like LED lights, a small hoop, and some adhesive. Follow our step-by-step guide to assemble your light, ensuring it's perfectly sized for your setup. For the best results, position the ring light carefully to highlight your subject and eliminate harsh shadows.
Materials Needed for Construction
A miniature ring light can greatly enhance your toy photography by adding a professional touch to your close-up shots. You don't need to break the bank to achieve this effect. With a few simple materials, you'll be on your way to crafting your own miniature ring light. Here's what you'll need:
- LED Strip Lights: Choose a strip with a cool white temperature for the best results. These strips are flexible and can be easily shaped into a circle.
- Circular Base: Something like a small embroidery hoop or a plastic ring frame will work perfectly.
- Power Source: A portable USB power bank guarantees your ring light is mobile and easy to use.
- Double-Sided Tape: This will help secure the LED strip to the circular base.
Step-by-Step Assembly Guide
With your materials ready, you can start crafting your own miniature ring light for dynamic toy photography. Begin by cutting a circular piece of cardboard to serve as the base. Next, evenly space small LED lights around the circle's perimeter. Secure them with hot glue, ensuring all lights face inward. Connect the LEDs using thin wire, and solder them in place to keep everything stable.
Once the wiring is complete, attach a small battery pack to power your LEDs. Use double-sided tape to fix it on the backside of the cardboard. Cover the lights with a thin strip of translucent paper or plastic to diffuse the light, creating a soft glow. Now, you've got a handy, custom-made ring light for close-up shots!
Tips for Optimal Lighting
While crafting your DIY miniature ring light is a great start, guaranteeing ideal lighting requires some additional tips. First, always position your light source at an angle to create depth and dimension in your toy photography. A flat, head-on light can make your subjects look lifeless.
Here are some useful tips:
- Diffusion: Use a thin white cloth or parchment paper over your light to soften harsh shadows.
- Background: Experiment with colored backdrops to see how they affect your lighting and mood.
- Distance: Adjust the distance between the ring light and your subject to control light intensity.
- Battery Life: Use rechargeable batteries to guarantee your ring light is always ready for impromptu photo sessions.
With these tips, you'll elevate your toy photography to new heights.
Diffusing Light With Recycled Materials
If you've ever struggled with harsh shadows in your toy photography, diffusing light can make a world of difference. You don't need fancy equipment; just look around your home for recyclable materials. Grab a white plastic bag or tissue paper to soften the light. Simply place it over your light source, like a lamp or flashlight, to create a more even illumination. Another great option is using a clean, empty milk jug. Cut it open and position it around your light source for a gentle glow. You can also try wax paper, which is often found in kitchens, to diffuse direct beams. These simple tricks help you achieve a professional look, making your toy subjects pop without harsh contrasts.
Constructing a Light Panel for Balanced Lighting
Creating a balanced lighting setup for your toy photography can be straightforward when you construct a light panel. You'll need just a few items to get started. First, gather materials like a poster board, aluminum foil, and LED strip lights. Here's how you can make your own light panel:
- Cut the Poster Board: Trim your poster board to your desired size, considering the space you'll be working in.
- Apply Aluminum Foil: Cover one side of the board with aluminum foil to maximize light reflection.
- Attach LED Strips: Secure LED strip lights along the edges of the board for even illumination.
- Power Up and Adjust: Connect the LED strips to a power source, and adjust the brightness to suit your scene.
This setup guarantees soft, even lighting for stunning photos.
Experimenting With Fairy Lights for Magical Scenes
When using fairy lights in your toy photography, think about how you position them to get the best glow. Try playing with different colors and effects to see how they change the mood of your scene. A little experimentation can transform your setup into a magical world.
Positioning for Optimal Glow
To achieve a magical glow in your toy photography, positioning fairy lights is key. You'll want to experiment with different setups to see how light interacts with your scene. Consider these strategies to enhance your photos:
- Wrap Lights Around: Gently wrap fairy lights around your subject to create an enchanting glow that highlights details.
- Backlighting: Place lights behind your toys to create a silhouette effect, adding depth and intrigue to the scene.
- Layering: Use multiple strands at various distances to add dimension and a dreamy quality to your composition.
- Foreground Twinkle: Position lights in the foreground to frame your subject, creating an inviting, twinkling effect that draws viewers in.
Experiment with these positions and watch your toy photography illuminate with magical charm.
Color Variations and Effects
While experimenting with fairy lights, you'll discover that color variations can transform your toy photography into a magical scene. By selecting different hues, you can create various moods and atmospheres. Soft blues and purples can give a dreamy, otherworldly feel, while warm reds and oranges evoke coziness or adventure.
Try wrapping the lights around your toys or placing them in the background for a soft bokeh effect. Don't be afraid to layer colors; combining multiple shades can add depth and intrigue to your photos. Use dimmers to control brightness and highlight specific areas.
Experiment with placement and distances to see how shadows and highlights interact. With fairy lights, your creativity knows no bounds—each setup offers a new opportunity to captivate.
Frequently Asked Questions
How Can I Prevent Glare in Toy Photography?
To prevent glare in toy photography, position your light source at a 45-degree angle. Use a diffuser, like a white sheet or paper, to soften light. Avoid direct reflections by adjusting your camera's angle slightly.
What Is the Ideal Color Temperature for Toy Photography Lighting?
Imagine your toys bathed in a warm glow, like a sunset captured in a jar. You should aim for a color temperature around 5000K to 6500K, balancing warmth and clarity, making your subjects pop with life.
How to Achieve Consistent Lighting Across Multiple Toy Photos?
To achieve consistent lighting across multiple toy photos, use a stable light source, like LED panels. Position them at the same angle for each shot. Utilize a light meter app to maintain uniform exposure settings throughout your shoot.
Can Smartphone Cameras Capture Professional-Quality Toy Photography With DIY Lighting?
Don't judge a book by its cover. Your smartphone camera can capture professional-quality toy photos with DIY lighting. Focus on good lighting techniques and composition, and you'll find your photos can look like they were shot professionally.
What Are the Best Camera Settings for Indoor Toy Photography With DIY Lights?
You'll want to set your camera to a low ISO to reduce noise, use a wide aperture for depth of field, and adjust shutter speed to balance exposure with your DIY lights. Experiment for best results.
At a Glance
You've got the tools in your hands to light up your toy photography like a pro. With just a bit of creativity and household items, you can transform your shots from ordinary to extraordinary. Remember, necessity is the mother of invention; so don't be afraid to experiment and think outside the box. Whether you're using natural light or crafting your own setups, these hacks will guarantee your photos shine like a diamond in the rough.


