
When creating epic toy storytelling perspectives, you'll discover that manipulating scale can transform a simple scene into something extraordinary. Imagine making a small toy appear monumental or capturing a moment where it looks endearingly vulnerable. This trick alone can shift the entire feel of your story, but it's just the beginning. What if you could further enhance your narrative by using backgrounds and other techniques? You might be surprised at how these elements work together to elevate your storytelling to new heights. Ready to explore more?
Key Takeaways
- Use low-angle shots to make toys appear heroic and larger-than-life.
- Experiment with side angles to create a sense of movement and action.
- Layer background elements to build depth and a three-dimensional feel.
- Utilize natural light during golden hours for soft, authentic lighting.
- Incorporate close-ups to capture detailed expressions and intricate features.
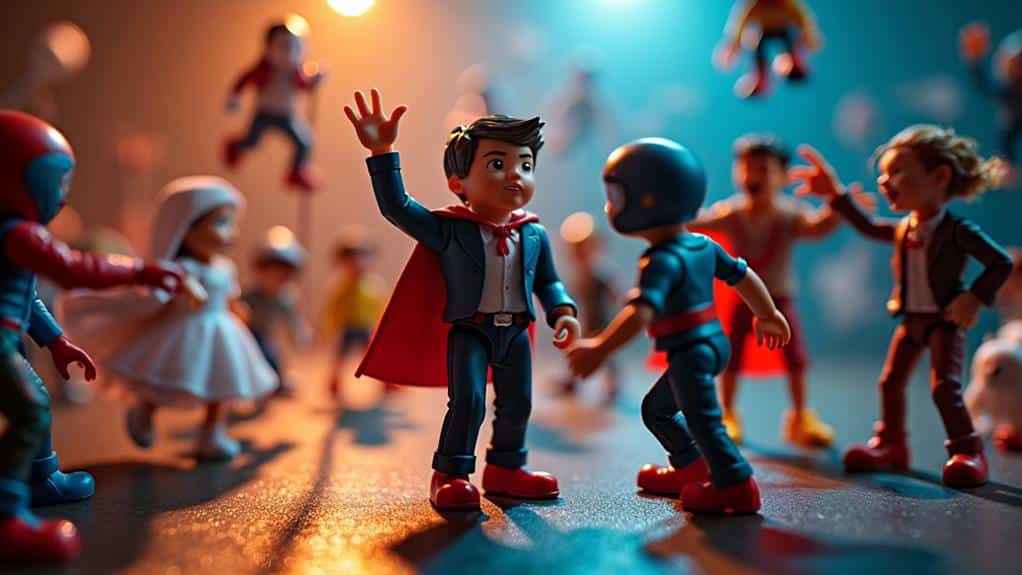
Play With Scale
When it comes to toy storytelling, playing with scale can dramatically enhance the narrative experience. Imagine a tiny action figure standing next to a towering book or a colossal tree. It instantly creates a sense of adventure and wonder. By manipulating scale, you can make your toys appear as if they're setting out on epic quests or exploring uncharted territories. Props can also help create a scene and set a mood, further enriching your storytelling.
You don't need to buy new toys to achieve this effect; everyday objects around your home can serve as perfect backdrops. A kitchen table can transform into a grand stage, while a small plant becomes an impenetrable jungle. By varying the sizes of objects in your photos or scenes, you create a dynamic sense of depth and excitement.
It's vital to experiment with different angles and perspectives. A low-angle shot can make a toy look heroic and larger-than-life, while a high-angle shot can emphasize vulnerability or smallness. These simple tricks can turn an ordinary scene into something extraordinary. So, grab your toys and start playing with scale. You'll be amazed at how a little creativity with size can turn your storytelling into an epic adventure
Use Backgrounds Wisely
Backgrounds are the unsung heroes of toy storytelling, setting the stage for your miniature adventures. They provide context and depth, transforming simple toy scenes into rich narratives. A well-chosen background can make your toy soldiers appear to be in the midst of an epic battle or your dolls enjoying a peaceful day at the park.
When selecting backgrounds, think about the story you want to tell. A vibrant cityscape can make action figures appear to be superheroes in an urban jungle, while a serene forest backdrop can give a sense of adventure to woodland creatures. Don't be afraid to get creative—use printed images, fabric, or even natural settings like a garden. Experimenting with color and pattern can help create unique and memorable photos.
Pay attention to color and texture. A cluttered or overly bright background can distract from the main focus, your toys. Instead, aim for a balance that complements the characters and enhances the scene without overwhelming it
Experiment With Angles
Experiment With Angles
Choosing the right background sets the scene, but the angle you shoot from can make or break your toy storytelling. Don't just settle for an eye-level shot; mix it up! Try low angles to make your toys look larger-than-life, giving them a heroic or imposing feel. High angles can make the viewer feel like they're towering over the scene, which is perfect for portraying vulnerability or a sense of discovery. Experiment with different lighting conditions to enhance the mood of your shots. Also, consider the environment and props that highlight the toy's journey for added context.
Experiment with side angles to create a sense of movement or action. This can be particularly effective in dynamic scenes, like a toy race or a dramatic showdown. Tilt your camera slightly to add tension or drama—this technique, known as the Dutch angle, can make scenes feel off-balance and exciting.
Don't forget to get up close for those intimate shots. Capture the detailed expressions and intricate features of your toys; this adds depth and emotion to your story. Conversely, wide angles can help establish the setting, showing the full scope of your imaginative world
Incorporate Natural Light
Natural light can be your best friend when it comes to toy photography. It adds a level of realism that artificial lighting often can't match. Proper use of lighting techniques can transform a simple toy into an intriguing subject that engages the viewer. To make the most of it, plan your shoots during the golden hours—early morning or late afternoon—when the sunlight is soft and diffused. Harsh midday light can create unwanted shadows and highlights that might distract from your toy's details.
Position your toys near a window or even outside to capture that natural glow. Pay attention to the direction of the light; side lighting can create dramatic shadows and depth, while front lighting will highlight details and colors. Don't be afraid to experiment with backlighting too, which can create a stunning silhouette effect.
Use natural elements like leaves or flowers to filter light, adding texture and dimension to your photos. If the light is too strong, a simple white sheet or curtain can act as a diffuser, softening the light and eliminating harsh shadows. By mastering the use of natural light, you'll bring an authentic and enchanting atmosphere to your toy storytelling, making each scene come alive with vibrancy and emotion.
Add Realistic Props
While natural light sets the stage for enchanting toy photography, adding realistic props can elevate your scenes to a whole new level. Imagine your toy figures not just standing in an empty space, but interacting with miniature furniture, tiny utensils, or even scaled-down vehicles. These props create a believable environment that makes your stories come to life.
Start by considering the setting of your scene. Are your toys in a kitchen, a forest, or a cityscape? Choose props that fit naturally into that environment. For a kitchen scene, tiny pots, pans, and food items can add authenticity. For a forest, use small twigs, leaves, and pebbles to mimic the natural surroundings. Don't overlook the importance of scale. Your props should be proportionate to your toys. Oversized or undersized items can break the illusion and distract from your story. You can often find suitable props in craft stores, dollhouse sections, or even repurpose household items.
Using tools like a Joby GorillaPod can help you achieve unique angles and stability, making your scenes look more dynamic. Finally, pay attention to the details. The more intricate and realistic your props, the more immersive your scene will be. Adding a worn-out book or a slightly chipped mug can add character and realism, making your toy storytelling truly epic.
Create Depth
To create depth in your toy storytelling, use varied camera angles to add visual interest and dimension. Incorporating leading lines can guide the viewer's eye into the image, giving a sense of depth and perspective. Layer background elements to build a richer scene that feels more lifelike. By combining these techniques, you'll make your stories more engaging and immersive
Vary Camera Angles
How can you make your toy photos more engaging and dynamic? The answer lies in varying your camera angles. Changing the angle from which you shoot can transform a static scene into a compelling story. Start by getting down to the toy's level. This perspective makes the viewer feel like they're part of the scene, not just an observer.
Don't hesitate to experiment with high and low angles. A high angle looking down can make your toys appear small and vulnerable, perfect for emphasizing a sense of danger or adventure. Conversely, a low angle looking up can make them appear heroic and larger-than-life. This creates a sense of grandeur and importance.
Try tilting your camera slightly for added drama. Known as a Dutch angle, this technique can inject tension and excitement into your shots. Remember, each angle tells a different story, so mix them up to keep your audience enthralled.
Lastly, use close-ups and wide shots to vary your composition. Close-ups can highlight intricate details and emotions, while wide shots can set the scene and provide context. By varying your camera angles, you'll create more dynamic and riveting toy photography.
Layer Background Elements
Ever wondered how to make your toy photos feel more lifelike? One key trick is to layer background elements to create depth. By doing this, you can transform a flat, uninspiring shot into a dynamic and engaging scene. Start by placing the main toy subject in the foreground. Then, add objects at varying distances behind it. These can be other toys, accessories, or even household items.
When you layer background elements, you trick the eye into seeing a three-dimensional space. Think about how real-life scenes work; there's always something closer and something further away. Mimic this in your toy photography. Use smaller objects to appear further in the background and larger ones for the mid-ground. This technique adds a sense of scale and realism.
Don't forget to play with focus. Keep your main subject sharp while allowing the background layers to blur slightly. This creates a natural depth of field and draws attention to the focal point. Experiment with different objects and distances to find what works best. With practice, you'll master the art of layering background elements, making your toy photos truly epic.
Focus on Details
When you plunge into the art of toy storytelling, focusing on details is what brings the narrative to life. Every little element, from the texture of a toy's clothing to the expression on its face, can add depth and realism to your story. Don't just place toys randomly; think about their poses, the direction they're looking, and even the tiny accessories they might be holding. These small touches can convey emotions, actions, and intentions, making your story far more engaging.
Pay attention to the setting too. A carefully arranged backdrop with miniature props can create a vivid world that draws your audience in. Is there a tiny cup on the table? A book lying open? These details make the scene feel lived-in and real. Lighting also plays a vital role; shadows and highlights can accentuate details and add mood.
Another key aspect is the consistency of details. If a toy has a scratch or a unique mark, make sure it remains visible throughout the story. Such continuity helps maintain immersion and credibility. By honing in on these details, you'll craft a toy storytelling experience that's rich, immersive, and unforgettable.
At a Glance
By using these seven tricks, you'll transform your toy photography from ordinary to epic. Experiment with scale, backgrounds, and angles to create compelling narratives. Natural light and realistic props will add authenticity, while focusing on details and creating depth will draw viewers into your story. Don't be afraid to try new techniques and perspectives. With practice and creativity, you'll craft unforgettable toy storytelling experiences that captivate and inspire. Now, grab your camera and start shooting! Capture the magic of everyday objects and environments, and think outside the box when it comes to incorporating them into your scenes. Whether it’s a city sidewalk or a nearby park, there are countless opportunities to snap magical scenes that transport your audience to another world. With a little imagination and a keen eye for detail, you’ll be amazed at the captivating images you can create.


