
To elevate your toy photography, try these seven artistic angles. Start with low angle shots to give toys a larger-than-life presence. Use overhead perspectives for unique views, emphasizing patterns and colors. Capture dynamic diagonals to inject energy and movement. Embrace silhouette techniques for dramatic contrasts. Experiment with forced perspective to create magical illusions of size. Incorporate reflections for added depth and intrigue. Finally, play with depth of field to focus on your subject against a blurred background. Each angle brings its own flair, offering endless possibilities to enhance your shots, and there's so much more to discover about each technique.
Explore Low Angle Shots
A low angle shot can transform your toy photography by adding drama and a sense of grandeur. When you position your camera below the toy's eye level, it makes the subject appear larger than life, giving it an impressive and commanding presence. This perspective can turn an ordinary toy into a heroic figure, full of personality and strength. You'll notice how the toy's details become more pronounced, and the background elements seem to stretch upwards, enhancing the scene's overall impact.
To effectively use low angle shots, get down to the toy's level or even lower. Experiment with different angles to find the most flattering perspective. Consider the lighting and shadows as well; a well-placed light source can emphasize the toy's features and create dramatic contrasts. Keep the background simple to guarantee the toy remains the focal point. Don't be afraid to experiment with different distances—close-ups can highlight intricate details, while wider shots can place your toy in a larger context.
Remember to maintain a steady hand or use a tripod to prevent blurry images. With practice, you’ll master the art of low angle shots and elevate your toy photography to new heights. Experimenting with different perspectives can truly enhance your compositions. By exploring unique angles for action figures, you can capture dynamic poses that bring your toys to life. Don’t be afraid to get creative with your settings and lighting; these elements can significantly impact the mood and vibrancy of your photos.
Utilize Overhead Perspectives
From above and beyond, overhead perspectives in toy photography offer a unique view that can transform your compositions. When you shoot from directly above, you capture scenes that are often overlooked, adding a fresh and intriguing dimension to your work. This angle can emphasize patterns, shapes, and colors that are not as apparent from traditional eye-level shots. To create engaging overhead shots, here are some tips to take into account:
- Choose the Right Surface: Select a background that complements your toys. Textured surfaces, like grass or sand, can add depth, while plain ones can highlight the toy's details.
- Use Natural Lighting: Overhead perspectives benefit from soft, even lighting. Shoot during the golden hour or in diffused natural light to avoid harsh shadows.
- Mind Your Composition: Arrange your toys thoughtfully. Think about using the rule of thirds or creating symmetry to draw the viewer's eye.
- Experiment with Props: Adding elements like leaves, rocks, or fabric can enhance the scene's narrative and make the composition more engaging.
Capture Dynamic Diagonals
While overhead perspectives offer a fresh take, capturing dynamic diagonals injects energy and movement into your toy photography. By tilting your camera and aligning your subject along a diagonal line, you create an engaging composition that naturally guides the viewer's eye. This technique transforms a static scene into one bursting with life and action.
Start by placing your toy in a way that it forms a diagonal across the image. Use leading lines like a toy train on tracks or an action figure in mid-leap to emphasize the diagonal path. This approach adds depth and dimension, making your subject stand out against the background.
Experiment with different angles. Get low and shoot upward to give your toys a larger-than-life appearance or shoot from above at a slant for a dramatic effect. Pay attention to the background, ensuring it complements and enhances the diagonal flow rather than distracting from it.
Play with lighting to highlight the contours and angles of your toys, adding shadows that follow the diagonal path. This reinforces the sense of movement, drawing viewers into an immersive miniature world. With dynamic diagonals, you'll captivate your audience and elevate your toy photography to new heights.
Embrace Silhouette Techniques
Silhouette photography can add a dramatic flair to your toy photography, creating striking contrasts and mysterious scenes. By capturing the outline of your toy against a bright background, you can evoke emotion and intrigue. To master this technique, focus on positioning your light source behind the toy, allowing it to become a dark shape against the light. Here's how you can embrace silhouette techniques effectively:
- Choose the Right Time of Day: Early mornings or late afternoons, when the sun is low, provide natural backlighting. This helps in creating bold silhouettes with minimal effort.
- Use a Simple Background: A clear sky or a plain wall works best. The simpler the background, the more your silhouette will stand out, making the subject the focal point of your shot.
- Adjust Exposure Settings: Lower your exposure settings to darken your toy. This enhances the silhouette effect and guarantees the background remains bright and vivid.
- Focus on Shape and Form: Since details are lost in silhouettes, concentrate on the toy's shape. Unique or recognizable profiles work particularly well.
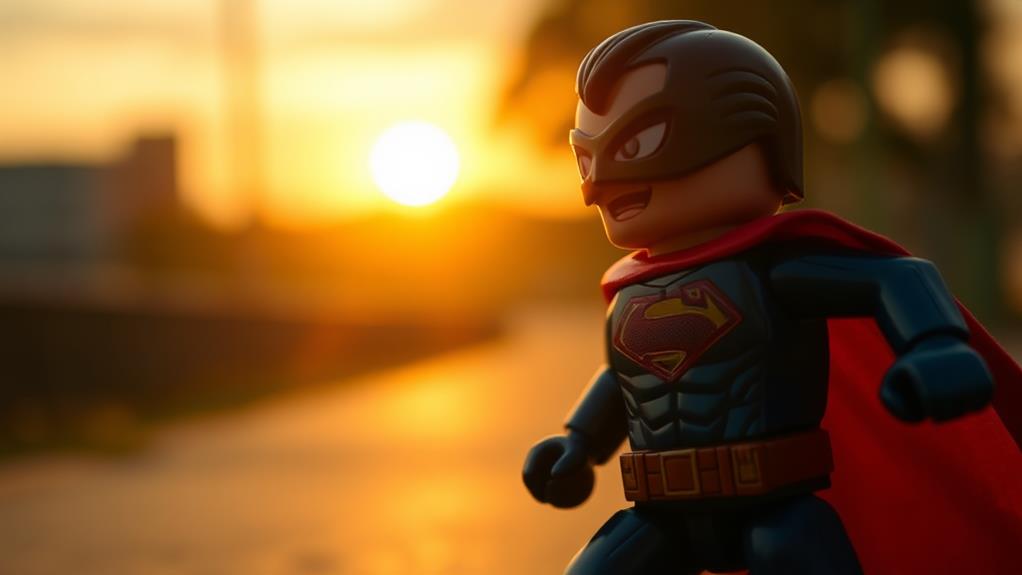
Experiment With Forced Perspective
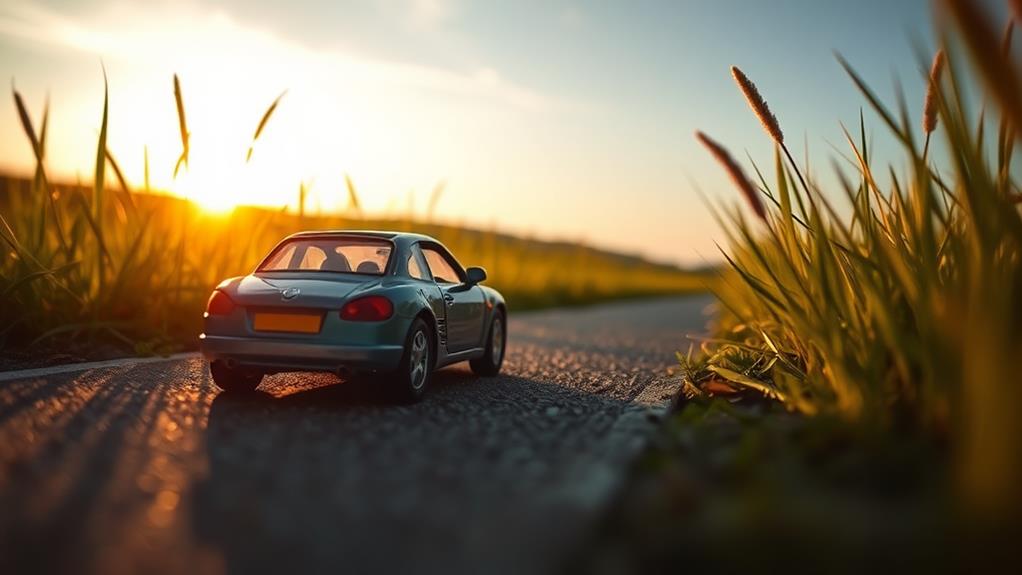
Capturing powerful silhouettes can set the stage for another enchanting technique in toy photography — experimenting with forced perspective. This method plays with depth perception, creating magical illusions that make your toys appear larger or smaller than they actually are. Start by selecting a scene where you can place your toy closer to the camera while positioning other elements, like buildings or trees, further away. This tricks the viewer's eye, altering the perceived scale of the objects.
To achieve a successful forced perspective shot, consider using a wide-angle lens. It helps to exaggerate the differences in size between foreground and background objects. You'll also want to think about the angle from which you shoot. Low angles can make your toy look like a giant towering over its surroundings, while high angles can shrink it down to a tiny figure in a vast world.
Pay attention to lighting, ensuring it's consistent across your scene to maintain the illusion. Natural light often works best, but you can use artificial sources if needed. Keep experimenting with various setups and angles to discover new perspectives that bring your toy photography to life in unexpected ways.
Incorporate Reflections
Reflections can add a stunning dimension to your toy photography, transforming simple scenes into mesmerizing works of art. They offer a unique way to play with light and symmetry, enhancing your photos with depth and intrigue. To effectively incorporate reflections, consider using surfaces like mirrors, water, or even glossy tabletops. Here's how you can get started:
- Use a Mirror: Place a small mirror under your toy to create a clear, symmetrical reflection. Adjust the angle to capture the most mesmerizing view, ensuring the mirrored image complements the subject.
- Find Water: Look for puddles or small bodies of water. These natural mirrors add an organic touch to your scene. Experiment with ripples or movement in the water for a dynamic effect.
- Utilize Glass: A glass surface, like a smartphone screen, can provide a sleek, polished reflection. This is perfect for indoor setups where you want controlled lighting and background.
- Explore Lighting: Position your light source strategically to highlight the reflection. Soft lighting can create a dreamy effect, while direct light sharpens the reflection's details.
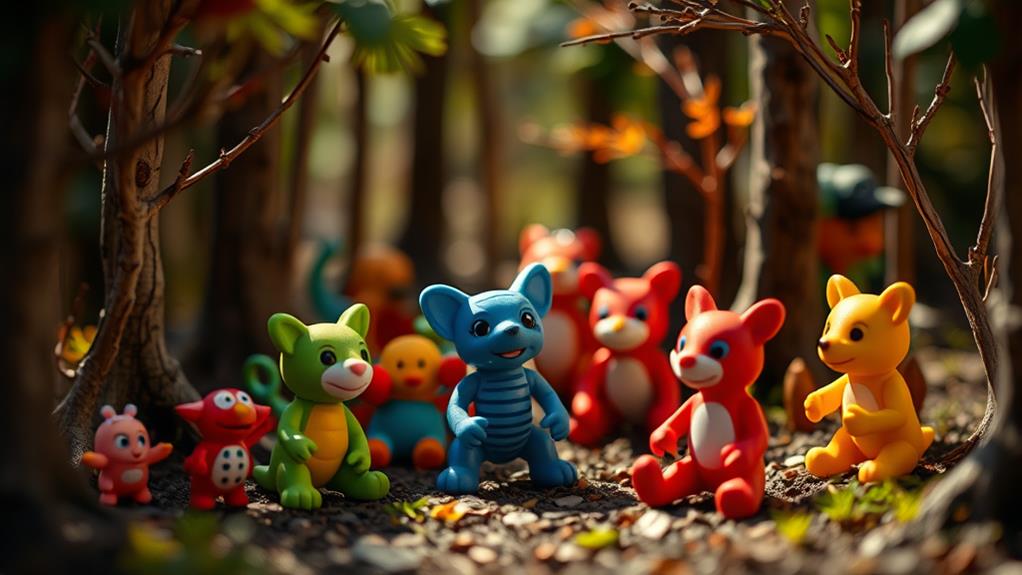
Play With Depth of Field

One of the most effective techniques to elevate your toy photography is playing with depth of field. This technique allows you to control which parts of your image are in sharp focus and which are beautifully blurred. By adjusting your camera's aperture settings, you can create stunning images that draw attention to your subject and add a sense of dimension.
Start by using a wide aperture (a low f-stop number) to achieve a shallow depth of field. This will make your toy pop against a soft, dreamy background, helping it stand out and capture the viewer's attention. Experiment with different f-stops to see how the background changes and how it affects the overall mood of your photo.
Conversely, a narrow aperture (a high f-stop number) will keep more of the scene in focus, which can be useful if you want to showcase the environment around your toy. This works great for group shots or when the setting is as important as the subject itself.
Don't forget to physically move your camera closer or farther from the toy to fine-tune the depth of field effect. With practice, you'll master this technique to create enchanting toy photography.
Frequently Asked Questions
How Can Lighting Affect the Mood of Toy Photography?
Lighting dramatically influences toy photography's mood. You can create warmth with soft, diffused light or tension with harsh, direct light. Shadows add mystery, while bright, even lighting evokes cheerfulness. Experiment with angles to find unique effects.
What Camera Settings Are Best for Capturing Vivid Toy Colors?
You should use a low ISO to reduce noise, a small aperture for depth of field, and adjust the white balance to match your lighting. Don't forget to shoot in RAW for better post-processing flexibility.
How Can I Convey Emotion in Toy Photography?
Did you know 60% of impactful photos convey strong emotions? To capture emotions in toy photography, focus on facial expressions, dramatic lighting, and compelling backgrounds. Highlight relatable scenarios to connect with viewers, making them feel the story.
What Props Enhance the Storytelling Aspect of Toy Photography?
You can enhance storytelling with props like miniature furniture, natural elements, or small-scale accessories. Choose items that complement your narrative, adding depth and context. Don't be afraid to experiment with lighting and shadow to create mood.
How Do I Choose a Compelling Background for My Toy Photos?
Choose a background that complements your toy's theme and color palette. Consider textures, patterns, or natural settings. Avoid clutter, and make certain the background doesn't overpower your subject. Experiment with depth to create focus and enhance storytelling.
At a Glance
You've revealed the secret arsenal of toy photography angles, transforming mere playthings into epic masterpieces. With these tips, you'll elevate your shots from ordinary to extraordinary, capturing the world in ways that defy gravity and logic. Your camera becomes a magic wand, conjuring illusions and breathtaking perspectives. Dive headfirst into this creative vortex, and watch as your toy photography transcends reality, leaving audiences spellbound and clamoring for more. Your artistic journey is nothing short of legendary.


