

Craft stunning toy photography backdrops on a budget using everyday and recyclable materials. Cardboard boxes can transform into customizable 3D landscapes. Use home fabrics like scarves for texture and flowing dynamics. Patterned papers provide easy design options, while tearing and layering craft paper adds depth and a unique look. Incorporate nature elements like leaves and rocks for a realistic touch. Recycle old magazines and aluminum foil to create various effects, or paint foam boards for a professional feel. Poster boards offer vibrant or calming colors to enhance your scenes. For more inspiration and ideas, explore your options creatively.
Cardboard Creations
Cardboard creations are a versatile and budget-friendly option for toy photography backdrops. You can find cardboard easily, whether it's from an old delivery box or a crafting store. Start by cutting and shaping it to fit your creative vision. Paint it any color or use markers to draw intricate designs, giving you control over the backdrop's mood and style. With some glue and imagination, you can create 3D elements like hills, buildings, or trees to add depth and interest to your shots.
Don't hesitate to experiment with texture. You can crumple the cardboard for a rugged look or layer pieces for a more dynamic effect. Use tape or clips to secure pieces together, ensuring stability during your photo shoot. You'll quickly see how cardboard's flexibility allows you to shift scenes effortlessly, from serene landscapes to bustling cityscapes.
Lighting plays an essential role in highlighting your cardboard backdrop. Adjust your light source to emphasize shadows and textures, bringing your toy photography to life. Remember, the key is creativity. With just cardboard and a bit of artistic flair, you can transform simple materials into enthralling scenes that enhance your toy photography portfolio.
Fabric Finds
While cardboard offers a structured foundation, fabric brings a soft, flowing element to your toy photography backdrops. It's versatile and can easily be draped, folded, or layered to create dynamic scenes. You don't need to spend a fortune either—look around your home for unused scarves, bedsheets, or even old T-shirts that might work as imaginative backdrops. Thrift stores are also treasure troves for unique fabrics at a fraction of the cost.
When selecting fabric, consider the texture and color. A silky fabric can provide an elegant, seamless background, while a textured piece like burlap adds a rustic touch. The key is to match the fabric's vibe with the story you're telling through your toys. Experiment with layering different types of fabric to add depth and interest.
Also, pay attention to lighting. Fabrics can reflect or absorb light in interesting ways, enhancing your photos. Try backlighting for a glowing effect or side lighting to highlight textures. Don't forget to secure your fabric backdrop with clips or tape to prevent unwanted movement during your shoot. With a little creativity, fabric backdrops can transform your toy photography into enchanting scenes.
Paper Patterns
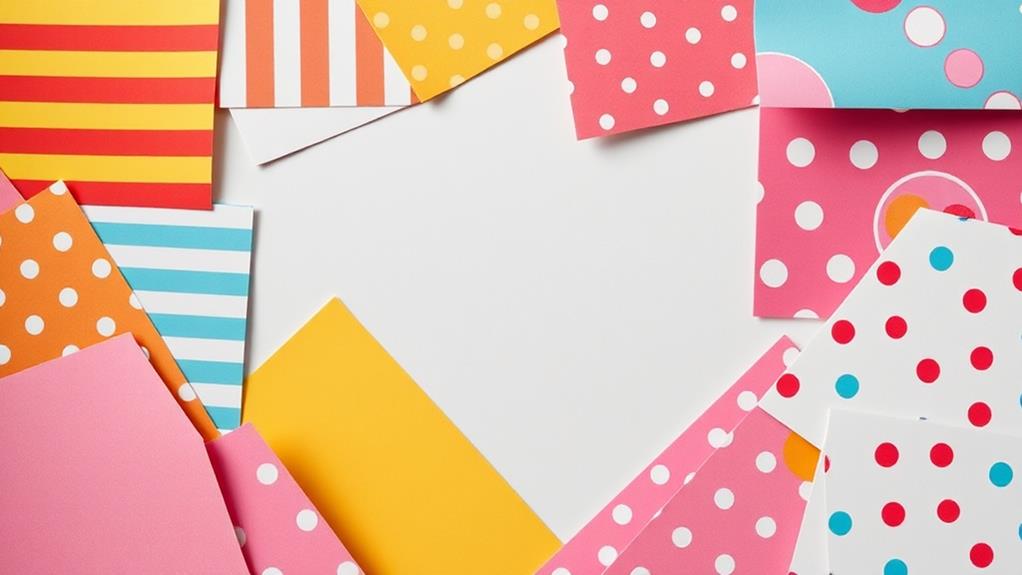
Often overlooked, paper patterns can be a game-changer in your toy photography setup. They're versatile, budget-friendly, and come in an endless array of designs. From bold geometrics to subtle textures, paper patterns can add depth and interest to your shots without breaking the bank. You can find them at craft stores, office supply shops, or even repurpose wrapping paper you already have at home.
To start, choose a pattern that complements your toy. For a dynamic look, pair a brightly colored toy with a contrasting background. If your toy has intricate details, opt for a simple pattern to keep the focus on the subject. Remember, the goal is to enhance, not overwhelm.
Once you've picked your pattern, secure the paper to a flat surface using tape or clips. Make certain it's wrinkle-free, as creases can be distracting in photos. Experiment with different lighting angles to see how shadows interact with the patterns. You might discover unexpected textures or highlights that enhance your image.
Nature Elements
Incorporating nature elements into your toy photography can elevate your images with a touch of realism and organic beauty. Using elements like leaves, rocks, and sand not only makes your photos more lifelike but also provides endless creative possibilities. You can find these elements in your backyard or local park, making this a budget-friendly option.
Consider using a small patch of moss as a forest floor, a few stones to mimic mountains, or a bowl of water to create a miniature pond. These elements add depth and texture, transforming ordinary toy scenes into enthralling stories. Experiment with different combinations and lighting to achieve the desired mood in your photos.
Here's a quick inspiration table to spark your creativity:
| Element | Emotion Evoked | Suggested Use |
|---|---|---|
| Leaves | Calmness | Forest or jungle scene |
| Pebbles | Strength | Mountainous landscape |
| Water | Serenity | Pond or river setting |
| Sand | Warmth | Desert or beach scene |
Recycled Materials

Nature elements certainly add a touch of realism to your toy photography, but there's another creative and budget-friendly approach to explore: using recycled materials. You can transform everyday items like cardboard boxes, newspaper, and aluminum foil into stunning backdrops. Not only does this save money, but it also helps the environment by reducing waste. Start by collecting materials from your home. Old magazines, fabric scraps, and plastic bottles can be repurposed to create textures and colors that add depth to your scenes.
Consider using cardboard as a base. It's sturdy and easy to paint or cover with other materials. You can cut it into different shapes or layer it to create a 3D effect. Newspapers or magazine pages work well for adding texture or background stories. Crumple or fold them to create interesting patterns.
Aluminum foil is perfect for creating metallic surfaces or reflective effects. You can crumple it for a rough texture or smooth it out for a sleek look. Experiment by combining these materials to bring your toy scenes to life. With a bit of creativity, recycled materials can offer endless possibilities for unique and eye-catching backdrops.
Foam Board Designs
Foam board backdrops offer a versatile and professional-looking option for toy photography enthusiasts. They're lightweight, easy to handle, and can be cut to fit any size requirement—perfect for creating dynamic scenes. You can easily paint or add textures to foam boards, giving you complete creative control over your backdrop designs. The boards are available at most craft stores and are quite affordable, making them an excellent choice for budget-conscious photographers like yourself.
To get started with foam board designs, consider the following approaches:
- Custom Painting: Use acrylic paints to create skies, landscapes, or abstract designs. It's an opportunity to let your artistic skills shine.
- Textured Finishes: Add sandpaper, fabric, or other materials for a tactile effect that brings depth to your shots.
- 3D Elements: Cut and layer pieces to build dimensional scenery, like mountains or buildings, enhancing the realism of your setup.
- Modular Designs: Design separate pieces that can be rearranged for different scenes, maximizing your creative output with minimal effort.
- Lighting Effects: Experiment with how light interacts with your foam board, casting shadows or highlighting textures to boost visual interest.
These techniques can elevate your toy photography without breaking the bank.
Poster Board Backgrounds

Simplicity meets creativity with poster board backgrounds in toy photography. When you're looking for an affordable and versatile option, poster boards are your best friend. They're available in a wide range of colors and textures, allowing you to create various moods and settings without breaking the bank. You can find them in craft stores, often priced at just a dollar or two per sheet, making them a budget-friendly choice for any toy photographer.
To use a poster board as a backdrop, simply prop it up behind your subject. You can tape it to a wall or use a simple stand to keep it upright. Experiment with different colors to see how they complement your toys. A bright red board could add drama, while a pastel blue might evoke a sense of calm. Don't hesitate to layer multiple boards for a more dynamic scene.
Additionally, you can enhance your backdrop by adding simple elements like stickers or cutouts to match your toy's theme. This allows you to customize your scene without needing professional equipment. With poster boards, the possibilities are nearly endless, letting your toys shine in their own vibrant worlds.
Craft Paper Techniques
Craft paper offers endless possibilities for creating unique backdrops in toy photography. It's affordable and versatile, making it an ideal choice for adding texture, color, and dimension to your shots. Start by selecting a variety of colors and patterns to match your theme. For instance, you can crumple the paper to create a rough texture or use scissors to cut intricate patterns, adding depth to your scene.
Experimenting with craft paper can dramatically change the mood of your photos. Here are some techniques to get you started:
- Tearing: Tear the edges for a rugged, natural look, ideal for scenes depicting nature or chaos.
- Layering: Overlap different colors and textures to create a sense of depth and complexity.
- Staining: Use tea or coffee to stain the paper, giving it an aged, vintage appearance.
- Folding: Fold the paper into shapes or ridges to introduce shadows and highlights.
- Stamping: Apply stamps with different designs to add unique patterns and details.
Frequently Asked Questions
How Can I Create a Realistic Depth of Field Effect With Budget Backdrops?
To create a realistic depth of field, place your toy slightly away from the backdrop. Use a wide aperture on your camera, creating blur. Incorporate layers with objects like paper cutouts to enhance the effect affordably. By incorporating different textures and colors in your background, you can further enrich the composition and make the toy stand out. Experimenting with various lighting sources, such as natural sunlight or soft artificial lights, will help create interesting shadows and highlights, enhancing the three-dimensionality of your scene. These realistic toy scene techniques will elevate your photography and make your subjects come alive with detail and personality.
What Lighting Techniques Enhance Toy Photography With Simple Backdrops?
Ah, the thrilling world of toy photography! Use diffused natural light or a cheap LED ring light for balanced illumination. Adjust angles and shadows to highlight toy details, creating a masterpiece worthy of a gallery… or your Instagram feed. Experimenting with various backgrounds can elevate your shots, whether it’s a simple textured fabric or a vibrant outdoor setting. Don’t forget to incorporate smartphone photography techniques for figurines, like utilizing the grid feature for better composition and focusing on key elements to draw the viewer’s eye. Enhancing your images with subtle post-processing can also bring out colors and details, making your toy photography truly stand out.
Are There Any Digital Tools or Apps to Complement Physical Backdrops?
You can use digital tools like Photoshop or apps like Lightroom to enhance your toy photography. They let you adjust colors, add effects, and blend digital elements seamlessly, complementing your physical backdrops beautifully. Try experimenting with them!
How Can I Ensure My Backdrop Colors Don't Overshadow the Toy Subject?
Think of your toy as the star and the backdrop as the stage. Choose neutral or complementary colors that enhance without overpowering. Adjust lighting to balance the scene, ensuring your subject shines brightly in the spotlight.
What Are Some Tips for Storing and Organizing Multiple Backdrop Materials?
Store your backdrops rolled up to prevent creases and use labeled containers for easy access. Organize them by material or color. You can save space by using a hanging rack or dedicated shelf for larger backdrops.
At a Glance
You've got a treasure trove of budget-friendly backdrop ideas at your fingertips, perfect for transforming your toy photography into something extraordinary. Whether you're crafting cardboard castles or finding funky fabric, let your creativity run wild. Don't forget to explore nature's bounty or upcycle old materials—it's like finding a hidden mixtape from the '80s in your attic. With these tips, you're all set to create enchanting scenes that make your toys the stars of their own adventures.


