
Enhance your toy photo edits by mastering lighting and shadows to add depth, and utilizing depth of field to mimic life-sized photography. Incorporate motion blur for a dynamic feel and utilize advanced layer blending modes to boost image contrast. Craft cinematic backgrounds using atmospheric effects like smoke and fog, and refine details with precision editing techniques such as dodging and burning. Leveraging AI tools also allows you to enhance image quality effortlessly. Discover more about these methods next.
Mastering Lighting and Shadows

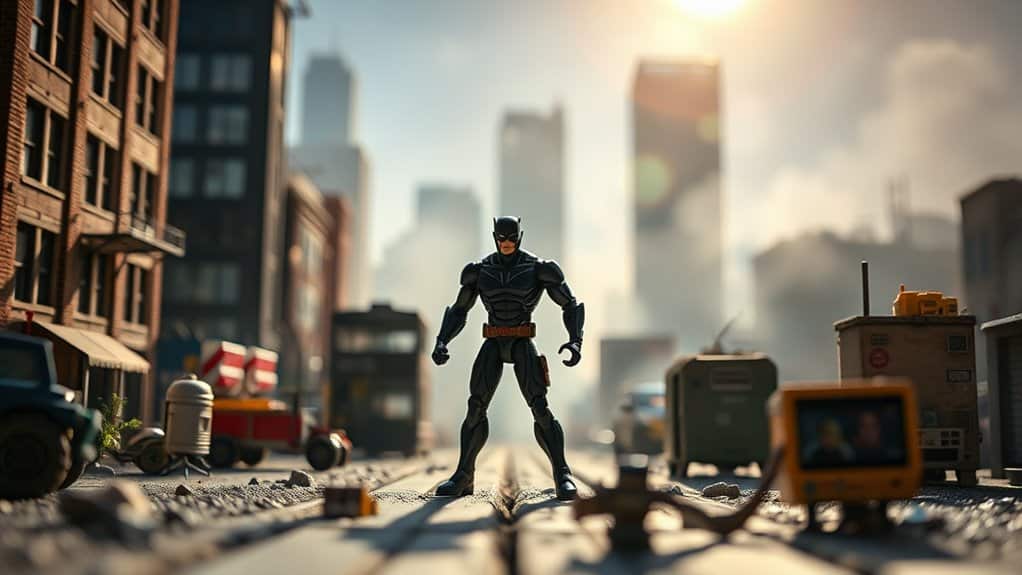
Lighting and shadows can transform a simple toy photo into an enchanting image. As you play with light, consider the time of day and the direction from which it shines. Soft, natural light during the golden hour can add warmth and create gentle shadows, enhancing your toy's features. Position your light source to emphasize the details you want to highlight, making sure shadows fall naturally.
Experiment with artificial light too. Use lamps or LED lights to direct focus and create dramatic effects. Shadows should enhance the scene, not overpower it, so adjust their intensity by moving the light source closer or further away. By mastering these elements, you'll bring depth and life to your toy photography, crafting images that captivate and intrigue.
Utilizing Depth of Field for Realism
To create a realistic toy photo, start by blurring background elements, which helps draw attention to the key details of your subject. Focus on the toy's most important features to make them stand out and capture viewers' interest. By simulating realistic perspectives, you'll give your photo a sense of depth that mimics real-life scenes.
Blurring Background Elements
When capturing the perfect toy photo, blurring background elements can greatly enhance the image's realism by mimicking the natural depth of field seen in life-sized photography. To achieve this, you can use a wide aperture setting on your camera or apply a blur effect in post-processing. This technique helps to draw attention to your toy subject while creating a sense of scale and dimension.
Focusing on Key Details
Capturing the intricate details of your toy subject is essential for creating compelling images that resonate with viewers. To achieve this, focus on utilizing depth of field effectively. By manipulating your camera's aperture settings, you can highlight specific features of your toy while gently blurring the rest. This technique draws attention to the most interesting parts and adds a layer of realism to your photos.
When setting up your shot, consider the distance between your toy and the background. Positioning the toy further from the background will enhance the depth effect. Also, experiment with macro lenses for close-up shots that emphasize tiny details, like facial expressions or textures. Remember, the goal is to make your viewers feel as if they're peering into a miniature world.
Simulating Realistic Perspectives
Having mastered the art of focusing on key details, let's explore how to simulate realistic perspectives using depth of field. By manipulating the depth of field in your toy photos, you can create a sense of scale and realism. Start by adjusting your camera's aperture settings. A wider aperture (lower f-stop) will blur the background, drawing attention to your subject. This technique mimics how our eyes perceive depth, making your photo feel more lifelike.
Position your toy strategically within the frame. Place it in the foreground with a blurred background to imply distance. Experiment with angles; shooting from a lower angle can enhance the illusion of size. Remember, the key is subtlety—too much blur can distract rather than enhance. Practice and refine your approach for the best results.
Incorporating Motion Blur for Dynamic Shots
When you're aiming to make your toy photos more dynamic, incorporating motion blur can greatly enhance action scenes. You'll simulate speed and movement, bringing an energetic feel to still images. By creating depth and focus, you guarantee your toy subjects leap off the screen, engaging viewers.
Enhancing Action Scenes
Although it might seem challenging at first, incorporating motion blur into toy photography can elevate your action scenes to a whole new level. It adds a sense of speed and excitement, making your shots more engaging and lifelike. To achieve this, start by selecting the right tool, like Adobe Photoshop or a mobile app with motion blur capabilities. Use these tools to blur the background or parts of a toy to simulate movement.
- Experiment with angles: Capture your toys from various perspectives to find the most dynamic shot.
- Adjust the intensity: Too much blur can obscure details, so find a balance that maintains clarity.
- Practice regularly: Familiarity with motion blur techniques improves precision and creativity over time.
With practice, your action scenes will burst with energy!
Simulating Speed and Movement
Motion blur techniques aren't just about enhancing scenes; they also play a pivotal role in simulating speed and movement for dynamic toy photography. When you want to capture the thrill of a race or the intensity of an action scene, motion blur can make your subjects come alive. Start by slightly dragging your camera during the shot or use digital tools to add blur effects afterward. This technique tricks the viewer's eye into perceiving rapid motion, transforming static toys into high-speed heroes. Don't overdo it—subtlety is key. Aim for just enough blur to convey movement without losing detail. By carefully applying motion blur, you'll elevate your toy photos, giving them a sense of urgency and excitement that captivates viewers.
Creating Depth and Focus
Depth and focus are essential elements in crafting engaging toy photos, and incorporating motion blur can add that extra layer of dynamism. When you want to convey movement, motion blur can transform a static scene into something vibrant and alive. Play around with these techniques to enhance your shots:
- Adjust the Shutter Speed: Use a slower shutter speed to create natural motion blur. It gives the illusion of speed and activity.
- Focus on a Single Subject: Blurring the background while keeping your toy sharp can draw the viewer's attention where you want it.
- Experiment with Panning: Move your camera along with the toy's motion. This keeps the toy in focus while blurring the background.
Enhancing Colors With Gradient Maps
When you're looking to make your toy photos pop, using gradient maps is a powerful technique to enhance colors and create mood. Gradient maps allow you to map a range of colors to the brightness values in your image. This means you can transform dull, flat colors into vibrant, eye-catching hues that make your toys stand out. Start by selecting a gradient that complements your scene. You'll notice that even subtle changes can dramatically alter the image's tone.
Experiment with different gradients to find the perfect fit. You can adjust the opacity and layer blend modes to fine-tune the effect. This technique is especially useful for adding warmth or coolness, depending on your toy scene's theme. Mastering gradient maps gives your photos a professional touch.
Creating Atmospheric Effects With Smoke and Fog
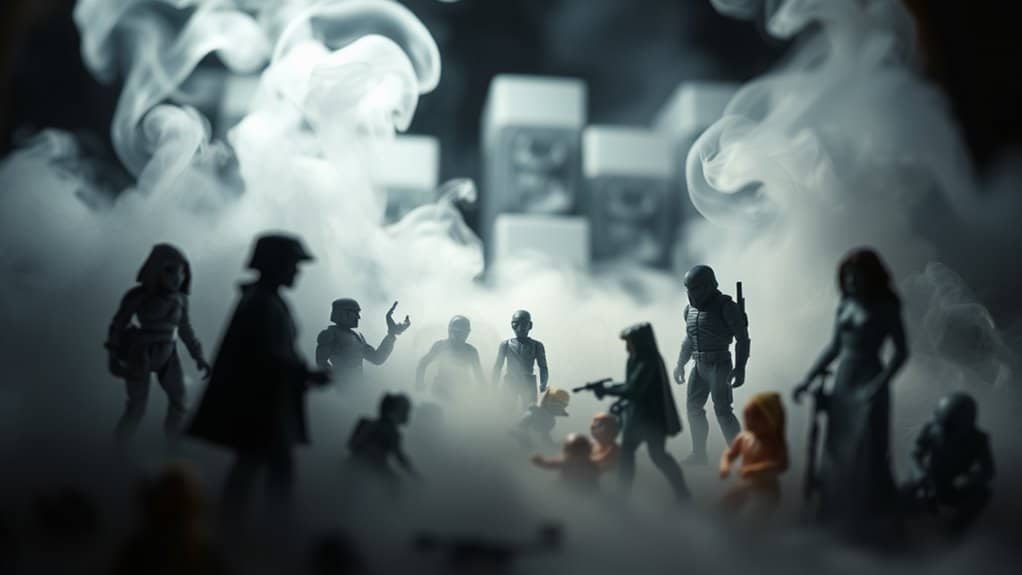
Enhancing your toy photos doesn't stop with color adjustments; adding atmospheric effects like smoke and fog can elevate your scene to a new level of realism. When you introduce these elements, your photos gain depth and mood, making viewers feel like they're peering into a miniature world. You can achieve these effects in a few ways:
- Use a vape pen or fog machine: These tools generate real smoke, allowing you to manipulate the thickness and flow for dramatic effect.
- Try dry ice: It creates a dense, low-lying fog that clings to surfaces, perfect for mysterious or eerie scenes.
- Photoshop magic: Use digital brushes or overlays to add smoke and fog, offering precise control over placement and opacity.
Experiment with these methods to see what works best for your style!
Adding Realistic Textures to Surfaces
To make your toy photos truly pop, adding realistic textures to surfaces can create an engaging and lifelike scene. You'll want to pay attention to details like wood grain, metal sheen, or fabric weave. Start by identifying the materials you're simulating. For instance, if your toy is set on a wooden floor, find high-quality wood textures online. Overlay these textures onto your image using photo editing software, adjusting the scale and angle to match the scene's perspective.
Don't forget to tweak lighting and shadows to enhance realism. Use soft brush tools to blend edges seamlessly. You can also apply subtle noise to mimic natural imperfections. These steps guarantee your toys appear as though they're part of a real-world environment, enchanting viewers' imaginations.
Employing Advanced Layer Blending Modes
Mastering advanced layer blending modes can greatly elevate your toy photo edits by creating depth and dimension. When you experiment with these modes, you'll reveal a world of possibilities to make your toy images pop. Layer blending modes allow you to seamlessly combine different elements, adding realism and creativity to your edits.
- Multiply: Darkens the base layer, adding shadow and intensity to your scene, perfect for creating moody atmospheres.
- Screen: Lightens the image, enhancing brightness and giving your toys a vibrant, ethereal glow.
- Overlay: Combines Multiply and Screen, boosting contrast and color to add drama and emphasis.
Dive into these blending modes, and watch your toy photos transform from ordinary to extraordinary. You'll amaze yourself with the magic you can create.
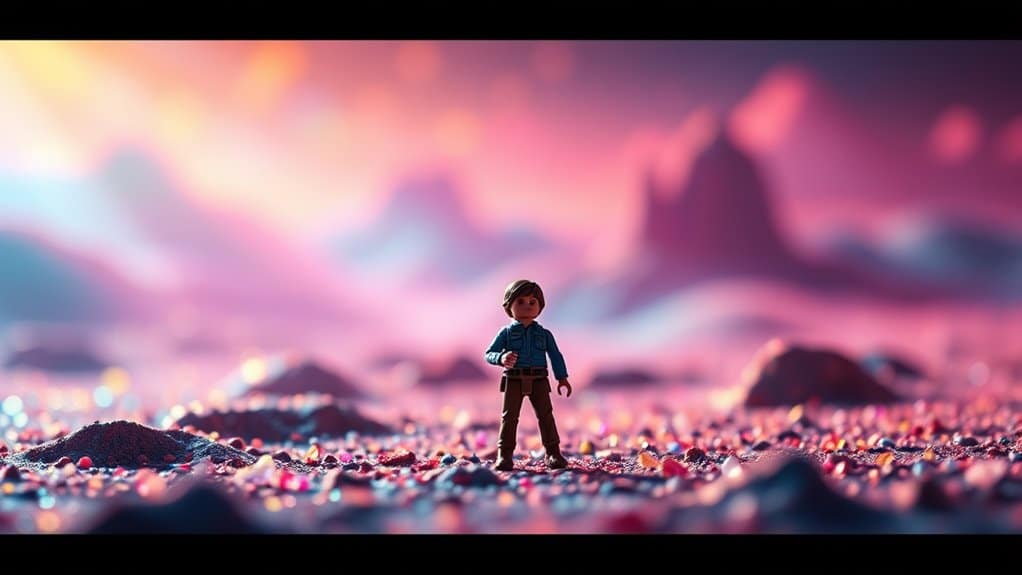
Crafting Cinematic Backgrounds
To craft cinematic backgrounds for your toy photos, focus on depth and perspective to make scenes feel more immersive. Use lighting and shadow dynamics to create mood and highlight your subject. By combining these techniques, you'll transform simple settings into enchanting backdrops.
Depth and Perspective Play
When crafting cinematic backgrounds in toy photography, depth and perspective play essential roles in transforming simple scenes into enchanting stories. You can elevate your images by experimenting with different angles and distances. By effectively using depth, you create a sense of realism that draws viewers into the miniature world.
Consider these techniques:
- Foreground Elements: Place objects in the foreground to add layers and depth, making the scene feel more dynamic.
- Leading Lines: Use lines, like paths or fences, to guide the viewer's eye through the scene and create a sense of journey.
- Forced Perspective: Play with object sizes and distances to suggest scale, making toys appear larger or smaller within their environment.
Lighting and Shadow Dynamics
Although often overlooked, lighting and shadow dynamics play an essential role in crafting cinematic backgrounds for toy photography. By manipulating light direction and intensity, you can create mood and focus on specific elements of your scene. Natural light offers a soft, realistic touch, while artificial light allows for more control and dramatic effects.
To enhance shadows, position your light source at an angle. This technique adds depth and dimension, making your toys pop against the background. Experiment with diffusers and reflectors to soften harsh lights and reduce unwanted shadows.
Refining Details With Dodging and Burning
Dodging and burning are powerful techniques that can elevate your toy photography by enhancing depth and detail. In simple terms, dodging brightens specific areas, while burning darkens them. This contrast adjustment can make your toy photos pop, bringing out intricate textures and defining shapes. To master these techniques, focus on:
- Highlighting Key Features: Use dodging to bring attention to focal points like eyes or logos.
- Creating Depth: Apply burning to shadows for a more three-dimensional look.
- Balancing Light: Even out lighting inconsistencies by adjusting highlights and shadows.
Experiment with different brush sizes and opacities to achieve natural-looking edits. Remember, subtlety is key. By refining details, you'll transform your toy photos from flat and lifeless to dynamic and engaging.
Leveraging AI Tools for Precision Edits
While traditional editing techniques have their place, leveraging AI tools can take your toy photo edits to a whole new level of precision. AI-powered software can help you automatically enhance image quality, correct colors, and even remove unwanted elements with ease. Tools like Adobe's Neural Filters or Luminar Neo offer AI-driven adjustments that save time and provide stunning results.
Imagine fine-tuning details without tedious manual work; AI detects and fixes imperfections swiftly. You can also use AI to simulate lighting effects or create depth, adding a professional touch. These tools analyze your images and suggest improvements, making your edits more efficient and effective. By incorporating AI, you're not just streamlining your workflow; you're revealing new creative possibilities in toy photography.
Frequently Asked Questions
How Can I Make My Toy Photos Appear More Lifelike and Engaging?
To make your toy photos more lifelike, focus on lighting and composition. Use natural light or soft diffused lighting to enhance details. Experiment with angles and perspectives. Add props and backgrounds to create immersive scenes that captivate viewers.
What Are Some Common Mistakes to Avoid in Toy Photo Editing?
You're ready to enhance your toy photos, but beware! Over-saturation can ruin the mood, and harsh shadows destroy realism. Don't forget, excessive sharpening turns charm into chaos. Balance and subtlety keep your edits engaging and lifelike.
How Do I Choose the Right Editing Software for Toy Photography?
You should consider your skill level and budget when choosing editing software for toy photography. Look for features like layer support, color correction, and ease of use. Adobe Photoshop or Lightroom are excellent choices for detailed work. Additionally, exploring tutorials on the top Photoshop techniques for toys can greatly enhance your editing capabilities. These techniques can help you achieve stunning effects and bring your toy photography to life. Remember to practice regularly to refine your skills and discover new creative possibilities.
What Are the Best Practices for Organizing My Edited Toy Photos?
You should create folders by theme or series, label them clearly, and use metadata for easy searching. Regularly back up your files and maintain a consistent naming convention to streamline your toy photo organization.
How Can I Effectively Use Props to Enhance Toy Photo Scenes?
Think of props as the seasoning in your toy photography recipe. Use them to add depth and context. Arrange them thoughtfully to create a vibrant scene that tells a story and brings your toys to life.
At a Glance
By mastering these advanced techniques, you'll elevate your toy photography to a professional level. Did you know that images with enhanced lighting and shadows are 60% more likely to engage viewers? Utilize depth of field and motion blur to breathe life into your shots, while gradient maps and atmospheric effects enrich your colors. With advanced blending modes, cinematic backgrounds, and precision AI tools, your photos will captivate and inspire. Embrace these tips, and watch your creativity soar!


