

To create realistic toy scene backgrounds, start by paying attention to scale and depth. Position toys and props strategically, using techniques like forced perspective for authenticity. Control the depth of field with your camera to highlight toy subjects while blending the background. Experiment with natural and artificial lighting to craft dynamic scenes, and use layers and detailed props that match your theme. Vary your camera angles to add drama or highlight intricate details. Finally, enhance your photos using editing tools to adjust lighting and apply subtle effects. Discover how these techniques can transform your toy scenes into lifelike art.
Understanding Scale in Photography
Capturing the essence of scale in photography can transform a simple toy scene into a breathtakingly realistic landscape. To achieve this, you need to pay close attention to the proportions between your toys and their surroundings. Start by considering the size of the toys in relation to elements you might include in the scene. For instance, if you're using a toy car, make sure the road and trees mimic real-life proportions to maintain believability.
Positioning is essential. Place the toys strategically to create a sense of distance or perspective. You can achieve this by placing smaller elements in the background and larger ones in the foreground. This technique tricks the eye into perceiving depth and scale, making the scene appear larger than it is.
Lighting plays a pivotal role, too. Use natural light or soft artificial lighting to cast shadows that are consistent with the size and position of your toys. Shadows should mimic those found in large-scale environments, enhancing realism. Experiment with different angles and intensities to find what works best.
Mastering Depth of Field
While understanding scale sets the foundation for a realistic toy scene, mastering depth of field adds that extra layer of authenticity. By controlling what's in focus, you can guide the viewer's eye and create a sense of three-dimensional space. Start by using a wide aperture (small f-number) to blur the background, which helps emphasize your toy subject and mimic how a real-world scene would appear. This technique makes the toys pop, giving them a lifelike presence.
To achieve this, get close to your subject and focus on its most detailed part, like the eyes of a toy figure. Experiment with different angles to see how the background changes and affects the overall composition. A shallow depth of field is perfect for isolating your subject, but if the scene requires more detail, try adjusting to a smaller aperture (larger f-number) for increased depth.
Don't forget to use your camera or smartphone's focus capabilities. Tap to focus on your subject and adjust the exposure as needed. Practice is key, so take multiple shots with varying depth of field settings. This will help you find the perfect balance between subject focus and background blur.
Utilizing Natural Light
One of the most powerful tools in your photography arsenal is natural light. It provides a dynamic range that artificial light often struggles to replicate, adding depth and authenticity to your toy scenes. When you utilize natural light, you create soft shadows and highlights that enhance the details of your miniature setup, making it feel more genuine. Position your scene near a window or shoot outdoors during the golden hour for the best results. The soft, diffused light during these times reduces harsh shadows and creates a warm tone, ideal for capturing realistic backgrounds.
Pay attention to the direction and intensity of the light. Move your toys around to find the perfect angle where the light enhances their features and the surrounding environment. This might mean rotating them or adjusting your camera's position. Experiment with different times of the day to see how the changing light affects your scene. If you find the light too strong, use sheer curtains or reflectors to diffuse it further. Reflectors can also redirect light into shadowy areas, balancing exposure without losing the natural feel. By mastering natural light, your toy scenes will gain an authentic and enchanting charm.
Crafting Detailed Backgrounds
Creating a detailed background for your toy scenes transforms them from ordinary to extraordinary. Start by envisioning the story you want to tell. Consider the setting, whether it's a bustling city or a serene forest. A well-thought-out backdrop makes all the difference in capturing the viewer's imagination.
Dive into textures and layers. Use materials like foam, cardboard, or fabric to construct elements such as hills, roads, or walls. Paint them with realistic colors that suit the environment you're trying to portray. Add depth by incorporating layers—trees behind houses, clouds over mountains—to create a sense of dimension.
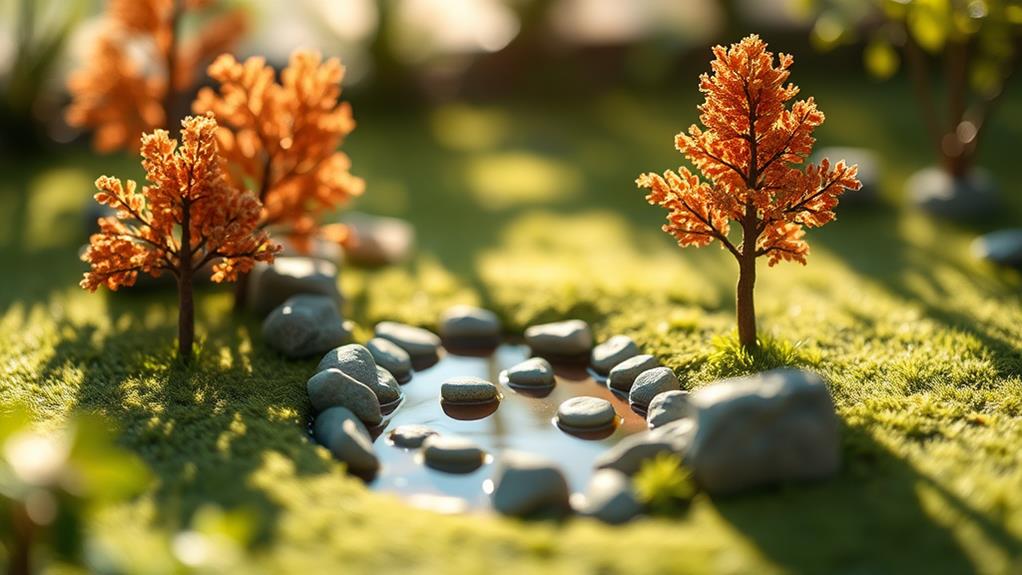
Details make your scene come alive. Think about the little things: add tiny pebbles for a gravel path, or moss for a forest floor. Even a small splash of color can enhance realism. Use a fine brush to create intricate patterns or weathering effects, like rust or dirt, on surfaces.
Don't overlook the sky. A painted or printed backdrop with clouds, stars, or a sunset sets the mood. Adjust your camera angle to avoid capturing unwanted edges or gaps. These thoughtful details guarantee your toy scene stands out with realism and charm.
Selecting the Right Props
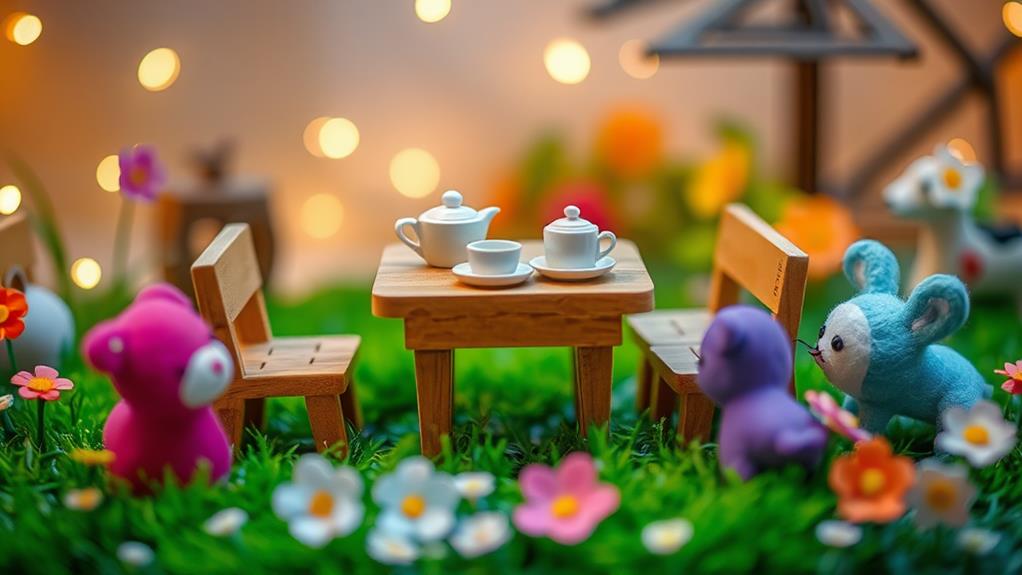
Choosing the right props is essential to bringing your toy scene to life. The props you select can transform a simple setup into a enchanting world. Start by considering the theme of your scene. Are you creating a bustling cityscape or a serene countryside? Your props should match and enhance this theme. For a city scene, tiny cars, streetlights, and miniature buildings can add authenticity. Meanwhile, a countryside might benefit from small trees, fences, and farm animals.
Pay attention to scale. Your props need to be proportionate to the toys you're using. If the props are too large or too small, they can disrupt the scene's realism. It's a good idea to measure your toys and look for props that complement their size.
Color plays a significant role, too. Choose props with colors that harmonize with your background and toys. Contrasting colors can make objects stand out, while similar tones can create a more cohesive look.
Experimenting With Angles
With the right angles, you can transform your toy scene from simple to stunning. Angles play a vital role in how your audience perceives the depth and realism of your setup. By experimenting with different perspectives, you'll find a way to make your scene more dynamic and engaging. Start by adjusting your camera or viewpoint to explore how each angle changes the look and feel of the background.
Consider shooting from a low angle to give your toys a towering, larger-than-life presence. This can add drama and make even the most mundane objects appear more significant. Alternatively, a high angle can create a sense of vulnerability or highlight intricate details in your layout that might otherwise go unnoticed. Don't be afraid to tilt the camera slightly to create an off-kilter effect that adds energy and movement to your scene.
Remember to pay attention to how light interacts with your chosen angles. Shadows can either enhance or detract from your setup, so it's important to monitor how they fall across your scene. By experimenting with angles, you'll discover new ways to breathe life into your toy backgrounds, making them truly enchanting.
Creating Depth With Layers

To achieve a sense of depth in your toy scenes, layering is key. Begin by organizing elements in your scene from foreground to background. Place larger objects closer to the camera and smaller ones in the distance. This arrangement mimics how we perceive depth in real life. You can use various materials to create layers, such as paper, fabric, or even small pieces of wood. Each layer should have distinct textures and colors to set them apart clearly.
Next, pay attention to the lighting of each layer. Use shadows and highlights to emphasize the separation between layers. You can achieve this by adjusting light sources or using reflectors to bounce light onto specific areas. Shadows falling on layers behind the objects in the foreground enhance the illusion of depth.
Consider incorporating different heights for your layers. By placing some elements at varied elevations, you create a three-dimensional effect that draws the viewer's eye deeper into the scene. This can be achieved by using platforms or stands to lift certain objects.
Lastly, don't forget to overlap layers slightly. This overlap helps to blend them into a cohesive scene, making the background appear more realistic and engaging.
Using Forced Perspective
Transform your toy scenes by mastering the art of forced perspective. This technique plays with scale and distance, creating the illusion that objects are larger or smaller than they really are. By carefully positioning your toys and backgrounds, you can trick the viewer's eye, adding a sense of realism and depth to your scenes.
Start by choosing a focal point for your image. Align your toys and background elements so they interact convincingly. For instance, place smaller toys closer to the camera, while larger background elements, like buildings or trees, sit further away. This setup creates an illusion of scale and depth, making your scene appear more expansive.
Experiment with angles and camera positions. A low angle can make toys appear towering and imposing, while a high angle might emphasize their smallness. Adjust your camera's focus to blur the background slightly, enhancing the sense of depth.
Lighting is essential. Guarantee consistent lighting across your scene to maintain the illusion. Shadows should match the direction and intensity to avoid breaking the spell. With practice, your toy scenes will captivate viewers, transporting them into a miniature world of intrigue and wonder.
Editing for Realism

How can you enhance the realism of your toy scenes? Editing plays an essential role in transforming a good image into a stunningly realistic one. Start by using photo editing software like Photoshop or GIMP. Focus on adjusting lighting and shadows. Enhancing contrast can make your toys pop, while softening certain shadows can create depth. It's all about striking the right balance to make the toys blend seamlessly into the background.
Look closely at colors. Use color correction tools to guarantee your toys match the scene's palette. Adjust the saturation and hue to match the ambient lighting conditions. This will prevent any elements from standing out unnaturally. You can also use filters to add a cohesive look to the entire image, giving it a unified feel.
Pay attention to details. Remove any unwanted artifacts or blemishes that could break the illusion of realism. Use tools like the clone stamp or healing brush to clean up imperfections. Finally, consider adding subtle effects like lens flare or depth of field blur to mimic the look of a real camera lens. These touches can add that extra layer of authenticity to your toy scenes.
Frequently Asked Questions
How Can I Make Toy Scenes Look Professional on a Budget?
You can make toy scenes look professional on a budget by using natural lighting, crafting DIY props, and choosing simple yet effective backdrops. Experiment with angles and focus on composition to enhance realism without spending a fortune. Additionally, utilizing miniature scene composition techniques can significantly elevate the visual appeal of your photography. By thoughtfully arranging props and strategically placing your toys, you can create a sense of depth and storytelling within the frame. Don’t forget to play with different perspectives and heights to capture unique shots that bring your scenes to life.
What Are Common Mistakes to Avoid When Creating Toy Scenes?
When creating toy scenes, don't overlook lighting or clutter the scene with unnecessary details. Avoid inconsistent scales or mismatched colors. Confirm the background complements the toys. Also, don't forget to check camera angles for the best perspective.
How Do I Choose the Best Camera for Toy Photography?
When choosing a camera, consider one that's kind to your wallet yet captures life's miniature wonders beautifully. Opt for one with a macro lens, good low-light performance, and adjustable settings to make your toy scenes shine.
What Software Is Ideal for Post-Processing Toy Scene Images?
You should try Adobe Lightroom for its intuitive interface and powerful editing tools. Photoshop is great for detailed adjustments and effects. If you prefer free options, GIMP offers robust features without a price tag.
How Can I Incorporate Storytelling Into Toy Scene Photography?
Oh, you mean you want your toys to have a plot twist? Add props and play with perspectives to create drama. Let those action figures live out epic narratives that'd make even Shakespeare shed a tear.
At a Glance
You've now got the tools to craft stunningly realistic toy scene backgrounds. Imagine setting up a miniature park scene. Use a shallow depth of field to blur the toy trees in the background, giving the impression of distance. Add real pebbles for texture, and angle the camera to enhance the scene's depth. Finally, edit your photo to balance the colors. By combining these techniques, you'll transform ordinary toys into mesmerizing, lifelike scenes.


