
Crafting your own figurine photography set is easier than you think. Start by choosing a location with abundant natural light near a window, avoiding direct sunlight to prevent glare. Use a simple backdrop to highlight your figurine and guarantee your surface is stable. Gather essential materials like a high-resolution camera, tripod, LED lights, and props. Experiment with lighting techniques: position softbox lights at 45-degree angles and play with backlighting. Capture from various angles, adjust camera settings for best results, and edit your images using software to enhance details. Explore these techniques further to perfect your setup and capture stunning photos.
Choosing the Right Location
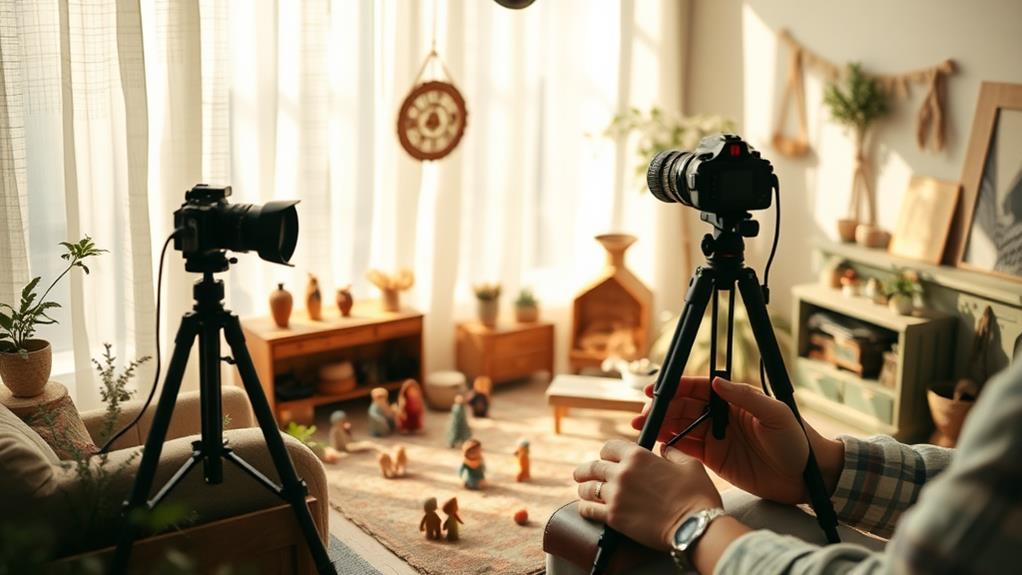
When setting up your figurine photography set, choosing the right location is vital to achieving the perfect shot. Begin by surveying your space and identifying areas with ample natural light. Natural light provides a soft, even illumination that highlights details without harsh shadows. Position your set near a window, but be mindful of direct sunlight, which can create unwanted glare. You might need to diffuse it with a sheer curtain or move slightly away to maintain control over the lighting.
Consider the backdrop of your chosen location. A neutral or simple background helps your figurine stand out, drawing attention to its details. You can use a plain wall, or if that's not available, a large piece of matte paper or fabric can work wonders. Make certain it's free from distractions like clutter or bold patterns that might compete with your subject.
Next, think about the surface where the figurine will be placed. A sturdy, level surface is essential to prevent any accidental toppling. If outdoors, avoid uneven ground or unstable surfaces. Finally, make sure there's enough space for you to move around and capture various angles without obstacles hindering your creativity.
Gathering Essential Materials
As you begin the figurine photography journey, assembling your essential materials is essential for success. First, you'll need a good camera or a smartphone with a high-resolution camera. This guarantees your figurines are captured in detail. Next, consider a tripod. It stabilizes your shots, eliminating blurry images due to shaky hands. Lighting is critical, so grab a set of adjustable LED lights to illuminate your subjects without harsh shadows.
Here's a helpful table to keep track of your key materials:
| Material | Purpose | Example |
|---|---|---|
| Camera/Phone | Captures high-quality images | DSLR/iPhone |
| Tripod | Provides stable shooting platform | Manfrotto |
| LED Lights | Offers adjustable lighting | Neewer |
In addition to these basics, don't forget about diffusers and reflectors. They help soften light and reduce harsh shadows, creating a more professional look. You might also want a variety of backgrounds and props to add interest and context to your shots, though we'll explore this in more detail later. Finally, keep some cleaning supplies on hand to dust off figurines, guaranteeing they're picture-perfect. With these materials in your toolkit, you're well-equipped to create stunning figurine photography.
Designing Your Background
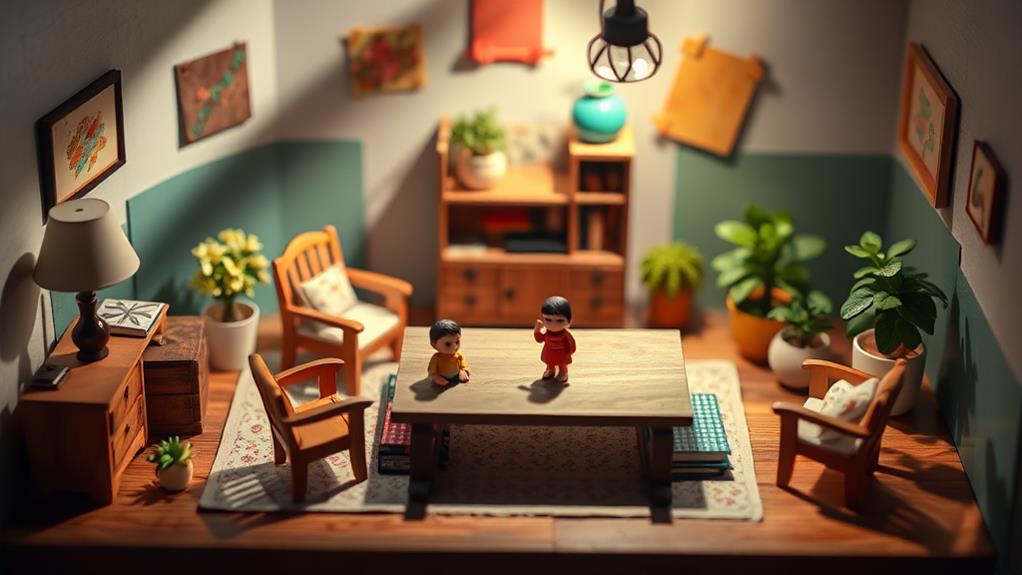
A well-designed background can transform your figurine photography from ordinary to enchanting. Start by considering the theme of your figurine. Is it a mystical creature or a superhero? Tailor the background to complement your subject. You might use colored paper, fabric, or even digital backdrops. Choose colors and patterns that enhance your figurine's features without overwhelming them.
Next, pay attention to scale. You want the background elements to match the size of your figurine. For example, if you're photographing a small action figure, miniature trees or buildings can create a sense of realism. Avoid cluttering the scene; simplicity often works best to keep focus on the figurine.
Incorporate textures to add depth. You can use surfaces like sandpaper for a gritty look or velvet for a soft, luxurious feel. Experiment with different materials to see what best complements your figurine.
Lighting Techniques for Figurines
With your background thoughtfully crafted, lighting becomes your next powerful tool in figurine photography. Start by considering natural light, which is soft and flattering. Position your figurine near a window, but avoid direct sunlight to prevent harsh shadows. Morning or late afternoon light works best for capturing subtle details.
If you're working indoors or after dark, invest in artificial lighting. A basic setup includes two softbox lights placed at 45-degree angles to your figurine. This arrangement minimizes shadows and highlights textures. Use a white reflector opposite the light source to balance the light and reduce harshness.
Experiment with backlighting for dramatic effects. Place a light source behind your figurine to create silhouettes or halo effects. This technique adds depth and highlights intricate details.
Consider the color temperature of your lights. Warmer tones (around 3000K) give a cozy feel, while cooler tones (around 5600K) offer crisp, neutral lighting. Play with these temperatures to match the mood you want to convey.
Lastly, always assess your lighting setup through your camera or smartphone. Adjust angles and intensities as needed, ensuring your figurine is portrayed in its best light.
Setting Up the Scene
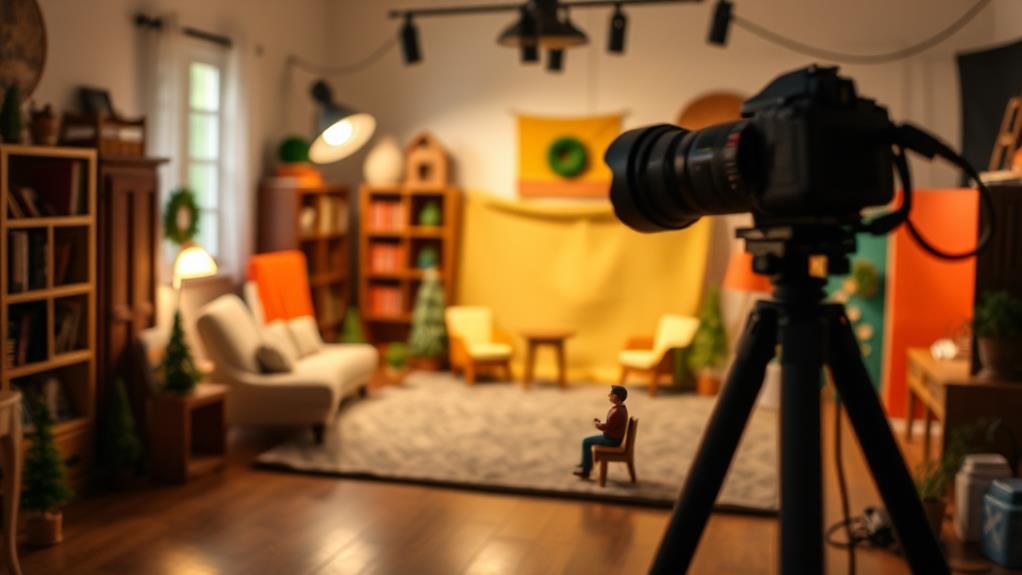
Often, the key to enchanting figurine photography lies in a well-thought-out scene setup. Start by choosing a backdrop that complements your figurine. Neutral colors or simple patterns can help your subject stand out, but don't be afraid to experiment with textures or materials like fabric or paper. Next, consider the scale and proportion of your scene elements. Small props, like miniature furniture or accessories, can add depth and context, making the figurine appear more lifelike.
Arrange your props carefully. Make sure they don't overshadow the figurine, but instead enhance the story you're trying to tell. Use everyday items creatively—small rocks, plants, or even household objects can create an interesting environment. Think about the theme or narrative you want to convey. Whether it's a serene forest or a bustling cityscape, your scene should align with the figurine's character or mood.
Pay attention to the color harmony within your scene. Consistent color schemes can evoke emotions and set the tone. Finally, check for unnecessary clutter that might distract from the main focus. A clean, intentional setup allows your figurine to shine and invites viewers to immerse themselves in the miniature world you've crafted.
Capturing the Perfect Shot
Capturing the perfect shot involves mastering both technical skills and artistic vision. You need to balance these elements to bring your figurines to life. Start by understanding your camera settings. Experiment with aperture to control depth of field, ensuring your figurine is the focal point while the background blurs into a soft, complementary haze. Shutter speed is vital too. A faster speed freezes action, ideal for dynamic poses, while a slower speed can capture the ambient light beautifully.
Lighting is your next big focus. Natural light offers a soft, even spread, but artificial light lets you control and highlight specific details. Position your light sources to avoid harsh shadows or unwanted glare. A tripod stabilizes your camera, reducing the risk of blurriness.
Consider these essential tips:
- Rule of Thirds: Position your figurine along imaginary lines to create balance.
- Angles: Experiment with different perspectives to add interest and dimension.
- Background: Choose a background that complements, not competes with, your figurine.
- Focus: Make sure the figurine's details are sharp and clear.
Refine your skills through practice, and soon, capturing stunning shots will be second nature.
Editing and Enhancing Photos

Once you've captured your shots, the journey to a perfect image continues in the editing phase. Start by selecting the best photos from your session. Use software like Adobe Lightroom or Photoshop, which offer a variety of tools to enhance your figurine images. Adjust the exposure to guarantee your image isn't too dark or bright. Use the contrast and saturation settings to bring out the colors and details of your figurines.
Pay attention to the white balance to guarantee your figurine's colors are true to life. Cropping can help focus attention on your subject by removing any distractions. Don't forget to sharpen your image slightly to enhance fine details. Here's a quick table to guide you on key editing aspects:
| Editing Tool | Purpose | Suggested Adjustment |
|---|---|---|
| Exposure | Adjusts brightness | Balanced, not washed |
| Contrast | Enhances differences | Moderate for depth |
| Saturation | Intensifies colors | Slight boost |
| White Balance | Corrects color temperature | Neutral tone |
Frequently Asked Questions
How Can I Prevent Dust From Settling on My Figurines During a Shoot?
You can prevent dust by using a clean, enclosed space or covering your figurines with a clear acrylic case. Dust with a microfiber cloth before and during the shoot. Maintain a dust-free environment with regular cleaning.
What Are Some Tips for Storing and Organizing My Figurine Photography Props?
Start by categorizing props by theme or size. Use clear bins for easy visibility. Label everything. Store fragile items in padded containers. Keep props accessible but out of direct sunlight to prevent fading or damage. Rotate them seasonally.
How Do I Transport My Figurine Photography Set Safely to Different Locations?
When you hit the road with your cherished collection, treat them like royalty. Use padded cases, secure each piece snugly, and avoid rough paths. Keep an inventory checklist handy to guarantee nothing gets misplaced during your travels.
Are There Specific Cleaning Techniques for Figurines Before a Photography Session?
Yes, gently dust your figurines with a soft brush to avoid scratches. Use a microfiber cloth for smudges, and if needed, a mild soap solution. Always dry completely. This guarantees your figurines look pristine in photos.
How Can I Protect My Figurines From Potential Damage During a Shoot?
Guarantee your figurines stay pristine by using soft padded surfaces and gentle lighting. Avoid direct sunlight and handle them with clean, dry hands. Secure them with stands or supports to prevent accidental falls during the shoot.
At a Glance
You've reached the final stage of your figurine photography journey. By now, you know the ropes—selecting the perfect spot, gathering materials, designing a backdrop, lighting just right, and snapping that stellar shot. Don't forget, editing is the cherry on top to make your photos shine. Keep practicing, and soon you'll be capturing magic in every frame. So go ahead, plunge in with both feet and see where your creativity takes you!


