

Master toy photography by releasing the power of angles to spin mesmerizing stories. Use low-angle shots to make toys appear grand and mighty, while high angles render them delicate and vulnerable. Get on eye-level for intimate shots that capture emotion and detail. Add drama with a tilted frame, or foster intimacy with an over-the-shoulder perspective. Highlight textures in close-ups and expand narratives using wide angles. Focus on silhouettes for mystery and utilize reflections to double the intrigue. Finally, capture the scene's essence with an aerial overhead shot. These techniques elevate your storytelling and reveal the magic behind every toy moment.
Low-Angle Drama
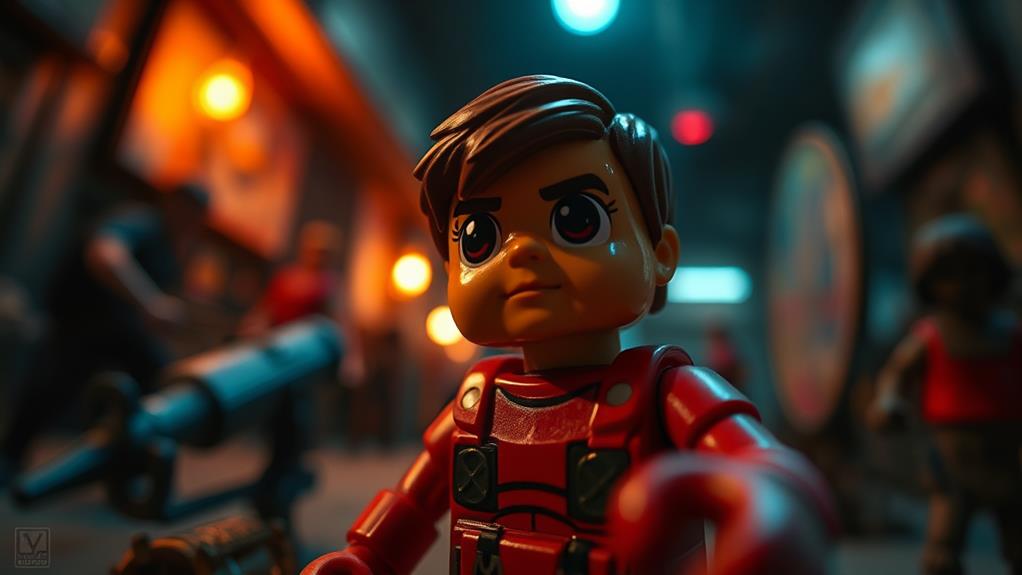
Capturing the essence of drama in toy photography can be as simple as changing your perspective. One effective method to elevate the drama is by using a low-angle shot. By positioning your camera below the toy's eye level, you create a sense of grandeur and power. This angle can make a small action figure look like a towering giant, giving it a commanding presence in the frame. It draws viewers into the world you've crafted, making them feel like they're part of the scene.
To achieve this, start by getting your camera as close to the ground as possible. You might need to lie down or use a tripod that supports low angles. Experiment with different focal lengths to see how they affect the scene. A wide-angle lens can exaggerate the height and add more context to the background, while a closer crop focuses on the toy's details, enhancing the drama. Lighting is essential here; try angling the light from below to cast dynamic shadows and highlight textures. Remember, the key is to immerse your audience, transforming ordinary toys into extraordinary characters filled with life and emotion.
High-Angle Perspective
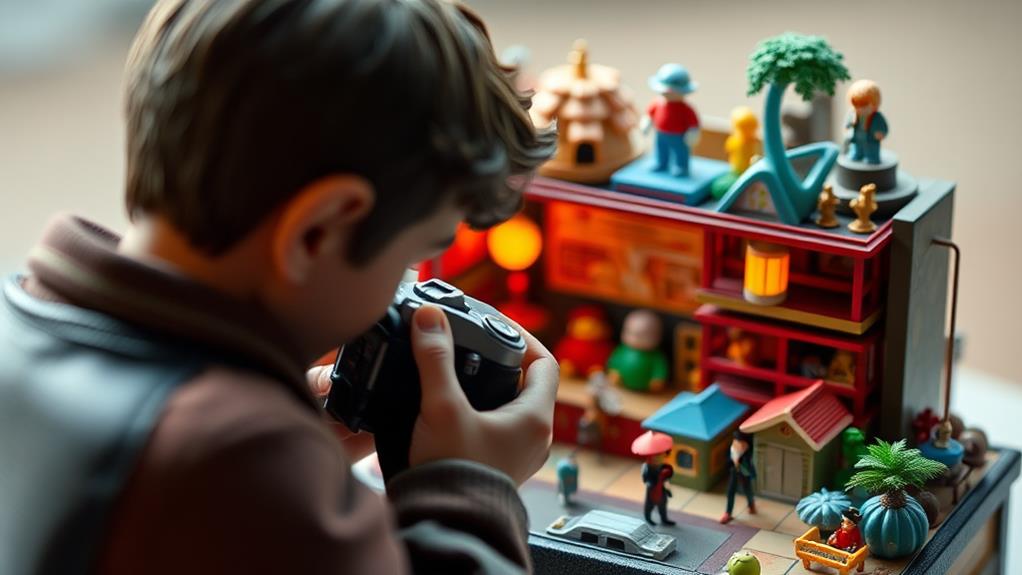
Switching to a high-angle perspective in toy photography offers a fresh and intriguing viewpoint. By capturing your subjects from above, you introduce a sense of vulnerability or insignificance, often making the toys appear smaller and more delicate. This angle can add depth to your story, highlighting a toy's environment or showcasing its placement within a larger scene. It's a great way to emphasize context, showing the relationship between the toy and its surroundings.
To effectively use a high-angle perspective, position yourself directly above the subject. Ascertain your lighting complements this viewpoint, reducing harsh shadows. Natural light works wonders here, providing a soft, even illumination. If you're indoors, try positioning your setup near a window or use diffused artificial lighting.
Consider the background, as it'll be more prominent from this angle. A clutter-free backdrop assures your subject remains the focal point. Experiment with various heights to find the most engaging composition. Remember, a high-angle shot can tell a story of discovery or exploration, inviting viewers to see the world from a different vantage point. So, grab your camera, get creative, and explore the unique narratives a high-angle perspective can reveal in your toy photography.
Eye-Level Engagement
While a high-angle perspective offers a unique vantage point, eye-level engagement brings a personal connection to your toy photography. By positioning your camera at the same height as the toy, you create a sense of intimacy and interaction. This angle allows the viewer to meet the toy on its level, forging a strong narrative link. It's as if the toy becomes a character in its own story, inviting the viewer to step into its world.
To make the most of eye-level engagement, pay attention to the toy's facial expressions or defining features. Capture the eyes or any significant detail that conveys emotion or character. This connection can evoke empathy, curiosity, or even nostalgia, enhancing the storytelling aspect of your work.
Lighting also plays a vital role in eye-level shots. Make sure the light highlights the toy's features without casting harsh shadows. Experiment with natural or artificial light to see what best accentuates the toy's personality.
Lastly, keep the background simple to maintain focus on the toy. A clutter-free backdrop guarantees the toy remains the star of the photo, drawing viewers into its miniature world, full of stories yet to be told.
Tilted Frame Dynamics
Tilted frame dynamics can add a sense of energy and movement to your toy photography. By simply tilting your camera, you can transform a static scene into one bursting with life and emotion. This technique is particularly useful when you want to convey action, drama, or tension. Imagine your toy figures in the middle of a daring escape or a climactic battle—a tilted frame can amplify that excitement and draw viewers into the story.
To effectively use tilted frames, consider these tips:
- Experiment with angles: Try different degrees of tilt to find what best suits your scene.
- Focus on composition: Guarantee that the main elements of your image remain balanced despite the tilt.
- Highlight motion: Use the tilt to accentuate movement, making your toys appear dynamic.
- Create drama: A tilted frame can introduce a sense of chaos or urgency to your narrative.
- Avoid overuse: While powerful, too many tilted shots can become disorienting. Use them sparingly for impact.
Over-the-Shoulder View
The over-the-shoulder view is a powerful technique in toy photography that creates a sense of intimacy and connection with your scene. By positioning the camera just behind one toy character, you give your audience the perspective of the character itself. This angle invites viewers into the world of your toys, allowing them to experience the scene as if they're part of the adventure. It's an excellent way to highlight interactions between characters and add depth to your storytelling.
To nail this angle, carefully consider your composition. Make sure the character in the foreground is slightly blurred, focusing instead on the action beyond. This directs attention to the main subject while maintaining the presence of the observing character. Adjust your lighting to enhance mood and create a more immersive environment. Natural light can add warmth, while dramatic shadows can increase tension.
Don't forget to experiment with the height and angle of your shot. Sometimes, a higher perspective can make the scene feel more dynamic, while a lower angle can emphasize the scale of the environment or the seriousness of the moment. Use the over-the-shoulder view to draw viewers deeper into your toy's story.
Close-Up Intimacy
Shifting focus from the broader scene to the intimate details, close-up shots in toy photography offer a unique way to capture emotion and character. By narrowing in on the small features, you highlight the intricate designs and expressions that might be missed from a distance. When you zoom in, you create a connection between the viewer and the toy, making the scene feel more personal and engaging.
To make the most of close-up intimacy in your shots, consider the following tips:
- Focus on the eyes: Eyes convey emotion and can be the focal point of your image, drawing the viewer in.
- Highlight textures: Capture the textures and materials of the toy to add depth and realism to your photo.
- Play with lighting: Use shadows and highlights to emphasize details and create mood.
- Experiment with angles: Try different angles to find the most compelling viewpoint that captures the toy's personality.
- Use a shallow depth of field: Blur the background to make your subject stand out, enhancing the feeling of intimacy.
Wide-Angle Context

While close-up shots draw viewers into the intimate world of toy photography, wide-angle context allows you to showcase the environment and story surrounding the toys. By using a wide-angle lens, you can capture the broader scene, revealing elements that contribute to the narrative you're crafting. This approach helps create a sense of scale and place, giving your toys a world to inhabit.
When you use wide-angle shots, think about how the background elements interact with your toys. Are they in a bustling cityscape, a dense forest, or perhaps a futuristic space station? The setting can greatly enhance the story, providing depth and layers to the image. Position the toys strategically within the frame, guiding the viewer's eye through the scene.
Pay attention to the horizon line and how it divides your image. A lower horizon can make your toys appear larger and more dominant, whereas a higher one may emphasize the setting. Experiment with different angles and perspectives to find the best composition for your story. Remember, wide-angle shots can also bring distortion, so keep an eye on lines and shapes to maintain balance. With practice, your wide-angle context will enrich your storytelling.
Silhouette Mystery
After exploring the expansive world of wide-angle context, let's step into the intriguing domain of silhouette mystery in toy photography. Capturing silhouettes adds an air of intrigue and drama to your shots, drawing viewers into a story untold. To master this technique, you need to focus on lighting and angles. Position your toy against a strong backlight, such as a setting sun or a bright window, to create a sharp contrast between the toy and its background. This contrast will highlight the toy's outline, leaving the details shrouded in mystery.
To enhance your silhouette photography, consider these tips:
- Choose a Simple Background: Keep it uncluttered to guarantee the silhouette stands out.
- Play with Perspectives: Experiment with low or high angles to add depth and interest.
- Mind the Gaps: Make sure the toy's limbs or features don't merge into a single shape.
- Adjust Exposure: Underexpose slightly to deepen the shadows.
- Consider the Story: Think about what the silhouette conveys, whether it's tension, whimsy, or adventure.
Reflected Imagery
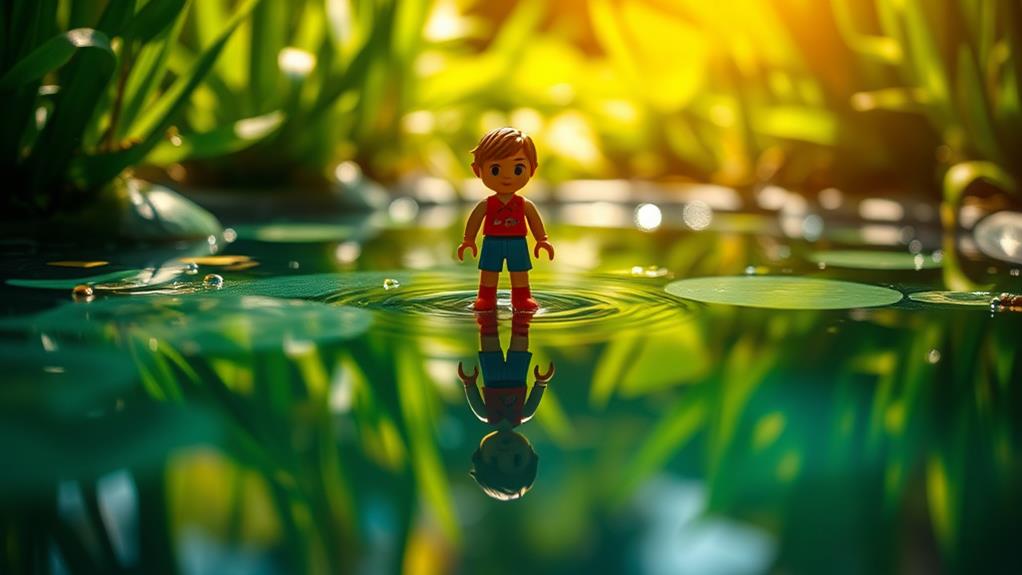
Immerse yourself in the enchanting world of reflected imagery in toy photography, where reflections can double the impact of your scene. By creatively using surfaces like mirrors, water, or even shiny objects, you can transform a simple snapshot into a fascinating story. Imagine your favorite action figure standing heroically on a mirror, its reflection suggesting a hidden depth or dual nature. This technique adds layers to your narrative, inviting viewers to see more than just the surface.
Start by selecting a reflective surface that complements your toy. Mirrors offer the clearest reflections, while water introduces a natural, fluid quality. Position your toy and adjust the angle to capture both the object and its mirror image. Experiment with lighting to enhance the reflection, making sure it doesn't overpower the scene. Natural light can produce soft, realistic reflections, while artificial light can create dramatic effects.
Don't hesitate to get creative. Try placing your toys near puddles or shiny tabletops. You might even discover unexpected reflections that add intrigue. Remember, the key is subtlety. Allow the reflection to enhance the story without detracting from the main subject. With practice, your reflected imagery will fascinate and inspire.
Aerial Overhead Shot
Capturing a bird's-eye view of your toys through aerial overhead shots can transform a mundane setup into a dynamic visual story. This perspective lets you highlight details that might otherwise go unnoticed. It's a powerful way to showcase the overall scene and relationships between characters or elements. Whether you're working with action figures, model cars, or dolls, an overhead shot adds depth and context to your storytelling.
To get the most out of your aerial overhead shots, consider these tips:
- Use a tripod or a stable surface: Avoid blurry images by keeping your camera steady.
- Mind your lighting: Overhead shots can cast unwanted shadows, so adjust your light sources accordingly.
- Experiment with angles: Try tilting your camera slightly for a more dramatic effect.
- Frame your scene thoughtfully: Guarantee all important elements are visible and well-arranged within the frame.
- Incorporate textures: Use different surfaces like grass, sand, or fabric to add interest and contrast.
Frequently Asked Questions
What Equipment Is Essential for Beginner Toy Photographers?
You need a decent camera, a sturdy tripod, and good lighting equipment to start toy photography. Don't forget lenses for close-ups and a backdrop or diorama to enhance scenes. Practice and patience will improve your skills.
How Can Lighting Affect the Mood of a Toy Photo?
They say, "The devil's in the details." Lighting's your magic wand. It sets the mood, turns a friendly toy into a menacing figure, or brings warmth to a scene. Experiment with angles and intensity for emotional impact.
What Are Some Tips for Creating a Realistic Toy Environment?
Use real-world props like sand or pebbles to mimic natural settings. Pay attention to scale—tiny trees or buildings work wonders. Incorporate background elements that blend seamlessly. Experiment with depth of field to enhance realism in your toy scenes.
How Do You Prevent Reflections When Photographing Glossy Toys?
You've got to manage reflections by diffusing your light source. Use a softbox or white sheet to soften the light. Adjust angles to avoid direct light hitting the glossy surface. Experiment until you find the perfect setup.
What Are Common Post-Processing Techniques Used in Toy Photography?
In toy photography, you'll often use post-processing techniques like adjusting brightness, enhancing colors, and removing blemishes. You can also add depth with shadows and highlights or create dramatic effects using filters and layers for storytelling.
At a Glance
And there you have it—your foolproof guide to transforming toy photography into the next big art movement. Who knew angles could make plastic superheroes look so profound? Remember, capturing the perfect shot is as easy as contorting yourself into a human pretzel for that elusive low-angle drama. And hey, if your tiny subjects don't make it to a gallery, at least you'll have a killer Instagram feed. Go forth and shoot, Picasso of playthings!


