
To create stunning toy figure scenes, start by ensuring your figures and accessories share the same scale and proportion. Choose backgrounds that complement your figures without overshadowing them. Proper lighting is essential; use natural light for soft effects or side lighting for texture. To add depth, position figures at varying distances and incorporate props. Familiarize yourself with color theory to make your scenes vibrant yet harmonious. Experiment with symmetry or asymmetry to guide viewer focus and capture dynamic shots. By varying camera angles, you can create interest and tell a compelling story. There's so much more to explore beyond these essentials.
Understanding Scale and Proportion
When creating a compelling toy figure scene, understanding scale and proportion is essential. You need to guarantee that all elements in your scene look like they naturally belong together. Start by selecting figures and accessories that are the same scale. If your figures are 1:12 scale, make sure the furniture and other props match this size. Avoid mixing scales, as it can make your scene look disjointed and unrealistic.
Pay attention to the proportions of each element. A toy figure's height should be consistent with door frames, chairs, and any vehicles you include. If a figure stands taller than a doorframe or can't fit into a car, it'll break the illusion of reality.
Also, consider the spatial relationship between objects and figures. Place larger objects towards the back of your scene to create depth, and use smaller items at the front to maintain perspective. This technique keeps your scene balanced and visually appealing.
Choosing the Right Background
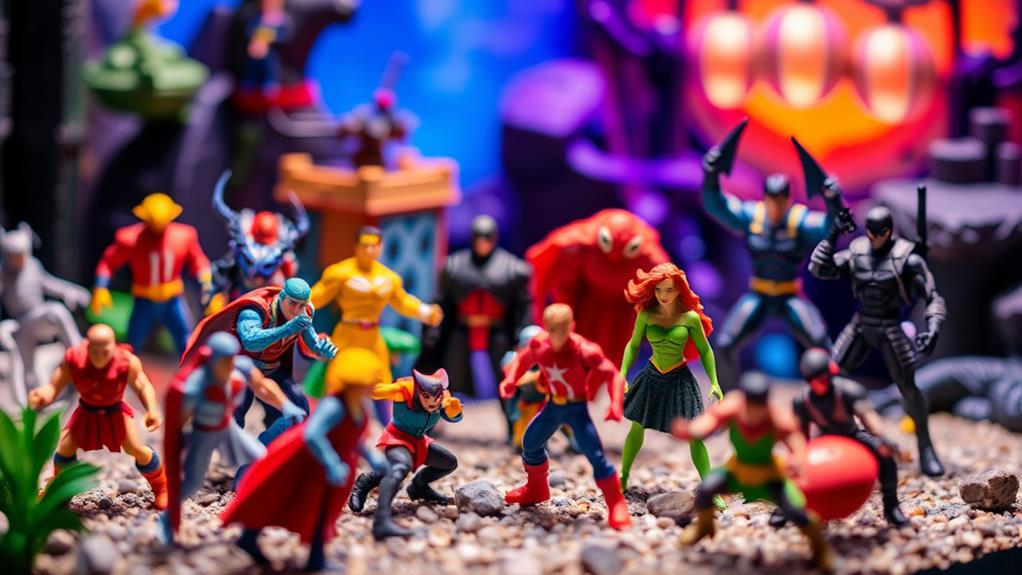
After mastering scale and proportion, the next step is picking the right background for your toy figure scene. The background sets the mood and context, so choose one that complements your figures and enhances your scene's narrative. Start by pondering the theme. If your figures are superheroes, an urban skyline might work best. For fantasy figures, a mystical forest could be ideal.
Think about the color scheme too. You want colors that highlight your figures without overwhelming them. For example, dark figures pop against lighter backgrounds, while bright figures might shine against darker backdrops. Texture is another element to reflect on. A smooth, minimalist background can make your figures the focal point, while a detailed background can add depth and interest.
Also, think about the background's scale compared to your figures. A background that's too detailed or busy can dwarf your figures, while one that's too plain might make the scene feel empty.
Don't hesitate to experiment with different materials. Paper, fabric, or even digital screens can serve as backgrounds. Experimentation is key, so try different setups until you find what feels right for your scene.
Mastering Lighting Techniques
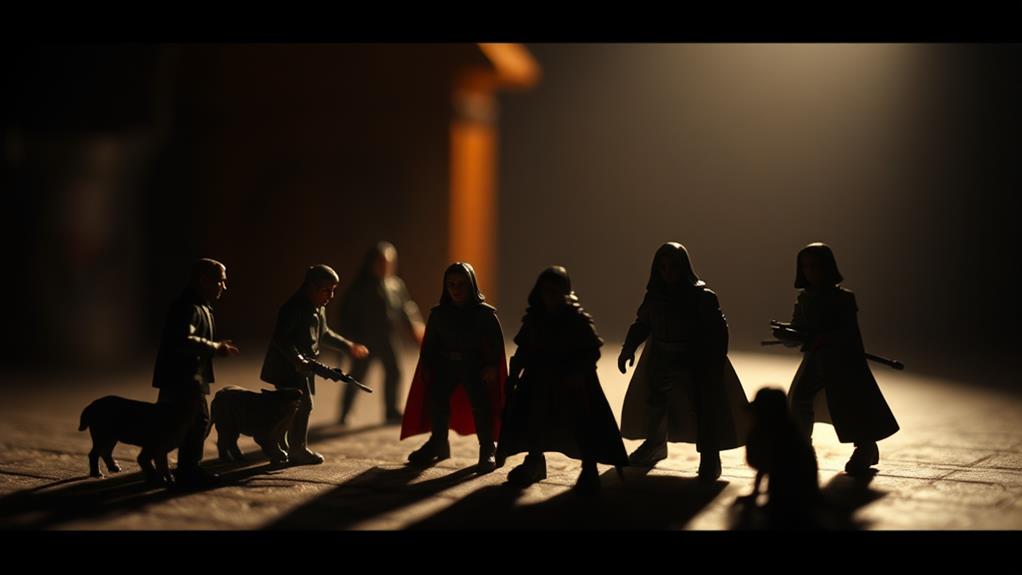
Lighting is one of the most essential elements in creating an engaging toy figure scene. It can dramatically alter the mood and focus, making your setup either enchanting or flat. By mastering a few key lighting techniques, you can bring your toy figures to life.
Start by experimenting with natural light. Position your figures near a window to see how sunlight can create soft shadows and highlights. Morning and late afternoon light often provide the best results. If natural light isn't an option, use lamps to mimic it. Consider using diffusers to soften harsh artificial lights.
Next, play with backlighting to add drama. Position a light source behind your figures to create silhouettes or enhance their features. You can also use side lighting to add texture, emphasizing details that might otherwise be missed.
Here's a simple table to help you choose the right lighting technique:
| Technique | Purpose | Effect |
|---|---|---|
| Natural Light | Soft shadows, highlights | Balanced, natural |
| Backlighting | Create silhouettes | Dramatic, striking |
| Side Lighting | Emphasize texture | Detailed, dynamic |
Creating Depth and Dimension
While lighting sets the mood and highlights your toy figures, adding depth and dimension can truly elevate your scene. Start by considering the placement of your figures. Position some closer to the camera and others further back to create a sense of space. This layering technique tricks the eye into perceiving depth, making your scene more dynamic.
Next, use props and backgrounds strategically. Incorporate elements like trees, buildings, or rocks to add layers. These props not only enhance the story but also contribute to the perception of distance. Adjust their size and placement to mimic real-life perspectives.
Another effective technique is to play with focus. Using a camera with adjustable focus settings, blur the background slightly while keeping the main figures sharp. This simulates a shallow depth of field, drawing attention to your focal point while adding depth.
Utilizing Color Theory

Color theory is a powerful tool that can transform your toy figure scenes from ordinary to extraordinary. By understanding and applying the principles of color theory, you can create enchanting and harmonious compositions that draw the viewer's eye. Start by familiarizing yourself with the color wheel, which helps you understand relationships between colors. Use complementary colors—those opposite each other on the wheel—to create contrast and make your figures stand out.
Incorporate analogous colors, which are next to each other on the wheel, for a more cohesive and serene look. This approach works well for background settings, allowing your main figures to shine without distraction. Pay attention to color temperature as well; warm colors (reds, oranges, yellows) can create excitement and energy, while cool colors (blues, greens, purples) evoke calm and tranquility.
Don't overlook the role of saturation and brightness. High saturation can make a scene more vibrant, but use it sparingly to avoid overwhelming your audience. Adjust brightness to highlight focal points. Remember, effective use of color theory not only enhances aesthetics but also communicates mood and emotion in your toy figure scenes.
Framing Your Shot Effectively
When setting up your toy figure scenes, framing is key to capturing the viewer's attention and telling a compelling story. Start by considering the positioning of your figures within the frame. Use the rule of thirds to place them off-center, creating a more dynamic and engaging composition. This technique draws the viewer's eye naturally, adding depth and intrigue.
Pay attention to your camera angle. A low angle can make figures appear larger and more imposing, while a high angle might give a sense of vulnerability. Experiment with different perspectives to find the one that best fits the narrative you're crafting. Don't hesitate to get up close for intimate shots or pull back for a wider view to set the scene.
Lighting also plays an essential role in framing. Use shadows and highlights to direct focus and highlight key elements. Natural light can enhance realism, but don't be afraid to use lamps or LED lights to create mood and contrast. Finally, be mindful of the background. It should complement the scene without overwhelming it, ensuring the figures remain the focal point. With thoughtful framing, your toy figure scenes will truly come to life.
Incorporating Natural Elements
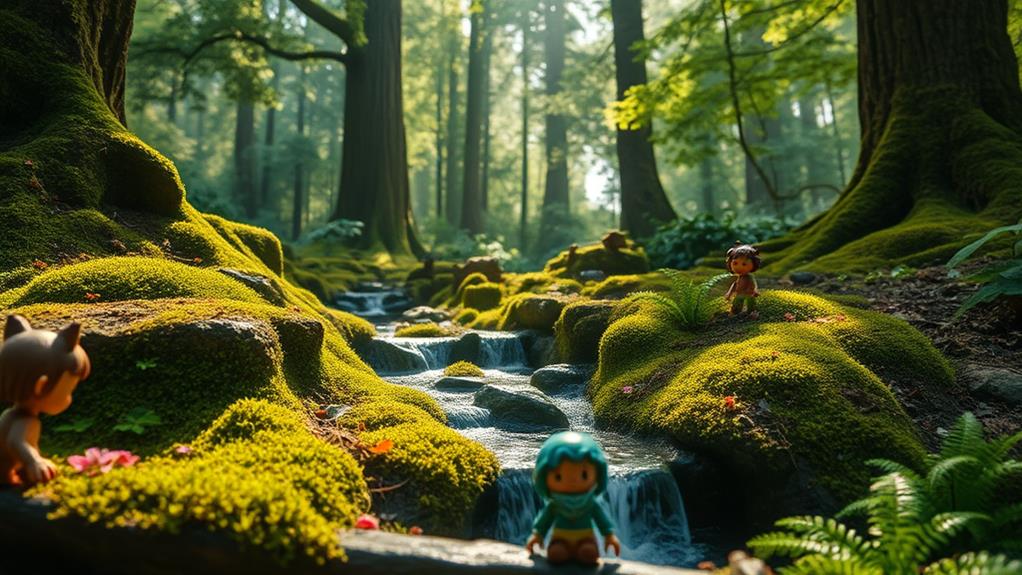
Nature's charm can elevate your toy figure scenes by adding authenticity and a sense of realism. Incorporating elements like rocks, leaves, or soil can transform a simple setup into a fascinating story. First, consider your scene's theme. Are your figures adventuring in a forest, exploring a desert, or battling on a rocky terrain? Choose natural elements that align with this theme to create a coherent environment.
For a forest scene, gather small twigs, moss, and leaves. These elements mimic trees and underbrush, providing a lush backdrop. If you're crafting a desert scene, use sand or fine gravel to mimic the barren landscape, and consider adding small stones to represent boulders. In a rocky setting, larger stones or pebbles can add depth and dimension.
Lighting plays a vital role. Use natural light to highlight the textures and colors of your chosen elements. Morning or late afternoon sunlight can cast interesting shadows and add warmth. Finally, pay attention to scale. Verify the natural elements aren't too overwhelming compared to your figures. By carefully selecting and placing these elements, you'll create dynamic, engaging scenes that draw viewers into your miniature world.
Balancing Symmetry and Asymmetry
As you incorporate natural elements into your toy figure scenes, consider the visual balance between symmetry and asymmetry to enhance the composition. Symmetry often provides a sense of harmony and order, while asymmetry adds interest and dynamic tension. Striking the right balance can make your scene more visually appealing and engaging. Here are some tips to help you accomplish this balance:
- Identify the Focal Point: Decide where you want the viewer's attention to land first. This can be the most detailed toy figure or an interesting natural element. Use symmetry to guide the eyes to this focal point, while asymmetry can keep the gaze moving across the scene.
- Vary Heights and Angles: Arrange figures and elements at different heights and angles. This creates a more natural and dynamic appearance, breaking any monotonous symmetry without causing chaos.
- Use Color and Texture: Incorporate contrasting colors and textures to highlight asymmetry subtly. This adds depth and richness to your scene without overwhelming the viewer.
- Balance Negative Space: Make sure that the empty spaces between figures and elements are thoughtfully arranged. Too much symmetry can make the scene feel rigid, while asymmetry can introduce a sense of flow and movement.
Highlighting Key Details
Nothing transforms a toy figure scene like highlighting key details that captivate the viewer's attention. By focusing on the small elements, you can elevate the overall impact of your display. Start by examining each toy figure for unique features, such as facial expressions or intricate textures. A well-placed spotlight on these aspects can draw the audience in and spark their curiosity.
Consider using color contrast to make certain figures or details stand out. If your scene includes a mix of vibrant and muted colors, arrange them so the brightest hues highlight focal points. This technique can guide the viewer's gaze naturally across the scene, guaranteeing they don't miss important nuances.
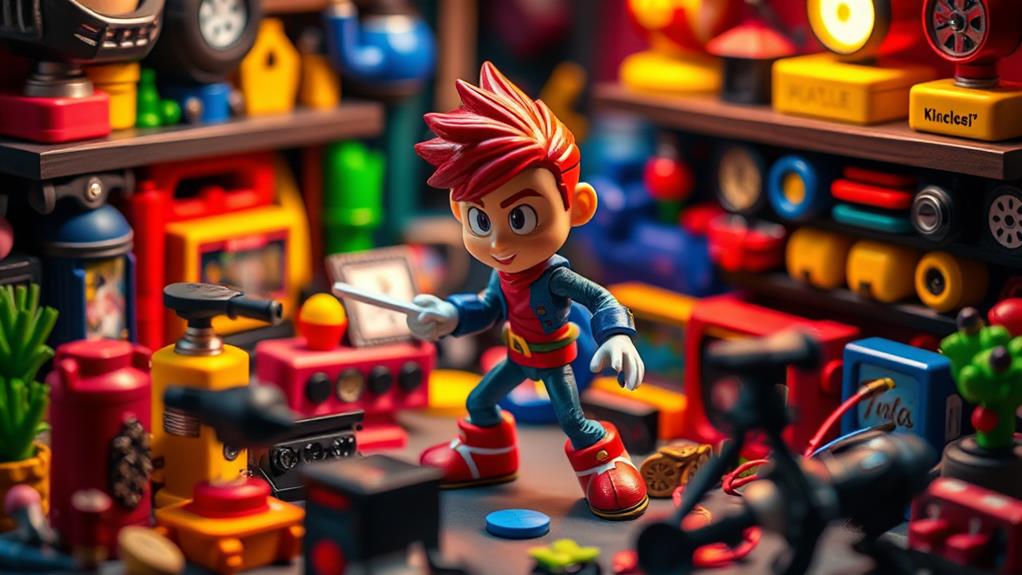
Adding small props can also enhance key details. Think about how accessories like miniature weapons, vehicles, or background elements can complement your figures. These additions create a richer, more engaging narrative and invite viewers to explore the scene in depth.
Don't forget lighting. Strategic lighting can emphasize textures, shadows, and contours, bringing your scene to life. Experiment with different light sources to find the perfect balance that highlights your key details without overwhelming the viewer. This approach guarantees your toy figure scene leaves a lasting impression.
Experimenting With Angles and Perspectives
Exploring different angles and perspectives can dramatically transform your toy figure scene, adding depth and intrigue. By adjusting your viewpoint, you can make a simple setup feel dynamic and engaging. Start by moving around your scene. Get low or high, and see how these changes affect the overall composition. You'll find that a low angle might make your figures appear more imposing, while a high angle can convey vulnerability or innocence.
Here are some tips to help you experiment effectively:
- Vary Your Angles: Instead of shooting every scene from eye level, try crouching down or standing on a chair. This shift can change the mood and impact of the scene.
- Use Forced Perspective: Position figures closer or farther from the camera to play with scale. A small toy can look enormous if placed nearer to the lens, creating an interesting illusion.
- Frame Creatively: Use surrounding elements like furniture or plants to frame your scene. This approach adds context and layers to your composition.
- Experiment with Tilts: Slightly tilting your camera can add motion and tension, enhancing the drama of your scene.
Frequently Asked Questions
How Can I Make Toy Figures Appear More Dynamic and Lifelike in Scenes?
To make toy figures appear dynamic, adjust their poses to show action or emotion. Use lighting to create depth and shadows. Play with angles and perspectives for added drama. Don't forget to add realistic backgrounds and props.
What Are Some Common Mistakes to Avoid When Setting up Toy Figure Scenes?
Don't clutter, don't ignore lighting, and don't overlook scale. Avoid repetitive poses, flat backgrounds, and inconsistent styles. Ascertain each element complements the scene, guiding focus and enhancing realism. Balance creativity with precision for engaging, believable scenes.
How Do I Choose Accessories to Enhance My Toy Figure Scenes?
Consider the theme and story you want to tell. Choose accessories that complement your figures and enhance the scene's narrative. Guarantee items are proportionate and add depth or action, bringing your scene to life visually and emotionally.
Are There Any Tips for Creating Scenes With Multiple Toy Figures?
Arrange the figures to convey a story, ensuring each character has a purpose. Vary poses and expressions for dynamism. Use props and layered backgrounds to add depth. Balance the composition by spacing figures naturally and avoiding clutter.
How Can I Effectively Convey a Story or Theme Through Toy Figure Scenes?
Use symbolism to give your scene depth. Arrange figures to reflect the theme, like a hero's journey or a battle between good and evil. Pose them dynamically, use props, and play with lighting to enhance storytelling.
At a Glance
Creating enchanting toy figure scenes is like putting the cherry on top of a sundae. You've got to understand scale and proportion, choose the right background, and master lighting techniques to create depth and dimension. Utilize color theory and incorporate natural elements to bring your scenes to life. Balance symmetry with asymmetry, highlight key details, and don't be afraid to experiment with angles and perspectives. With these tips, your toy figure scenes will truly shine.


