
If you're looking to elevate your toy photography, creating custom backdrops can make a huge difference. Imagine setting up a miniature cityscape using simple paper and cardboard or adding depth with fabric and textiles. You can even bring the outdoors inside with nature-inspired scenes or get creative with themed wrapping paper and chalkboard art. Each of these DIY ideas offers unique ways to enhance your shots, but there's more to explore. Ever thought about using Lego brick walls to add a playful touch? Let's discuss how these backdrops can transform your toy photography sessions.
Key Takeaways
- Use construction paper and cardboard to create custom cityscape scenes with detailed buildings, windows, and streets.
- Incorporate fabric and textiles for textured, layered backdrops that evoke various moods and settings.
- Create nature-inspired backdrops using artificial or real leaves, moss, and small branches for an organic feel.
- Arrange fresh or artificial flowers in balanced compositions for vibrant, eye-catching floral layouts.
- Utilize themed wrapping paper for quick, affordable, and easily interchangeable backdrops.
Paper and Cardboard Scenes
When it comes to creating DIY backdrops for toy photography, paper and cardboard scenes offer a versatile and affordable option. You can easily find materials like construction paper, cardstock, or even old cardboard boxes around your home. Start by planning your scene. Whether it's an urban cityscape or a natural landscape, sketch out your ideas first. Don't forget to ponder the space between the toy and the backdrop to avoid any distractions.
Next, gather your materials. You'll need paper, scissors, glue, and maybe some markers or paint for added detail. If you're creating a cityscape, cut out building shapes from cardboard and cover them with colored paper. Add windows and doors using markers. For a natural setting, try cutting out trees, bushes, and rocks from green and gray paper. Also, experimenting with different textures can add depth to your scenes.
Don't forget the background. Use a large sheet of blue paper for the sky and add clouds with white paper or cotton balls. If you want to add depth, layer different elements by gluing some pieces directly on the backdrop and others on small stands made from folded cardboard
Fabric and Textiles
While paper and cardboard scenes provide a solid foundation for your toy photography, fabric and textiles can elevate your backdrops to a whole new level. They add texture, depth, and a touch of realism that's hard to achieve with flat surfaces. Imagine creating a cozy bedroom scene: a piece of patterned fabric can serve as a bedspread, while a small swatch of fluffy material can mimic a rug. For added stability, consider using fabrics with non-slip rubber backing to keep everything in place during your shoot.
You're not limited to just one type of fabric, either. Different materials can evoke different moods and settings. For example, velvet can give a luxurious feel, while burlap can make your scene look rustic. Experiment with layering fabrics to add complexity and interest.
Using textiles also allows for easy manipulation. You can drape, fold, or bunch them to create dynamic backgrounds that change with each shoot. Don't overlook the potential of old clothes, scarves, or even dish towels. They can be repurposed creatively without costing you a dime.
To guarantee your fabric backdrops look their best, iron out any wrinkles and use clips or tape to secure them in place. A little attention to detail can make all the difference in your final shot.
Nature-Inspired Backdrops
Bring the beauty of the outdoors into your toy photography by creating nature-inspired backdrops. You can use leafy green backgrounds, set up woodland forest scenes, or arrange vibrant floral layouts to add a fresh, organic feel to your shots. These natural elements will make your photos come alive with depth and color. Incorporating natural light sources that offer warm golden hues can further enhance the aesthetic of your nature-inspired scenes. Experiment with different angles and the direction of light to create dynamic compositions that captivate the viewer
Leafy Green Backgrounds
For an enchanting toy photography setup, why not try leafy green backgrounds that mimic the beauty of nature? These backdrops can bring a fresh, vibrant feel to your photos, making your toy subjects stand out brilliantly.
You can easily create a leafy green background using materials you already have at home. A simple option is to use artificial leaves or vines, which you can find at craft stores. Attach them to a plain wall or a cardboard sheet with some tape or glue. This setup not only looks natural but also adds depth and texture to your shots.
Another approach is to use real leaves. Gather leaves from your garden or a nearby park, and arrange them on a flat surface. You can layer different types of leaves to add variety and interest. If you prefer a more permanent solution, consider pressing and preserving the leaves before attaching them to a backdrop.
For a quick fix, you can even print high-resolution images of leafy backgrounds and use them as your backdrop. This method provides a seamless, realistic look with minimal effort. By incorporating leafy green backgrounds, you'll give your toy photography a lively, natural ambiance that captures the essence of the great outdoors.
Woodland Forest Scenes
Imagine transporting your toy photography subjects into the heart of a magical woodland forest. Crafting a nature-inspired backdrop can elevate your shots, making them more dynamic and immersive. Start by collecting natural elements like small branches, moss, and pinecones. These items add authenticity and detail to your scene.
Choose a base that mimics the forest floor. A piece of brown felt or some natural-colored fabric works great. Arrange your collected items on the base, layering them to create depth. Position the branches upright to simulate trees, and scatter moss and pinecones around to recreate the forest underbrush.
Lighting is pivotal. Aim for soft, diffused light to mimic the dappled sunlight filtering through foliage. If you're indoors, use a softbox or place a white sheet over a lamp to achieve this effect. Experiment with angles to find the most flattering light for your toys.
Don't forget about the background. A printed forest scene or a green gradient can provide the illusion of depth and continuity. With a bit of creativity and effort, you'll create an enchanting woodland forest backdrop that brings your toy photography to life.
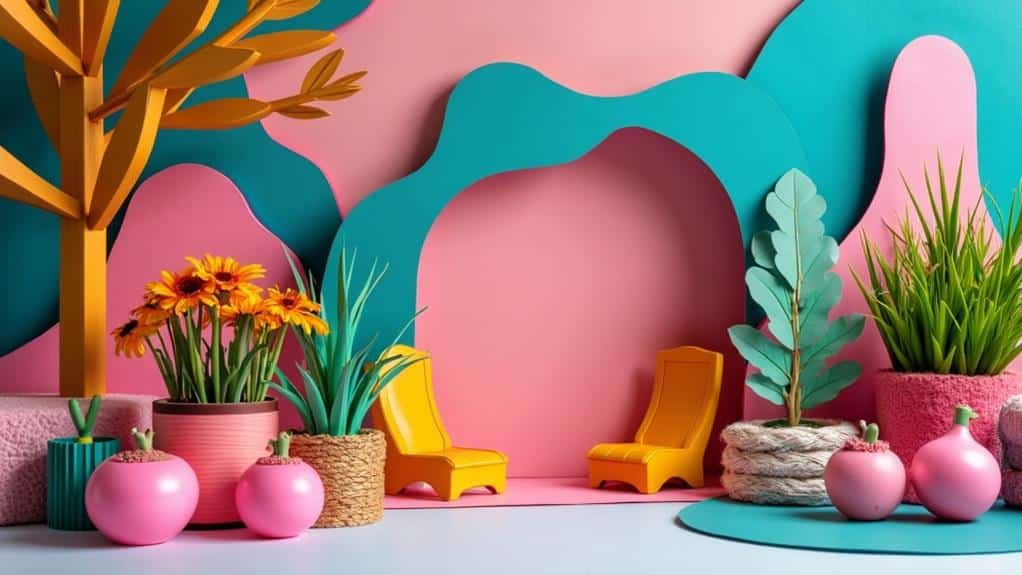
Floral Arrangement Layouts
Frequently, floral arrangement layouts can transform your toy photography into a vibrant and mesmerizing scene. With a few simple steps, you can create nature-inspired backdrops that breathe life into your shots. Start by selecting a variety of fresh or artificial flowers in different colors, shapes, and sizes. This diversity will add depth and contrast to your photos.
Next, arrange the flowers in an aesthetically pleasing manner. You don't need to be a professional florist; just focus on creating a balanced composition. Consider layering flowers at different heights and angles to create a sense of depth. You can also incorporate leaves, twigs, or other natural elements to enhance the overall look.
To guarantee your backdrop doesn't overshadow your toys, choose flowers that complement rather than clash with the toy's colors. Position your toys in front of the floral setup and use natural light or soft artificial lighting to highlight their features. Experiment with different angles and perspectives to capture the most enthralling shots.
Cityscape Miniatures
To create stunning cityscape miniatures for your toy photography, start by gathering materials like cardboard, paint, and small LED lights. You can then build simple structures such as buildings and streets using basic tools like scissors, glue, and a ruler. Finally, add realistic details like windows, signs, and weathering effects to bring your miniature city to life.
Materials and Tools Needed
Creating a stunning cityscape miniature for your toy photography requires a few essential materials and tools to bring your vision to life. Start with a solid base, like a sturdy cardboard or foam board, which will serve as the foundation for your miniature buildings. Foam sheets or balsa wood are excellent for constructing the buildings themselves, as they are easy to cut and shape.
You'll need a sharp craft knife or a hobby knife to guarantee clean, precise cuts. A metal ruler and a cutting mat will help you measure and cut accurately. For detailing, fine-tip markers, acrylic paints, and small brushes will allow you to add windows, doors, and other intricate features.
Don't forget to have some strong adhesive on hand, such as hot glue or super glue, to assemble the structures. For additional texture and depth, consider using materials like sandpaper to mimic concrete surfaces or tiny pebbles for gravel.
Building Simple Structures
When building simple structures for your cityscape miniatures, start by sketching out your design on paper. This helps you visualize the layout and decide on the dimensions of buildings, roads, and other elements. Once you've got your sketch, transfer your design onto cardboard or foam board. These materials are sturdy yet easy to cut and shape.
Cut out the basic shapes for your buildings: rectangles for skyscrapers, squares for smaller structures, and any unique shapes you envision. Use a ruler to confirm straight edges and precise measurements. Assemble the pieces using hot glue, which dries quickly and holds well.
For windows and doors, cut smaller rectangles and squares into the building facades. You can trace these elements first to maintain uniformity. If you want to add a bit of depth, layer additional pieces of cardboard behind the cutouts.
Arrange your buildings on a baseboard to create your cityscape. Think about spacing and perspective to enhance the overall look of your miniature city. Once your structures are glued in place, you'll have the foundation of an engaging backdrop for your toy photography.
Adding Realistic Details
With your basic structures in place, it's time to breathe life into your cityscape miniatures by adding realistic details. Start by incorporating tiny windows and doors. Use colored cardstock or thin plastic sheets trimmed to size. Glue them onto your buildings to provide depth and character.
Next, add street elements. Craft miniature streetlights using toothpicks and small beads. Paint them metallic to look authentic. For street signs, print tiny labels and attach them to toothpicks or thin wires. Don't forget sidewalks; use textured cardboard or foam sheets to mimic concrete.
To create a lived-in feel, scatter miniature items around. Tiny benches, trash cans, and vehicles can be purchased from hobby stores or made using household items. For greenery, use small tufts of model grass or moss to simulate trees and bushes. A few strategically placed plants can make your cityscape look more inviting.
Themed Wrapping Paper
A roll of themed wrapping paper can instantly transform your toy photography setup, providing a vibrant and versatile backdrop. With countless patterns and colors available, you can find a design that perfectly complements the toys you're photographing. Whether it's a whimsical fairy tale scene or a sleek, modern look, wrapping paper offers endless creative possibilities.
To get started, choose a wrapping paper that matches the theme of your toy photos. For example, if you're photographing action figures, opt for a bold, dynamic pattern. If it's a set of delicate dolls, a soft pastel design might be more fitting. Secure the wrapping paper to a flat surface or wall using tape or clips to create a seamless backdrop.
One of the best things about using wrapping paper is its affordability and ease of use. You can quickly swap out different patterns to experiment with various looks without breaking the bank. Additionally, wrapping paper is lightweight and easy to store, making it a practical option for photographers with limited space.
Don't forget to play around with lighting and angles to enhance the backdrop's effect. With themed wrapping paper, your toy photography will be both eye-catching and professional.
Chalkboard Art
Chalkboard art is a fantastic way to add a personalized and artistic touch to your toy photography backdrops. It's incredibly versatile and allows you to create unique scenes tailored to your toys. Start with a simple chalkboard or even chalkboard paint on a sturdy piece of cardboard or plywood. You can draw anything—landscapes, cityscapes, or abstract designs—giving you endless creative possibilities.
To get started, sketch your ideas lightly with a pencil before committing to chalk. This helps you plan the composition and avoid mistakes. Don't worry if you're not an artist; even simple shapes and designs can make a big impact. Use different colors of chalk to add depth and interest. You can also blend colors with your fingers or a soft cloth for a smoother look.
One of the best parts about chalkboard art is its erasability. If you're not happy with a design, just wipe it clean and start over. This flexibility allows you to experiment without any pressure. Plus, changing the backdrop is quick and easy, making it perfect for diverse toy photography sessions.
Get creative and have fun making each shot truly one-of-a-kind!
Lego Brick Walls
Lego brick walls offer a dynamic and customizable backdrop for your toy photography, allowing you to create vibrant and intricate scenes. You can easily build unique environments by arranging the colorful bricks in various patterns and configurations. Whether you're aiming for a classic brick wall look or something more imaginative, the possibilities are endless.
Start by selecting a base plate to build on. This will give you a stable foundation. Then, choose your color palette. Bricks come in a multitude of colors, so match them to the theme of your shoot. Want a rustic warehouse scene? Use shades of gray and brown. Creating a whimsical fairy tale? Opt for pastels and bright hues.
Don't forget to play with depth and texture. Adding protruding bricks or incorporating different brick sizes can make your backdrop more engaging. Another tip is to use mini-figures or Lego accessories to add extra elements to your scene, making it feel more alive.
Lego brick walls are not only fun to build but also adaptable, letting you change your backdrop as often as you'd like. This flexibility guarantees your toy photography always stays fresh and exciting.
At a Glance
With these seven DIY backdrop ideas, you'll transform your toy photography into a mesmerizing experience. Use paper and cardboard for dynamic scenes, fabrics for added texture, and nature-inspired elements for a fresh feel. Cityscape miniatures, themed wrapping paper, chalkboard art, and Lego brick walls offer unique, customizable settings. These cost-effective backdrops let you focus on capturing the perfect shot, revealing endless creative possibilities. Get started today, and watch your toy photography reach new heights! Experimenting with these ideas not only enhances your creativity but also brings your miniature worlds to life with ease. Whether you’re a beginner or a seasoned photographer, these easy DIY diorama backdrops provide the perfect opportunity to elevate your storytelling. Dive in and let your imagination guide you as you build stunning, photo-worthy scenes!


