
Imagine transforming your toy photography with simple yet stunning DIY backdrops that make your miniature scenes pop. You don't need expensive equipment or a professional studio; just a bit of creativity and some household items can do the trick. Think about using paper, fabric, or even nature-inspired elements to craft unique settings. Techniques like layering and texturing can add incredible depth and realism. Curious about how to achieve these effects without breaking the bank? There's a lot more to explore, from lighting tricks to modular backdrops that you can customize for any scene.
Key Takeaways
- Use colored cardstock or construction paper for solid, clean backgrounds that make toys stand out.
- Incorporate natural elements like leaves, rocks, and water for added authenticity and depth.
- Repurpose household items like old electronics or aluminum foil to create futuristic or textured settings.
- Experiment with seasonal themes using items like autumn leaves, spring flowers, or winter snow.
- Utilize modular pieces like foam boards and LEGO bricks to create customizable, detailed backdrops.
Paper and Cardboard Backdrops
Creating paper and cardboard backdrops is an easy and cost-effective way to enhance your toy photography. You can find these materials at any craft store or even repurpose items from around your home. Start with a simple piece of colored cardstock or construction paper. It provides a clean, solid background that helps your toys stand out.
If plain paper feels too basic, consider using patterned scrapbook paper. These come in endless designs, allowing you to create various scenes without much effort. For a more dynamic backdrop, you can paint or draw your own designs on cardboard. Use acrylic paints or markers to add depth and texture. Soft, diffused light can also enhance the overall look, reducing shadows and hotspots, and making your backdrop appear more professional.
Another great technique is layering different pieces of paper or cardboard. It adds a three-dimensional effect, making your photos pop. You can also crumple paper to create textured backgrounds, simulating rocky terrains or abstract settings.
Don't forget lighting. The right light can make your simple paper or cardboard backdrop look professional. Experiment with natural light or desk lamps to find what works best. With a bit of creativity, you'll find that paper and cardboard are versatile tools for stunning toy photography
Fabric and Textile Backgrounds
Fabric and textile backgrounds offer a rich and textured alternative to paper and cardboard backdrops. They add depth and a sense of realism to your toy photography. Start by raiding your own home for materials; old T-shirts, bedsheets, and scarves make fantastic backdrops. Look for fabrics with interesting patterns, textures, and colors that will complement your toys. For those looking for even more flexibility, consider investing in flexible neo rubber legs that allow mounting on different surfaces.
Once you've selected your fabric, it's important to prepare it properly. Iron out any wrinkles to guarantee a smooth and even surface. You can hang the fabric using a simple setup like a clothesline or tape it to a wall. For a more professional look, invest in a backdrop stand.
Experiment with different lighting techniques to see how the fabric interacts with light. Some textiles will reflect light beautifully, giving your photos a soft, glowing effect. Others might absorb light, creating dramatic shadows.
Don't be afraid to layer fabrics to add complexity to your scene. You can use a solid color as a base and add a sheer, patterned fabric on top for added interest. With a little creativity, fabric and textile backgrounds can elevate your toy photography to new heights
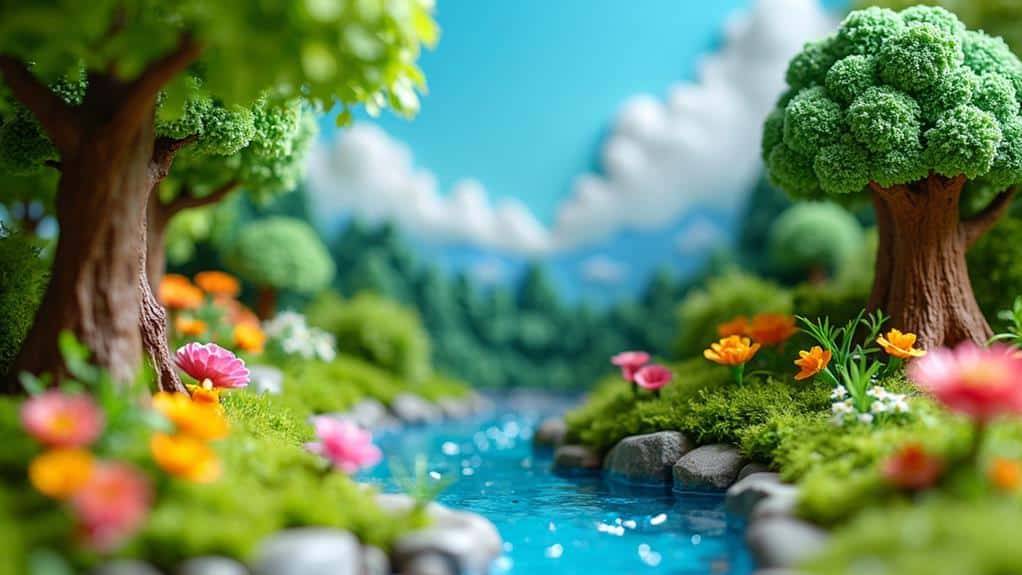
Nature-Inspired Settings
When creating nature-inspired settings for toy photography, think about incorporating natural elements like leaves, rocks, and water. You can also use seasonal themes to bring out the character of your toys, whether it's autumn leaves or spring flowers. These backdrops add authenticity and depth to your shots, making them more engaging. Experimenting with different textures, such as wood or stone, can further enhance the natural feel of your settings. Additionally, consider the mood you want to convey and how the natural elements can complement the toys
Natural Elements Integration
Integrating natural elements into your toy photography can elevate your images by adding depth and realism. Start by incorporating simple items like small rocks, twigs, or leaves. These elements help create a miniature world that feels lifelike. Place your toys among these items to make them appear as if they're part of a natural setting.
Experiment with water. A shallow dish can serve as a pond or river, reflecting your toys and adding an extra layer of interest. Just guarantee you use waterproof toys or take precautions to protect them. You can also introduce sand or soil to mimic different terrains. A small patch of moss or grass can recreate a forest floor, while sand can evoke a desert landscape.
Lighting plays a vital role. Natural light can enhance the authenticity of your scene. Position your setup near a window or use portable LED lights to mimic sunlight. Adjusting the angle and intensity of the light can create shadows and highlights that add depth to your photos.
Don't forget to play with perspective. Get down to the toy's level for a more immersive shot. By carefully integrating these natural elements, you'll create compelling and visually stunning toy photographs.
Seasonal Themes Exploration
Building on the idea of incorporating natural elements, you can take your toy photography to the next level by exploring seasonal themes. Each season offers distinct colors, textures, and atmospheres that can make your photos pop. For spring, think about using fresh flowers, budding branches, and pastel colors. A simple backdrop of green moss and tiny blossoms can create a vibrant, lively scene for your toys.
Summer scenes can be energized with elements like sand, seashells, and bright, sunny backdrops. You might even add a small pool of water to simulate a beach setting. For autumn, use fallen leaves, acorns, and rich, warm hues like orange and red. A scattering of miniature pumpkins can add a festive touch.
Winter themes bring their own magic with snow, icicles, and frosty settings. Use cotton balls or baking soda to mimic snow, and add a few twinkling lights for a cozy effect. Each season provides a unique opportunity to change up your backdrops and keep your toy photography fresh and engaging. By tapping into the natural elements of each season, you'll create stunning, dynamic scenes that captivate your audience.
Urban and Industrial Scenes
Urban and industrial scenes offer a gritty backdrop for your toy photography. Repurpose household items like old electronics or metal scraps to create a realistic setting. Add miniature graffiti walls using cardboard and paint to give your photos an authentic street vibe.
Repurposed Household Items
Ever looked around your house and thought about how some everyday items could transform your toy photography? If you're aiming for urban and industrial scenes, you're in luck. Repurposing household items not only saves money but also adds a unique touch to your shots.
Start with aluminum foil. Crumple it up, then flatten it to create a textured, metallic surface that mimics urban decay or industrial flooring. Old computer parts, like circuit boards, can be used to create a futuristic or high-tech backdrop. Just prop them up and position your toys in front for an instant cyberpunk vibe.
Empty cereal boxes work wonders too. Cut and paint them to resemble shipping crates or abandoned buildings. Stack them to create depth and dimension. For a gritty, urban look, use old shoe boxes. Cut out windows and doors, then paint them to look like rundown apartments or warehouses.
Don't forget about bathroom tiles. Their uniformity and shine can simulate sleek, modern cityscapes. Arrange them creatively for an interesting background.
Lastly, consider using old wires and cables. Coil them up or let them sprawl across your scene for an industrial feel. With a bit of creativity, your household items can elevate your toy photography to the next level.
Miniature Graffiti Walls
Creating miniature graffiti walls can add an authentic urban flair to your toy photography. First, gather materials like foam board, spray paint, and acrylic markers. Cut the foam board to your desired wall size; typically, 12×18 inches works well for most scenes.
Next, use a rough-textured sponge to dab grey and brown paint onto the foam board, mimicking the gritty look of concrete. Let it dry completely. Once dry, sketch your graffiti design lightly with a pencil. Don't worry if you're not a graffiti artist—you can find stencils online or create simple tags and shapes.
Using vibrant spray paints, carefully spray over your pencil sketches. Layer colors for a more realistic effect. If you prefer more control, acrylic markers are perfect for adding finer details and outlines. Let each layer dry before adding the next to avoid smudges.
Digital Backdrop Techniques
When it comes to enhancing your toy photography, digital backdrop techniques offer a versatile and time-saving solution. You can instantly transport your toys to any setting, from a bustling cityscape to a serene forest. All you need is a green or blue screen, your camera, and some basic photo editing software.
Start by setting up your green screen behind the toys you're photographing. Make sure it's well-lit and free of wrinkles to avoid shadows or inconsistencies. After capturing the shot, upload the image to your editing software. Tools like Photoshop or GIMP work great for this purpose.
Next, use the software's chroma key feature to remove the green or blue background. This will allow you to seamlessly integrate your toys into any digital backdrop you choose. Websites like Unsplash or Pexels offer a plethora of high-quality background images for free.
Lighting and Shadow Effects
How can you take your toy photography to the next level? It's all about mastering lighting and shadow effects. Start by experimenting with natural light. Position your toys near a window with diffused sunlight for soft, even lighting. If natural light isn't an option, use a desk lamp with a white cloth draped over it to mimic the same effect.
To create dramatic shadows, play with the angle and distance of your light source. A low-angle light can cast long, intriguing shadows, adding depth and mystery to your scene. Don't forget to use reflectors—simple pieces of white paper or aluminum foil—to bounce light back onto your toys, softening harsh shadows and highlighting details.
Colored gels can also add an artistic flair. Attach them to your light source to cast colored shadows or create mood lighting. For precise control, use small LED lights that can be easily positioned around your scene.
Customizable Modular Backdrops
Elevate your toy photography by diving into the world of customizable modular backdrops. These versatile setups let you mix and match different elements to create a variety of scenes, adding depth and realism to your photos. Start by gathering modular pieces like foam boards, wooden panels, or even LEGO bricks. These can be easily rearranged, painted, or textured to fit your vision. To enhance your scenes even further, consider integrating emotional toy photography props such as mini plants, vehicles, or furniture. These props can add a sense of character and storytelling to your photos, bringing your toys to life in a whole new way. With customizable modular backdrops and emotional toy photography props, the possibilities for creating stunning and engaging toy photography are endless.
First, decide on the theme for your backdrop. Whether it's an urban setting, a fantasy landscape, or a simple indoor scene, modular backdrops adapt to your needs. Paint the base pieces in colors that complement your toys. Add details like miniature posters, graffiti, or foliage to enhance the setting.
Next, focus on the versatility of your backdrop. Incorporate detachable elements like windows, doors, or furniture that you can reposition. Use Velcro, magnets, or slots to make swapping out pieces effortless. This flexibility allows you to quickly change scenes without rebuilding everything from scratch.
At a Glance
You've got all the tools you need to create stunning DIY backdrops for your toy photography. By experimenting with paper, fabric, nature, urban scenes, and even digital techniques, you can bring your miniature worlds to life. Don't forget to play with lighting and shadows to add depth and realism. With a bit of imagination and creativity, you're ready to make your toy photos truly stand out. Now, go capture those perfect shots! If you’re feeling particularly ambitious, consider building a miniature city or diorama to serve as the ultimate backdrop for your toy photography. You can use everyday materials like cardboard, foam board, and paint to create a realistic urban environment. Whether it’s a bustling street scene or a quiet park, the possibilities are endless for bringing your toy figures to life in their own tiny world. Just let your imagination run wild and watch as your photos take on a new level of creativity and uniqueness.


