
As a toy photographer on a budget, make the most of natural light by snapping shots near windows in the early morning or late afternoon. Craft DIY diffusers using items like shower curtain liners or parchment paper. Repurpose household items like aluminum foil and foam boards as reflectors. Consider affordable LED panels and add a whimsical touch with fairy lights. Your photos will markedly improve without spending much. Discover how these tips can transform your photography.
Utilizing Natural Light for Stunning Effects
When you're capturing the perfect shot of your toys, natural light can be your best friend. Positioning your setup near a window allows you to harness the gentle, diffused glow of daylight. Early mornings or late afternoons are ideal for shooting as the sun's angle creates softer shadows and warmer tones, enhancing your toys' textures and details. Avoid harsh midday sun, which can produce unwanted glare and stark contrasts. Instead, try moving your scene to a shaded area for even lighting. Experiment with different angles by rotating your toys or moving around them to find the best illumination. Remember, understanding how light interacts with your subject is key. Use natural light creatively, and you'll transform ordinary shots into stunning visual stories.
Crafting DIY Light Diffusers at Home
Sometimes, all it takes to elevate your toy photography is a simple, homemade light diffuser. You don't have to spend a fortune on professional gear; you can make effective diffusers with everyday materials. Start with a clear plastic container or a white shower curtain liner. Cut it to size if needed, and place it between your light source and the toy. This softens harsh light, reducing shadows and glare for a more balanced shot. If you have parchment paper or a white t-shirt, they work too. Simply drape or secure them over a lamp to diffuse the light evenly. Experiment with distances and angles to see what works best for your setup. With these DIY solutions, you'll improve your photos without breaking the bank.
Making the Most of Household Items as Reflectors
After mastering DIY light diffusers, it's time to explore another cost-effective tool in toy photography: household items as reflectors. You don't need expensive gear to create stunning effects; simple objects around your home can enhance your lighting setup. Try using these items to reflect light onto your subjects, adding depth and dimension without breaking the bank:
- Aluminum Foil: Its shininess can direct light precisely where you need it, creating sharp highlights.
- White Foam Board: Provides a soft, diffused reflection, perfect for gentle illumination.
- Mirrors: Small mirrors can bounce light onto specific areas, adding drama and focus to your scene.
Experiment with these items to find the right balance and watch your toy photography transform with minimal investment.
Exploring Affordable LED Light Panels
You're in for a treat with affordable LED light panels, which offer consistent lighting without breaking the bank. Choose panels that suit your scene size and brightness needs. To soften harsh light, try simple DIY diffusion techniques like using parchment paper or a shower curtain.
Choosing LED Light Panels
When you're venturing into toy photography, choosing the right LED light panels can make a world of difference in your shots. It's crucial to find panels that balance quality with affordability. Look for panels that offer adjustable brightness and color temperature, so you can adapt to different scenes and moods. Compact and lightweight options are ideal for maneuverability during shoots.
Consider these features when making your choice:
- Adjustability: Verify the LED panel lets you tweak brightness and color for creative control.
- Portability: Lightweight models are easier to move around, perfect for dynamic setups.
- Energy Efficiency: Opt for panels that consume less power, saving you money in the long run.
DIY Diffusion Techniques
Although professional lighting equipment can be pricey, you can create stunning toy photography with a few clever DIY diffusion techniques. Start by using materials you likely already have at home. A simple white bedsheet or shower curtain can work wonders. Just drape it over your affordable LED light panel to soften harsh shadows and create even lighting. Wax paper is another great option; tape it onto a cardboard frame and place it in front of the light source.
For more control, try using parchment paper or even a white plastic bag. Both options are lightweight and easy to adjust. These DIY solutions can help you achieve professional-looking results without breaking the bank. Experiment with different materials and positions until you find what works best for your setup.
Creating Mood With Inexpensive Colored Gels
To create an enchanting mood in your toy photography without breaking the bank, consider using inexpensive colored gels. These versatile sheets can transform ordinary lighting into mesmerizing scenes. Simply attach them to any light source and watch as your toys get bathed in vibrant hues. You can easily find colored gels online or at art supply stores, making them a budget-friendly choice.
When working with colored gels, keep in mind:
- Experiment with layering: Combine different colors for unique effects.
- Vary light intensity: Adjust the brightness to change the mood.
- Play with angles: Move the light source to see how shadows and colors shift.
Setting Up Cost-Effective Backdrops and Backgrounds
You don't need to spend a fortune on fancy backdrops to make your toy photography stand out. Consider using DIY materials like fabric scraps, poster boards, or even textured paper to create unique scenes. Get creative with background alternatives such as printed images, natural settings, or everyday household items to add variety and depth to your shots.
DIY Backdrop Materials
Many toy photographers overlook the impact a well-crafted backdrop can have on their images. Creating your own DIY backdrop materials can be both affordable and fun. Start by using everyday items around your home. Consider these options:
- Colored Paper: Grab some construction paper or poster board. They're inexpensive and provide a variety of colors to set different moods.
- Fabric Scraps: Old bed sheets or clothes can make fantastic textured backgrounds. Look for unique patterns or solid colors.
- Cardboard Boxes: Flatten them and paint or decorate them as desired. They're sturdy and versatile.
These simple materials can transform your toy photography, making your subjects pop without breaking the bank. Experiment and see which combinations work best for your creative vision.
Creative Background Alternatives
While professional backdrops can be costly, there are plenty of creative alternatives that won't strain your budget. Start by using everyday items around your home. A simple bedsheet or a piece of fabric can work wonders. Hang it up as a backdrop, and you've got yourself an instant and versatile setting.
Consider using colored paper or wrapping paper for vibrant backgrounds. You can tape them to a wall or lay them flat. For more texture, try cardboard, which you can paint or decorate to match your theme.
Nature also offers cost-free options. Head outside and use natural settings like grass, sand, or leaves for unique scenes. By thinking outside the box, you can create dynamic backgrounds that enhance your toy photography without breaking the bank.
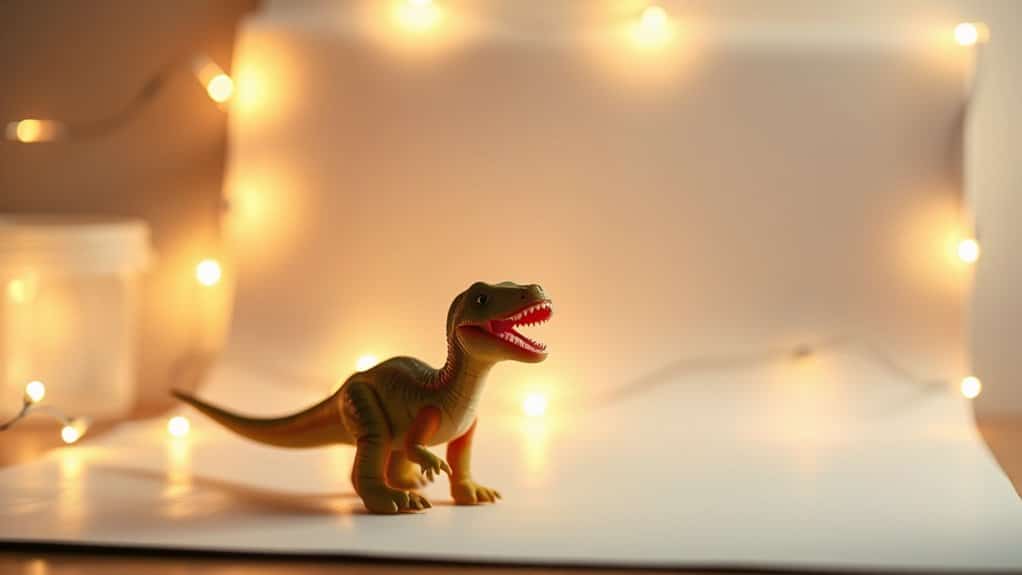
Incorporating Fairy Lights for Creative Shots
When it comes to adding a magical touch to your toy photography, fairy lights can be a game changer. They're affordable, versatile, and easy to use. Position them around your scene to create a warm, whimsical atmosphere. Fairy lights can highlight your subjects and add depth to your shots. Experiment with different setups to find what works best for you. Here are some creative ways to use fairy lights:
- Background Glow: Drape them in the background for a soft, dreamy effect.
- Enhance Focus: Wrap them around your main subject to draw attention.
- Create Shadows: Use them to cast interesting shadows and patterns.
With fairy lights, you'll transform ordinary scenes into enchanting photographs, all while staying on budget.
Building a Simple Lightbox With Everyday Materials
Creating a simple lightbox with everyday materials can elevate your toy photography by providing even, controlled lighting. Start by finding a cardboard box that's big enough for your toys. Cut out large windows on three sides, leaving the bottom intact. Cover the openings with white tissue paper or lightweight fabric to diffuse the light. Place a white poster board inside as a backdrop, bending it to form a seamless curve.
For lighting, position desk lamps or flashlights on each side of the box. Use daylight bulbs for a neutral tone. Adjust the lights until you achieve the desired effect. This DIY lightbox softens shadows and highlights your toys, making details pop. You'll see a noticeable improvement in your photos without breaking the bank.
Frequently Asked Questions
How Can I Manage Lighting for Outdoor Toy Photography?
Use natural light to your advantage by shooting during the golden hours—early morning or late afternoon. Position toys to catch the best sunlight angles. Reflectors, even DIY ones, help control shadows and enhance details effectively.
What Are the Best Camera Settings for Low-Light Toy Photography?
For low-light toy photography, set your camera to a wide aperture, use a high ISO while minimizing noise, and opt for a slow shutter speed. Stabilize your camera on a tripod to avoid blurriness and maximize sharpness.
How Do I Prevent Shadows When Photographing Toys Indoors?
Why not try diffusing your light source? Use a white sheet or paper to soften harsh light, eliminating those pesky shadows. Experiment with multiple light angles to fill in gaps, ensuring your toys stand out beautifully.
What Is the Ideal Time of Day for Natural Light Toy Photography?
You'll find the best natural light for toy photography during the golden hours, shortly after sunrise and before sunset. This soft, warm light reduces harsh shadows, creating a magical ambiance that enhances your toy photos beautifully.
How Can I Create a Soft Lighting Effect Without Professional Equipment?
To create soft lighting without professional gear, use a white sheet or shower curtain to diffuse sunlight or a desk lamp. Position it between your light source and subject. Experiment until you achieve the desired effect.
At a Glance
So, you're now a toy photography lighting guru without breaking the bank. Who knew you could achieve such brilliance with natural light, DIY diffusers, and a bit of fairy light magic? Forget about those high-end studios; you've got household items and colored gels to create masterpieces. Next time someone asks about your secret, just smile and say, "Oh, it's all about strategic lamp positioning and a touch of budget wizardry." They'll never know your true genius.


