
When you're aiming to elevate your toy storytelling photography, mastering a few key techniques can make all the difference. It starts with choosing the right toys that resonate with your story concept, ensuring they're not just visually appealing but also narrative-enhancing. Setting the scene with high-quality props and experimenting with creative lighting can transform an ordinary setup into a mesmerizing tableau. How do you use dynamic angles and create depth to add drama and motion? And what role does post-production editing play in refining your final image? Let's explore these methods to bring your toy stories to life.
Key Takeaways
- Use low angles to make toys appear larger-than-life and more dynamic.
- Incorporate foreground, midground, and background elements to create depth and scale.
- Experiment with creative shadow play to add drama and focus.
- Adjust lighting to enhance textures and colors, avoiding direct midday sunlight.
- Utilize framing elements like trees or household items to guide the viewer's eye.
Choose the Right Toys
Choosing the right toys is the foundation of mesmerizing toy storytelling photography. You need to select toys that resonate with your story concept. Think about the characters you want to highlight and the emotions you aim to evoke. Action figures, dolls, or even miniature vehicles can be excellent choices, but they must align with your narrative. High-quality toys with intricate features and realistic expressions, such as the Funko Vinyl Luffy, will make your photos more enchanting.
Consider the details and craftsmanship of the toys. High-quality toys with intricate features and realistic expressions will make your photos more enchanting. Avoid toys that look too generic or lack personality. Instead, opt for ones that have unique characteristics, as these will add depth to your storytelling.
Scale is another vital factor. Verify the toys you choose are proportionate to each other and the environment you'll create. Mixing different scales can be jarring and disconnect your audience from the story.
Lastly, think about the flexibility and poseability of the toys. Toys with movable joints or interchangeable parts offer more dynamic posing possibilities, allowing you to capture a variety of scenes and emotions. By paying attention to these elements, you'll set a strong foundation for your toy storytelling photography.
Set the Scene
To set the scene, start by selecting an appropriate background that complements your toys and story. Arrange your props thoughtfully to enhance the narrative and create a visually engaging composition. Using diffusers and reflectors can help manipulate light and create different effects that add depth to your scene. Remember, each element should add to the story you're telling
Select Appropriate Background
Setting the scene with an appropriate background is essential for bringing your toy storytelling photography to life. A well-chosen background enhances the narrative, providing context and depth that make your toys' adventures more believable. Start by considering the story you want to tell. Is it a thrilling space mission, a cozy tea party, or an epic battle? Your background should reflect and amplify that setting.
Use natural elements like grass, sand, or rocks for outdoor scenes. For indoor settings, look for textured surfaces such as wooden tables or patterned fabrics that can simulate real environments. Pay attention to color and contrast. A busy background might distract from your main subject, so keep it simple when necessary. Verify the colors don't clash with your toys but rather complement them.
Experiment with depth by placing your toys at different distances from the background. This adds a three-dimensional feel and makes the scene more dynamic. Remember, lighting plays a pivotal role. Natural light can enhance textures and colors, but don't shy away from artificial lighting to create mood and focus.
Arrange Props Thoughtfully
Thoughtfully arranging props can bring your toy storytelling photography to the next level. Start by choosing props that complement your story. Each item should serve a purpose, whether to enhance the narrative or to enrich the visual appeal. A well-placed prop can add depth and context, making your scene more believable and engaging.
Consider the scale of the props relative to your toys. Oversized or undersized items can disrupt the sense of realism. Aim for balance in your composition. Place larger props in the background and smaller ones closer to the focal point, guiding the viewer's eye through the scene naturally.
Lighting also plays a vital role. Use props to manipulate shadows and highlights, adding drama or focus where needed. For instance, a small lamp can create a cozy corner, while a tree branch might cast an intriguing shadow over your toys.
Don't overcrowd the scene. Too many props can distract from the main subjects. Instead, opt for a few well-chosen items that enhance the story you're telling. Experiment with different arrangements until you find a composition that feels just right. By thoughtfully arranging your props, you'll create compelling, visually stunning toy photography.
Focus on Lighting
When you're taking photos of toys, pay attention to how natural light sources can enhance your scenes. Experiment with creative shadow play to add depth and drama to your shots. Adjusting the intensity of the light can create different levels of contrast between the shadows and highlights. By focusing on lighting, you'll make your toy stories more engaging and visually striking
Natural Light Sources
Harnessing the power of natural light can transform your toy storytelling photography from mundane to magical. When you use natural light, you capture the true essence and details of your toys without the harshness artificial lights often bring. Start by positioning your toys near windows or open spaces where sunlight streams in. Morning and late afternoon light, known as golden hours, provide a soft, warm glow that can add a magical touch to your scenes.
Pay attention to the direction of the light. Side lighting creates depth and texture, highlighting the intricate features of your toys. Backlighting can give a dramatic silhouette effect, perfect for creating a sense of mystery or adventure. Remember, the sun's position changes throughout the day, so experiment with different times to see how the light interacts with your setup.
Avoid direct midday sunlight, as it can cast harsh shadows and wash out colors. Instead, opt for diffused light on cloudy days or use sheer curtains to soften the light. This helps maintain a balanced exposure and captures the vibrant colors of your toys. By mastering natural light, you'll bring your toy storytelling to life with authenticity and charm.
Creative Shadow Play
Creative shadow play can elevate your toy storytelling photography by adding depth, intrigue, and a sense of drama. To harness the power of shadows, start by experimenting with various light sources, such as lamps or flashlights. Position these lights at different angles to create long, dramatic shadows or subtle, mysterious ones.
Don't shy away from using everyday objects to manipulate light. A piece of lace can cast intricate patterns, while a colander can create a starry effect. Think outside the box to find unique ways to play with shadows.
Next, consider the mood you want to convey. Shadows can evoke various emotions—from eerie and suspenseful to cozy and intimate. For instance, a toy soldier casting a long shadow can suggest a heroic or ominous narrative, depending on the context.
Pay attention to the background as well. A plain surface might make the shadow stand out more, while a textured one can add complexity to your composition.
Use Dynamic Angles
Dynamic angles can transform your toy photography from ordinary to extraordinary. By shifting your camera's position, you can breathe life into your shots and make your toys appear more dynamic and engaging. Instead of shooting straight on, experiment with low angles to make your toys look larger-than-life, or high angles to create a sense of vulnerability or scale.
To start, get down to the toy's level. This perspective draws viewers into the toy's world, making the scene more immersive. You can also try tilting your camera slightly to add a sense of motion or tension. These subtle shifts can drastically change the mood of your photo, making it more riveting.
Don't be afraid to get creative. Use wide-angle lenses to exaggerate features and create a more dramatic effect. Rotate your camera for a diagonal composition that adds energy and movement to the scene. Each angle tells a different story, so experiment to see what works best for your narrative.
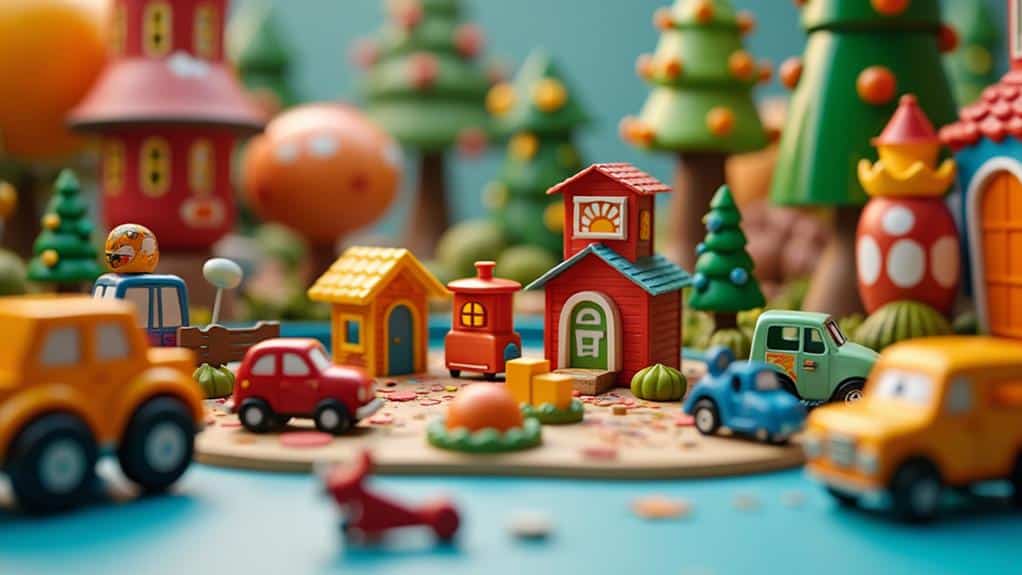
Create Depth and Layers
Adding depth and layers to your toy photography can make your images more engrossing and lifelike. One effective way to achieve this is by incorporating a foreground, midground, and background. Place a toy or prop in each of these planes to create a sense of distance and scale. For instance, you could position a character close to the camera, another toy in the middle distance, and a scenic backdrop further away.
Use elements like trees, rocks, or even household items to frame your scenes. Framing not only adds depth but also guides the viewer's eye towards the main subject. Play around with different focal lengths; a wide-angle lens can exaggerate perspective, making your toys appear more dynamic.
Another tip is to use depth of field creatively. A shallow depth of field can blur the background and foreground, isolating your subject and adding a dreamy quality. Alternatively, a deeper depth of field keeps more of the scene in focus, adding layers of detail.
Don't forget about lighting. Shadows and highlights can add dimension and texture, making your scene feel more three-dimensional. Experiment with various light sources to see how they affect your composition.
Capture Motion
To truly bring your toy photography to life, capturing motion is key. Start by considering what action your toy should be performing. Whether it's a superhero leaping into action or a race car zooming down a track, motion adds a dynamic element that static shots can't achieve.
Use a slower shutter speed to create a sense of movement. For example, if you're photographing a toy car, try panning your camera while the car moves. This keeps the car in focus but blurs the background, giving the impression of speed. Alternatively, you can simulate motion by using props like cotton for smoke or splashing water to suggest motion if shooting a toy boat.
Remember, lighting is vital. Use natural light or set up lamps to highlight the toy and its movement. Shadows can also enhance the sense of motion, so don't shy away from experimenting.
Lastly, practice different angles. A low angle can make your toy look larger-than-life as it moves, while a high angle might capture more of the background blur. By capturing motion effectively, you'll infuse your toy storytelling with energy and excitement, making each shot a mini-adventure.
Edit for Impact
Editing your toy photography for impact can transform an ordinary shot into a riveting visual narrative. Start by adjusting the lighting and contrast to make your subjects pop. Enhance the color balance to guarantee the toys' hues are vivid and true to life. Don't hesitate to add a touch of saturation to make the image more dynamic.
Next, consider cropping your image to focus on the most compelling elements. This can eliminate distractions and guide the viewer's eye to the story you want to tell. Use the rule of thirds to place your subjects in prime positions within the frame.
Sharpening is vital for toy photography; it brings out fine details that make your toys look realistic and engaging. However, be careful not to overdo it, as excessive sharpening can create an unnatural appearance.
If your scene includes a background, blur it slightly to emphasize depth and focus on the toys. This technique, known as bokeh, can add a professional touch to your photos.
At a Glance
You've got the tools to create enthralling toy storytelling photography. Choose the right toys and set the perfect scene. Focus on lighting to bring your story to life. Experiment with dynamic angles and create depth and layers for added drama. Capture motion to convey action and use post-production editing to refine your images. With these techniques, you'll elevate your toy photography, making every shot a compelling narrative that draws viewers in. Now, go out and tell your story!


