
When you're crafting emotional toy stories through photography, the magic lies in the meticulous choice of props, backdrops, and lighting. It's not just about snapping a photo; it's about weaving a narrative that resonates. Have you ever wondered how the scale of a prop or the texture of a background can transform a simple toy into a compelling character? By paying attention to these details, you can create scenes that speak volumes. But what are the key elements that truly bring these stories to life and leave a lasting impact? One of the key elements to bringing emotional toy stories to life is the attention to detail in the miniature props. These tiny accessories can add depth and personality to the characters and scenes, enhancing the emotional impact of the story. For those looking to improve their craft, miniature prop tutorials can be a valuable resource in learning how to create and incorporate these details effectively. By mastering the art of prop selection and creation, photographers can take their toy stories to the next level, leaving a lasting impact on their audience.
Key Takeaways
- Strategic use of lighting and color temperature evokes specific emotions and highlights important details.
- Props add context and depth, enhancing the narrative and making scenes more engaging.
- Capturing facial expressions and body language brings toys to life and conveys powerful emotions.
- Crafting a structured narrative with clear characters and emotional journeys keeps viewers invested.
- Editing techniques like color grading and cropping focus attention and heighten emotional impact.
Choosing the Right Toys
Choosing the right toys for your child can feel overwhelming, but focusing on their interests and developmental stage makes it easier. You've got to ponder what captivates them and how they're growing. For instance, if your child loves animals, a set of toy animals could be a hit. If they're in the early stages of development, simple, colorful toys that stimulate their senses are ideal. Incorporating accessories can also add a touch of realism to their playtime experience.
It's also vital to choose toys that encourage creativity and problem-solving. Blocks, puzzles, and art supplies can help fine-tune these skills. You're not just giving them something to play with; you're providing tools that foster their cognitive and emotional growth.
Safety is another key factor. Always check age recommendations and verify toys don't have small parts that could be choking hazards. Durable, non-toxic materials are a must. You want your child to enjoy their toys without you worrying about their safety.
Lastly, ponder toys that promote social interaction. Board games and cooperative playsets can teach valuable lessons in sharing and teamwork. By being thoughtful and intentional, you'll find toys that not only entertain but also enrich your child's development.
Setting the Scene
After selecting the perfect toys, the next step is setting the scene to maximize your child's playtime experience. Start by choosing a backdrop that complements the toys. A simple, neutral background often works best, allowing the toys to stand out without distracting elements. Consider using fabric, paper, or even natural settings like a garden or park, depending on the story you're trying to tell. Be mindful of the space between the toy and the backdrop to avoid any visual clutter.
Next, think about the props you'll need. Props can add depth and realism to the scene. For instance, if your child is playing with toy animals, include small plants, rocks, or miniature fences to create a lively habitat. For a more urban setting, use tiny buildings, cars, or street signs. The key is to make the environment as engaging as possible to stimulate your child's imagination.
Don't forget to arrange the toys and props in a way that tells a story. Position them in dynamic poses that suggest action or interaction. This not only enhances the narrative but also helps your child to think creatively. By carefully setting the scene, you'll create a rich, immersive experience that makes playtime even more magical
Utilizing Lighting Techniques
Lighting can be the secret ingredient that transforms a simple play scene into a spellbinding story. By carefully utilizing lighting techniques, you can evoke specific emotions, highlight important details, and create depth within your toy photography. Start by considering the mood you want to convey. Soft, diffused light can create a calm, serene atmosphere, perfect for tender moments. On the other hand, harsh, direct lighting can add drama and intensity, making a scene feel more urgent or tense. Using affordable lighting equipment like Neewer and LimoStudio can help achieve various lighting effects without breaking the bank.
Positioning your light source is vital. Side lighting can add depth and dimension, casting intriguing shadows that enhance the scene's realism. Backlighting, where the light is placed behind the subject, can create a striking silhouette effect, adding mystery and focus to your central characters.
Experimenting with color temperature can also make a significant difference. Warm tones (yellows and oranges) can evoke feelings of comfort and nostalgia, while cool tones (blues and greens) can suggest melancholy or isolation
Capturing Expressive Poses
To capture expressive poses, focus on highlighting the toy's facial expressions and utilizing body language effectively. Pay attention to how a slight tilt of the head or a raised arm can convey different emotions. By mastering these elements, you'll bring your toy stories to life with depth and feeling. Additionally, strategic placement of props can add context and enhance the mood, further enriching the emotional narrative. Experiment with different props to evoke emotions and create a deeper connection with your audience
Highlighting Facial Expressions
Amidst the world of toy photography, capturing expressive poses and highlighting facial expressions can bring your characters to life in the most compelling way. Focus on the tiny details that convey big emotions. Whether it's the slight tilt of a head, a wide-eyed look of surprise, or a furrowed brow, these subtle expressions make a huge difference.
Start by paying attention to the lighting. Good lighting emphasizes facial features, casting shadows that add depth and mood. Use soft, diffused light to bring out gentle expressions or harsher lighting for intense moments. Angle your light source to accentuate the eyes, as they're often the most expressive part of a face.
Next, use macro lenses to capture close-ups. This gives you the ability to highlight the intricate details of your toy's face. Experiment with different angles and perspectives to find the one that best conveys the emotion you're aiming for.
Lastly, don't be afraid to adjust the facial features of your toy if possible. Some toys have interchangeable faces or movable parts. Utilize these features to create the perfect expression. Your attention to detail will make your toy photos resonate on an emotional level.
Utilizing Body Language
Your toy's body language can be just as powerful as its facial expressions in conveying emotion and narrative. When you position your toy, think about how humans use their bodies to express feelings. A slumped posture can suggest sadness or defeat, while an upright pose with outstretched arms can convey joy or triumph.
To capture these expressive poses, consider the toy's joints and articulation. Many action figures have multiple points of articulation, allowing for a wide range of movements. Utilize these to create dynamic and relatable poses. Even simple adjustments, like tilting the head or raising an arm, can dramatically alter the mood.
Don't forget to experiment with angles and perspectives. Shooting from a low angle can make your toy appear powerful and imposing, while a high angle can make it seem vulnerable. Play with the positioning of limbs to create a sense of movement or stillness, depending on the story you're telling.
Props and backgrounds also enhance body language. For instance, a toy leaning against a wall might suggest exhaustion or contemplation. By thoughtfully arranging your scenes and focusing on body language, you can evoke complex emotions and create a compelling narrative.
Incorporating Background Props
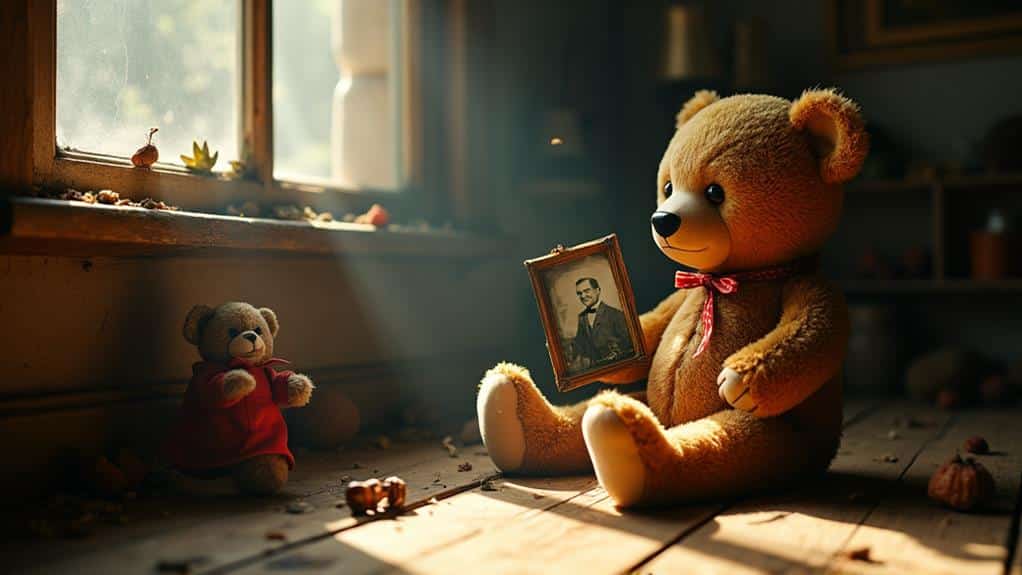
When you incorporate background props, you enhance your storytelling by adding layers of context and emotion. Props create depth and help set the scene, making your toy stories more engaging. Think of them as the supporting cast that brings your main characters to life.
Enhancing Storytelling With Props
Incorporating background props can substantially enhance storytelling by providing a richer, more immersive environment. When you use background elements thoughtfully, you give your toy characters a believable setting that adds depth to their narrative. Think of a toy soldier placed in a miniature battlefield or a doll in a cozy, well-decorated room. These settings don't just fill the space; they inform the story, mood, and context, making your viewers feel more connected to the scene.
You should choose props that complement the emotions and actions of your toy characters. For instance, a rainy backdrop with tiny umbrellas and puddles can evoke a sense of nostalgia or sadness, while a sunny beach scene can convey joy and relaxation. The key is to match the props with the storyline you're creating.
Don't overlook the small details. Adding a tiny book, a piece of furniture, or even a miniature plant can make a big difference. These elements can suggest a character's personality or hint at the plot. By paying attention to these details, you'll not only enhance your storytelling but also captivate your audience's imagination, making your toy stories unforgettable.
Creating Depth and Emotion
Building on the foundation of enhancing storytelling with props, creating depth and emotion through these elements can elevate your toy narratives to new heights. When you incorporate background props, you're not just adding visual interest but also enriching the story's emotional texture. Think about the setting and how it can reflect or contrast with the toy characters' emotions. A desolate, crumbling backdrop can evoke feelings of loneliness or struggle, while a vibrant, colorful setting can suggest joy and adventure.
To add depth, consider layering your props. Place some elements in the foreground, middle ground, and background to create a sense of three-dimensionality. This technique draws viewers into the scene, making them feel like they're part of the toy's world. For example, a toy soldier standing in front of a dilapidated fortress with scattered debris can convey a powerful narrative of perseverance.
Pay attention to the scale of your props. Using larger or smaller items can exaggerate the toy's emotional state. A tiny teddy bear in an enormous room can evoke vulnerability, while a superhero figure towering over miniature buildings can symbolize triumph. By carefully selecting and arranging your background props, you'll create emotionally rich, immersive toy stories.
Setting the Scene
Setting the scene with background props is essential for bringing your toy stories to life. When you carefully choose and arrange background elements, you create a believable world where your toys can express their emotions and experiences. Think about what kind of setting fits the narrative you want to tell. Is it a cozy living room, a bustling city street, or a serene forest? Each background prop should enhance the story you're telling and complement the toy characters.
Start by selecting props that match the scale of your toys. Miniature furniture, tiny trees, or small-scale buildings can make a big difference. Use textures and colors that evoke the right mood. For instance, warm colors and soft textures can create a comforting atmosphere, while harsh, dark elements can convey tension or drama.
Don't forget to pay attention to lighting. It plays a key role in setting the tone. Soft, diffused light can make a scene feel intimate and tender, while sharp, directional light can add intensity. By thoughtfully incorporating background props and lighting, you can craft a compelling scene that draws viewers into your toy's emotional journey.
Creating a Narrative
Crafting a compelling narrative for your toy story begins with understanding the emotional journey you want your characters and, by extension, your audience to experience. Start by identifying the core emotions you want to evoke—joy, sadness, nostalgia, or even excitement. This emotional blueprint will guide every decision you make, from the storyline to the visual elements.
Define your characters clearly. Give them distinct personalities, backgrounds, and motivations. These details make them relatable and enable your audience to connect with them on a deeper level. Once your characters are established, place them in a scenario that challenges them emotionally. Conflict is pivotal; it propels the story forward and keeps viewers engaged.
Next, think about the story arc. A well-structured narrative typically follows a sequence: introduction, rising action, climax, falling action, and resolution. Verify that each part of the story serves a purpose and contributes to both character development and emotional depth.
Use your photography props to enhance the narrative. Props should not only complement the setting but also symbolize key themes or turning points in the story. By thoughtfully integrating these elements, you'll create a rich, emotionally engaging toy story that resonates with your audience.
Editing for Emotional Impact
Editing is your secret weapon for maximizing the emotional impact of your toy story. By carefully fine-tuning your images, you can evoke powerful feelings and create a lasting impression. Start by focusing on three key aspects:
- Color Grading: Adjust the colors to match the mood of your story. Warm tones can evoke happiness and nostalgia, while cooler tones can convey sadness or tension.
- Cropping and Composition: Sometimes, a simple crop can focus attention on the most important elements, making the scene more emotionally engaging. Experiment with the rule of thirds or leading lines to guide the viewer's eye.
- Adding Effects: Subtle effects like vignettes, blurs, or grain can enhance the emotional depth of your photos. Don't overdo it, though; the goal is to amplify, not overshadow, the story.
As you edit, always keep your narrative in mind. Each adjustment should serve to strengthen the story you're telling. Use before-and-after comparisons to verify your changes are impactful. Trust your instincts and remember that even small tweaks can make a big difference in how your audience connects with your toy story.
Sharing and Engaging Online
Once you've perfected the emotional impact of your toy story through precise editing, it's time to share it with the world and engage your audience online. Start by choosing the right platforms. Instagram and Pinterest are ideal for visually-driven content, while Facebook groups and Reddit communities can offer targeted engagements.
Craft compelling captions that complement your photographs. Use storytelling techniques to draw viewers in, offering a glimpse into the narrative behind each image. Don't forget to use relevant hashtags to increase visibility. For example, #ToyPhotography, #MiniatureArt, and #EmotionalStorytelling can help your posts reach a broader audience.
Engagement is a two-way street. Respond to comments and questions promptly to foster a sense of community. Share behind-the-scenes content to give your audience a peek into your creative process. This not only builds connection but also keeps your followers invested in your work.
Collaborate with other toy photographers and influencers to expand your reach. Cross-promotions can introduce your work to new audiences and create a ripple effect of engagement. Finally, track your performance using analytics tools. This helps you understand what resonates most with your audience, allowing you to refine your future posts for even greater impact.
At a Glance
You've learned how to make emotional toy stories with photography props by choosing the right toys, setting the scene, and using lighting techniques. Capturing expressive poses and incorporating background props help bring your story to life. Creating a compelling narrative and editing for emotional impact deepen your connection with the audience. Finally, sharing your work online allows you to engage with others who appreciate the art of toy photography. Now, go create those heartwarming stories!


